
The Paint 3D app in Windows helps you remove the background of an image. You can then save the edited image as a new file to do with as you see fit.
Open Paint 3D
-
On the Windows taskbar, select Start.
-
In the Search box, type: Paint 3D
-
Select the Paint 3D app to open it.
Open the image file you want to edit
If you have copied an image to your clipboard, press Ctrl+V to paste it on the Paint 3D canvas. Otherwise, if the image file already exists on your device, open it in Paint 3D like so:
-
Select Menu.
-
Under Open, select Browse files.
-
Navigate to the file you want to edit. Select it, then select Open.
Remove the background of the image
-
On the toolbar, select Magic Select.
-
Adjust the focus area to fit around the area of the image you want to keep.

-
Select Next.
-
Look closely to see whether the tool accurately isolated your target image from the background. Some adjustments may be necessary. Use the Add and Remove options to change what areas are isolated by the tool. (To mark an area that you want to keep or remove, trace its outline or use brush strokes.)

-
When your cutout is satisfactorily marked, select Done.

-
Your focus object has now been lifted from the background of the picture. Select it and drag it to one side of the canvas (the white rectangle shown in the image below) temporarily.

-
Delete the remainder of the picture from the canvas area: Click and drag over the canvas area to select it, then press Delete.
-
On the toolbar, select Canvas.
-
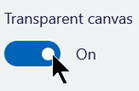
In the Canvas pane on the side, turn on Transparent canvas.
-
Move your object back on the canvas area, and adjust the dimensions of the canvas, if you want.

-
To save the edited image, select Menu > Save as > Image. Then select Save, then specify a location and a name for the image file. Select Save.
The saved image file is now ready for you to do with as you wish—send it to someone, insert it in a document, etc.


