You can apply retention labels to files in SharePoint and OneDrive, either individually or collectively.
The labels you see have been customized by your organization. If you have questions about which label to apply, contact your help desk or IT department.
Apply a retention label to an item
In OneDrive or a SharePoint library, you can apply a retention label to a file, for example a Microsoft 365 document created in Word, PowerPoint, Excel, or a OneNote notebook. You can also label non-Office files, for example a PDF document or an image file. SharePointlist itemscan also be labeled.
You can also apply a label to a library or folder. When you label a library or folder, that retention label is applied by default to unlabeled files in that folder. Learn more about default labels for SharePoint.
Apply a label in OneDrive or SharePoint
-
Select the item.
-
In the upper-right corner, select Open the details pane
-
Under Apply label, select Choose a label to open the list of options.
-
Select the appropriate retention label for your document. (To learn about the differences between the labels, you can point at each one to see a description of it and its retention period.)
-
If a Save option appears, select it.
Set a default retention label for a SharePoint document library
-
Open the document library.
-
Near the top right of window, select the Settings icon:
-
Select Library settings.
-
On the Settings page, under Permissions and Management, select Apply label to items in this list or library.
-
On the Apply Label page, select the drop-down box, then select the label that you want to apply.
The label you select will be automatically applied to all new files added to the document library beginning now.
-
Optional: To automatically apply the label to all files currently in the document library, select Apply label to existing items in the library.
-
Select Save.
Note: Retention labels can be overwritten at the file level. In other words, after you've set a default label for a library, you can still assign an alternate label to an individual item or items in the library, if necessary.
Create a view that contains retention labels
In SharePoint (and Teams—but not OneDrive), you can create a view of the library that contains the Labels column or Item is a Record column. This view lets you see at a glance the retention labels assigned to all items and which items are records. Note, however, that you can't filter the view by the Item is a Record column. Here's how to create such a view.
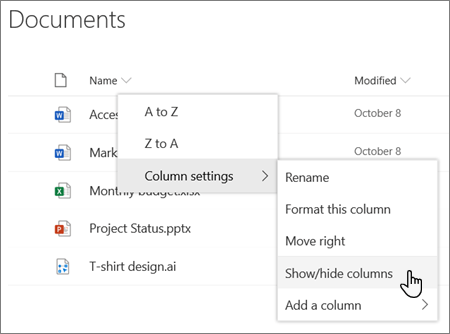
Start by making the Retention Label column visible:
-
At the top of any column, select the down arrow
-
In the Edit view columns pane, select the box for Retention label.
-
When you're finished, select Apply.
If you like, you can save the view for quick access at a later time:
-
On the right end of the command bar, select View options > Save view as:
-
Assign a name to the view.
-
Select whether you want the view to be public, for other folks to see.
-
Select Save.
Some actions aren't allowed for labeled items
When an item has a retention label, some actions aren't allowed—depending on the settings your admin has chosen.
If you see a message in SharePoint that you can't edit a labeled item, it's because it has been labeled a record. You might be able to edit this item if you first unlock it. See the next section for instructions.
Lock or unlock a record
Some retention labels have the ability to "lock" an item because it is a record that must be preserved. This prevents the item from being deleted, for example. For things like contracts, this is an important recordkeeping measure. However, you might be able to unlock items so that they can be revised or updated with a new version.
Note: Whether you can lock or unlock an item is determined by settings under the control of administrators, including the label configuration, site configuration, and whether you have "Contribute" permissions.
-
In the library or list, select the item you want to lock or unlock.
-
Near the upper right of the window, select Open the details pane:
-
In the Details pane, under Record status, select Locked.
-
A toggle control appears next to the name of the setting. Click the toggle to switch from Locked to Unlocked, or vice versa.
Once the item is unlocked, then you can edit it. When you're done editing, you can also lock the item again by following the steps above and toggling the Record status back to Locked.
Important: If your administrator has turned off versioning and the record starts out as unlocked, you'll be able to lock the item, but then you cannot unlock it again. In other words, for this scenario, it's a one-way action rather than a toggle.
See Also
For administrators: Compare the restrictions for what actions are allowed or blocked


