Rather than changing fonts in your slides one by one, you can change the default fonts for your entire presentation. The font pairing (header font, body font) is an important design decision in PowerPoint.
-
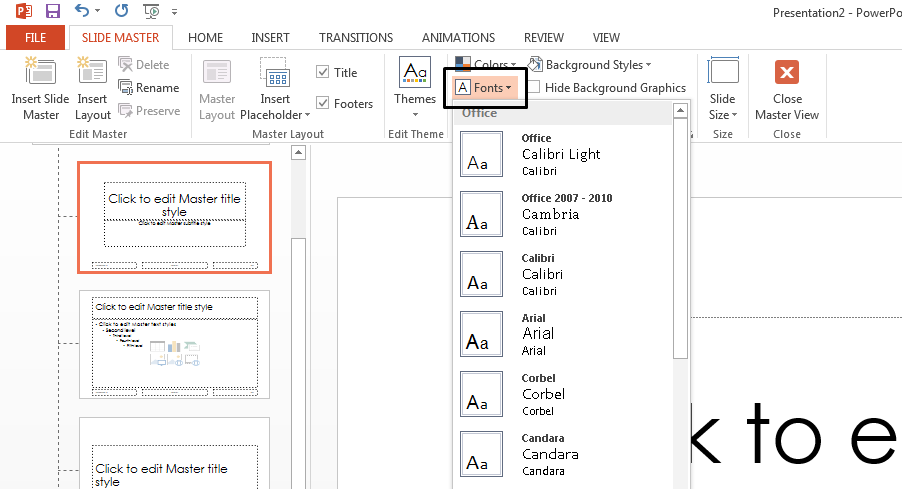
Select View > Slide Master.
-
On the Slide Master tab, select the Fonts drop-down menu. Select the font you want to use for all the slides in the presentation. You don't have to choose from the pre-defined font pairs on the menu; choose Customize Fonts at the bottom of the menu to select your own fonts.
Note: Any changes you make in Slide Master view affect all the slides that use the master.
-
Select Close Master View. The text throughout your presentation is automatically updated to the new font.
Create a template to save your default font
You can save the above default font updates by creating a PowerPoint template. This template saves your font updates and can be used in future presentations.
-
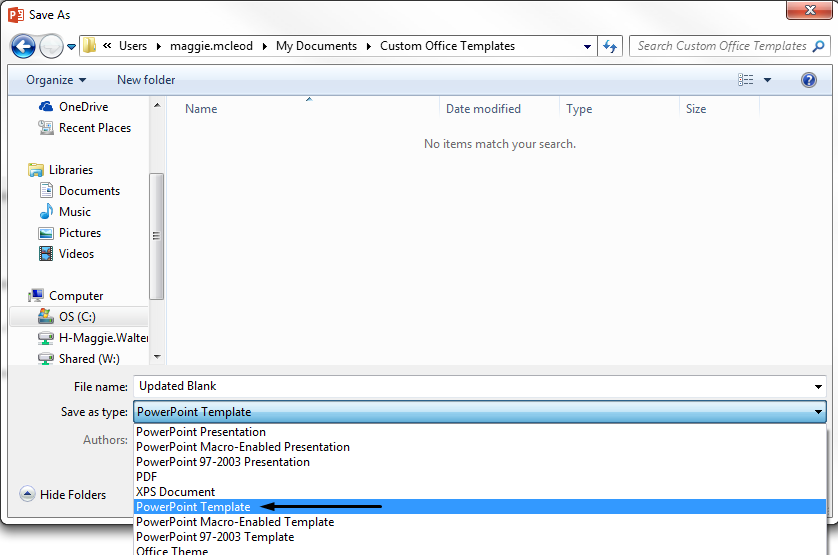
Select File > Save As.
-
Select Computer > Browse.
-
Navigate to C:\Users\<your username>\Documents\Custom Office Templates.
-
Type the name of your template in the File Name box. Select the Save as type drop-down menu and select PowerPoint Template.
-
Select Save.
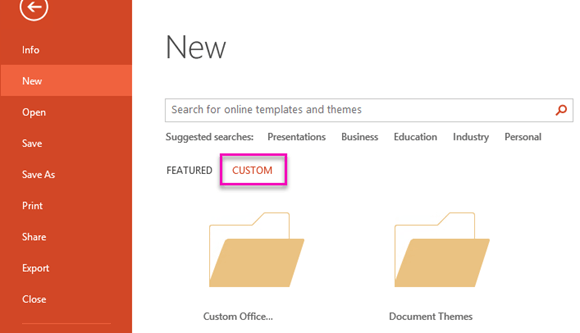
Note: You can access your template when you create a new presentation. Select File > New and select Custom > Custom Office Templates to find your template.


