Creating a new message in Outlook Web App is as simple as choosing New mail. Responding to a message is just as easy. Choose Reply, Reply all, or Forward at the top of the message in the reading pane.
|
This article is for Outlook Web App, which is used by organizations that manage email servers running Exchange Server 2013 or 2010. If you're using Microsoft 365, or Exchange Server 2016 or 2019, your email program is Outlook on the web. For help with Outlook on the web, see Get help with Outlook on the web. |
-
On the toolbar, choose New mail.
-
In the To or Cc line, type the name of anyone who's in your contacts folder or organization’s address list. You can also enter an email address.
Note: The first time you enter a person’s name, Outlook Web App searches for that person’s address. The searched name is saved so that it resolves faster the next time you address a message to that person.
-
Add a subject, type your message, and then choose
When you reply to a message, three things happen automatically. In the new message form, the subject and text of the original message are included, and a prefix (Re:) is added to indicate it's a reply.
To reply only to the person who sent the message
-
Select the message in the reading pane, and then choose
-
Type your response, and then choose
To reply to the sender of a message and all other recipients
-
Select the message in the reading pane, and then choose
-
Type your response, and then choose
When you forward a message, the subject and original message are included in the new message form automatically. A prefix (Fw:) is also added to the message being forwarded.
-
Select the message in the reading pane, and then choose
-
Do one of the following:
-
On the To line, type the name or email address of the person to receive the message.
or
-
Choose To or Cc to open your address lists.
-
-
Type a message, and then choose
The Insert
-
Add an attachment Choose
-
Add a picture that appears in the message Choose
-
Add a signature manually Choose
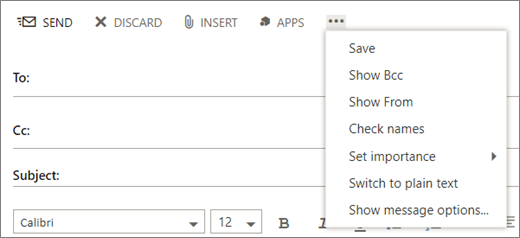
Outlook Web App provides a More actions
-
Save Outlook Web App automatically saves a message as you compose it, but you can force a save at any time.
-
Show Bcc Use Bcc to include someone in the recipients list while hiding their name from the other recipients.
-
Show From If you have permission to send from more than one address, use this field to change the from address of the message you’re composing.
-
Check names Select this option to check the names and email addresses you've typed to make sure that it's possible to send messages to them.
-
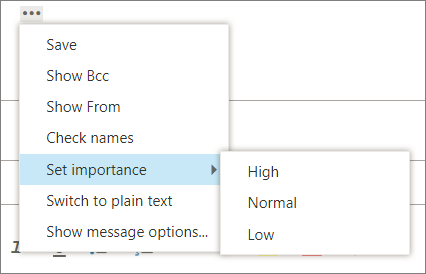
Set importance Use to set message importance. It won’t change how the message is handled, but it will let recipients know if it’s high importance or low importance.
-
Switch to plain text Use to change the standard setting of Switch to HTML.
-
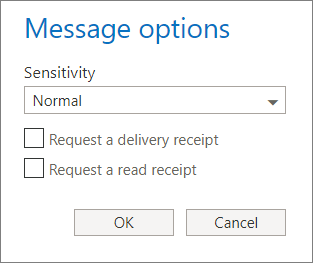
Show message options This option offers additional Message options where you can set message sensitivity and request read receipts.
The sensitivity settings are Normal, Personal, Private, and Confidential. These settings are informational only and don’t change how the message is handled.
Request a delivery receipt if you want to know when a message you sent has reached the recipients. A read receipt will tell you when a message that you sent has been marked as read. Some email programs, however, allow recipients to choose if they'll respond to read receipts.
Important:
-
You might also see the option to encrypt the message or digitally sign it, depending on whether your administrator has turned on these features.
-
If rights management settings are available for your account, you'll also see an option to Set permissions. You can use permissions, for example, to prevent recipients from forwarding a message that you’ve sent, or from using reply all to respond to a message that you’ve sent.
In Outlook Web App, you can start, stop, and restart writing at any time. Outlook Web App automatically saves the message you’re working on.
To find a message that you started but didn't send, begin by looking in the Drafts folder in the folder list. All drafts are kept there until they’re either sent or deleted.
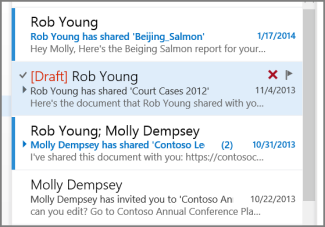
If you don't find your draft message in the Drafts folder, look for it in the same folder as the original message. The word Draft will appear in the message list next to the name of the person who sent the original message.
To handle a draft message
Select the draft message in the message list to view it in the reading pane. You can discard the draft or continue working on it.
-
View message in new window You view a message you're composing in a separate window. Choose Open in a separate window
-
Add more recipients to message Any time before you send a message, you can add more recipients. On the To or Cc line, type the recipient's name or email address.


