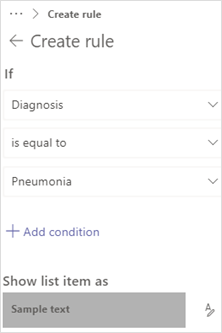
You have a wide variety of formatting options for your lists. You can use formats to simply make a list easier to read, or you can create rules to highlight certain list items based on values in the list (conditional formatting). And using JSON, you can create more complex views to suit your organization's needs.
Note: These features are not currently available on mobile.
In this article
Format a list layout
-
Go to the list you want to format.
-
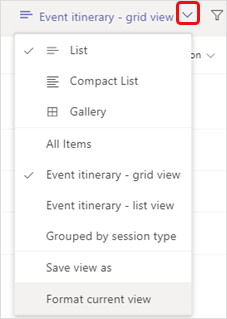
On the right side above the list select the Switch view options down arrow and select Format current view.
-
Under Choose layout, select List.
-
In the Format view panel you have several options.
• To alternate blue and white rows in your list for easy reading, select Alternating row styles. • To make other changes to alternate rows, such as different colors, fonts, and borders, select Edit row styles. Select the edit icon
-
When you've finished formatting the view, select Save.
-
To name and save the new view for future use, repeat step 2 above but select Save view as, enter a name, and select Save. Now this view will appear in the Switch view options drop-down list along with the other views and options.
Format a gallery layout
-
Go to the list you want to format.
-
On the right side above the list select the Switch view options down arrow and select Format current view.
-
Under Choose layout, select Gallery.
-
Select Edit card.
-
In the Card Designer panel you can make the following changes to the gallery view. • Select the column names for the data that you want to appear in the cards. • Drag the column names to reorder the column data in the cards. • To include the column names in the cards, as opposed to just including the data, select Show column names as labels.
-
When you've finished formatting the view, select Save.
-
To name and save the new view for future use, repeat step 2 above but select Save view as, enter a name, and select Save. Now this view will appear in the Switch view options drop-down list along with the other views and options.
Format a view using JSON
-
Select Advanced mode at the bottom of the Format view panel or Card Designer panel, and enter JSON in the box.
For details and JSON examples, see Formatting list views and Use view formatting to customize SharePoint.
Want to know more?
Use view formatting to customize SharePoint
Format a column to change how it looks
Format the pill shapes in a choice column
Note: In the SharePoint articles, not all of the content applies to Teams.
For IT admins
Manage the Lists app for your organization in Microsoft Teams


