Contact list getting a little overwhelming? The fastest way to organize your contacts is by color—such as blue for coworkers, red for family and friends, and green for community organizations and members. Either use the built-in color categories or create your own, and rename them to something meaningful (such as “Coworkers” instead of “Blue”). Then sort by color to focus on the contacts you want.
The built-in color categories include blue, orange, purple, red, yellow, and green. To add an existing contact to one of these categories:
-
Click People.
If you see icons instead of words, you can click the People icon or use the tip below to change what you see.
Tip: To change navigation options from icons to words, click the three dots next to the icons, click Navigation Options..., and uncheck Compact Navigation.
-
Right-click the contact you want to categorize, click Categorize, and then click the color you want.
-
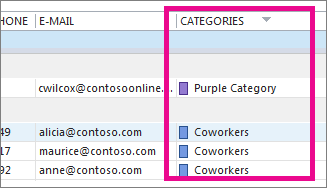
To tell what category a contact has been assigned to, in your list of contacts (View > Current View > Change View > List), scroll to the right to see the Categories column. Any assigned categories will appear there.
Tips:
-
When you create a contact, you can also assign it to a color category. When filling in all the new contact information in the Contact box, click Categorize, and then pick the category you want.
-
-
Rename a color category
To help you remember what a color category is for, you can change its name to something more meaningful. For example, if you’re using the Blue Category for coworkers, you can rename it Coworkers.
-
Click People > Home > Categorize > All Categories.
-
Click the category you want to rename, and then click Rename.
-
Type your new category name.
Tip: To make it easy to add contacts to this category, pick a shortcut under Shortcut Key. Then, the next time you want to assign contacts to this category, select them in your contact list and press the shortcut key.
Create a color category
Want to use a different color for a category? Just create one.
-
Click People > Home > Categorize >All Categories.
-
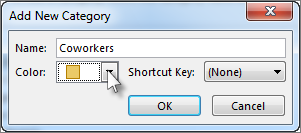
Click New, type the name you want to use, and then click the arrow next to the Color box to pick your color.
Tip: To make it easy to add contacts to this category, pick a shortcut under Shortcut Key. Then the next time you want to assign contacts to this category, select them in your contact list and press the shortcut key.
Sort contacts by color category
When you’re done assigning color categories to people, you can quickly sort your contacts by color to see the ones you want.
-
Click People.
-
Click Home, and then in the Current View group, click List.
-
Scroll all the way to the right in your list of contacts to see the Categories column.
-
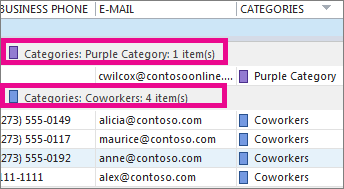
Click the Categories column header to sort the list by color. For each category, you’ll see a subheading with a list of all the contacts in that category.


