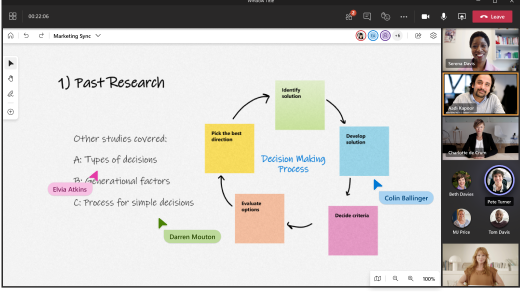
Whiteboard provides a space for teams to think together, try out different ideas, and make the best plan. Whiteboard is fully integrated into Microsoft teams, which makes it easy to plan projects before, during, and after a Teams meeting.
Check out these tips for getting the most out of Whiteboard during your next planning session.
Prep your whiteboard ahead of time
Here are some suggestions for getting your whiteboard ready before the meeting:
-
Create a new whiteboard from the board picker screen.
-
In the Create panel, select Templates > Project planning.
-
Choose a template that best fits your needs. For example, choose the Daily Stand-up template to track workload and everyday tasks. Or choose Project kickoff if you need to define your team's long-term goals.
-
Customize the template to suit your needs. For example, you can add additional notes, change colors, or add highlight arrows.
-
Upload images or relevant documents as PDFs.
-
To learn more, see Whiteboard features and functionality
Once your board is ready, you can send a link to your team.
Take control of the meeting
Once the meeting starts, follow these steps to share your board:
-
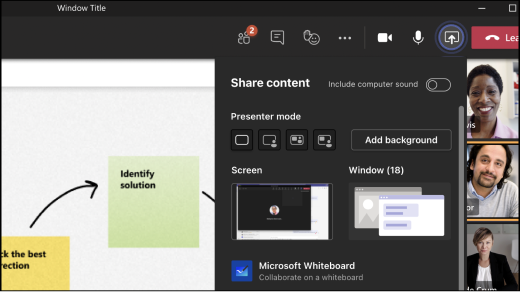
Select the Share icon in the meeting's share tray.
-
In the Whiteboard section, select Microsoft Whiteboard.
The board picker view will open. You can select the board you already prepared from the list or start a new board.
Here are some additional Whiteboard features you can use when leading the meeting:
-
Direct your team's attention with the laser pointer tool.
-
Use the highlighter tool or arrow shapes to call out key concepts.
-
Add new sticky notes to keep track of the discussion.
Keep your team engaged
Remind your team that they can use the following tools to collaborate in real time:
-
Add sticky notes to keep track of new ideas.
-
Use sticky note reactions such as checkmarks or smiley faces to vote on ideas.
-
Draw on the board or handwrite notes with the inking tool.
-
Upload images, including stock images from Bing.
Collaborative cursors make it easy to keep track of which meeting attendees are making which changes.
Put your plan into action
Here are some suggestions for following up after the meeting keeping your team informed:
-
Send a message to the attendees with the outcome and any follow-ups. You can also include a link to the whiteboard.
-
Remind meeting attendees that they can find the whiteboard in their board picker.
-
Send a snapshot of the finished whiteboard to anyone who missed the meeting. Select Export image from the Settings menu.
-
To learn more, see Continue working on a whiteboard after a meeting.
Run regular planning sessions
If you want to set up regular planning meetings, do the following:
Create a Planning channel in Teams and add a whiteboard
-
Navigate to your team in Teams, select the . . . menu, and add a channel. Its name should be the period that you’re planning for (for example, "First quarter”).
-
In the same channel, select the + button at the top, search for Whiteboard, and then select Save.
-
Your whiteboard is attached to the channel and you can begin planning.
-
Ensure your team knows about the channel and board by at-mentioning them in Teams.
Complete the planning process
-
Lay out the structure of the board with a project planning template or create your own.
-
Write instructions in a clear location on the board so team members know how to use it.
-
Some instructions could include specifying certain colors to indicate which areas certain features fall under, or which reactions represent feature acceptance, and so on.
-
Instruct team members to populate backlog items into the board on color-coded sticky notes.
-
During meetings associated with planning, use the board to move items around the backlog and facilitate related conversations.
-
Once a plan is set, migrate it into your project management system.


