The School home page site is a communication site designed to serve as an internal home page for your school intranet. It is the place where your students and educators can stay up to date on events and news, access school resources, and more. It also looks and works great on any device!
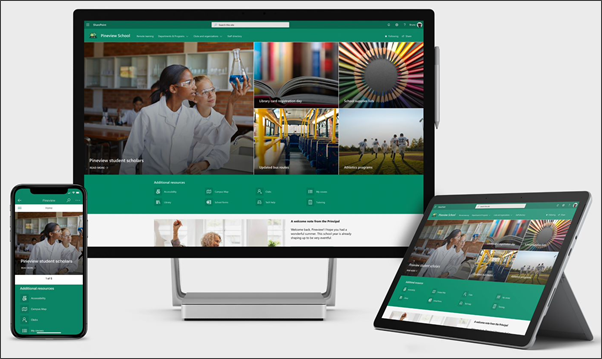
In this article, we share the elements that are on the School home page template in the SharePoint look book and how you can customize the site to make it your own.
Using this template creates a brand new site; it can't be added over an existing site. We recommend that this site is set up and maintained by a designated team responsible for disseminating information to the whole school. This could include IT admins, school leaders, designated staff members, or student leaders.
Notes:
-
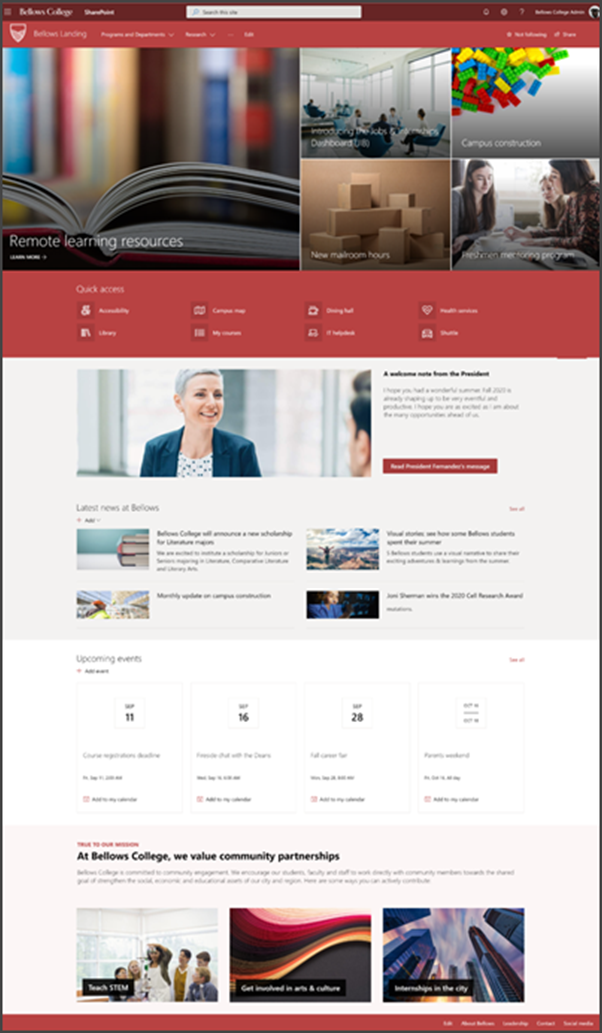
See an example of how this site could look for your higher education class. The possibilities are endless!
-
Want more? See all of the templates available for educators in Inform and engage your school staff and students with site templates.
-
Not every element of this site might be relevant for your school. You can delete elements that you don't need. You can also delete the sample news posts.
Step 1: Add the School home page site template
First, add the template from the SharePoint look book.
Note: You must have site owner permissions to add this template to your site.
-
Go to the School home page in the SharePoint look book.
-
Select Add to your tenant.
-
Enter the following information:
-
Email: Enter your email address where you will receive a confirmation when the template is successfully added to your site.
-
Site URL: This is the location where your site will be added. You must provide an URL that hasn't been used before as this template creates a new site.
-
Step 2: Customize your site
Once you've added the School home page template, it's time to customize it and make it your own.
|
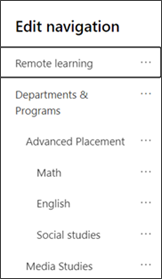
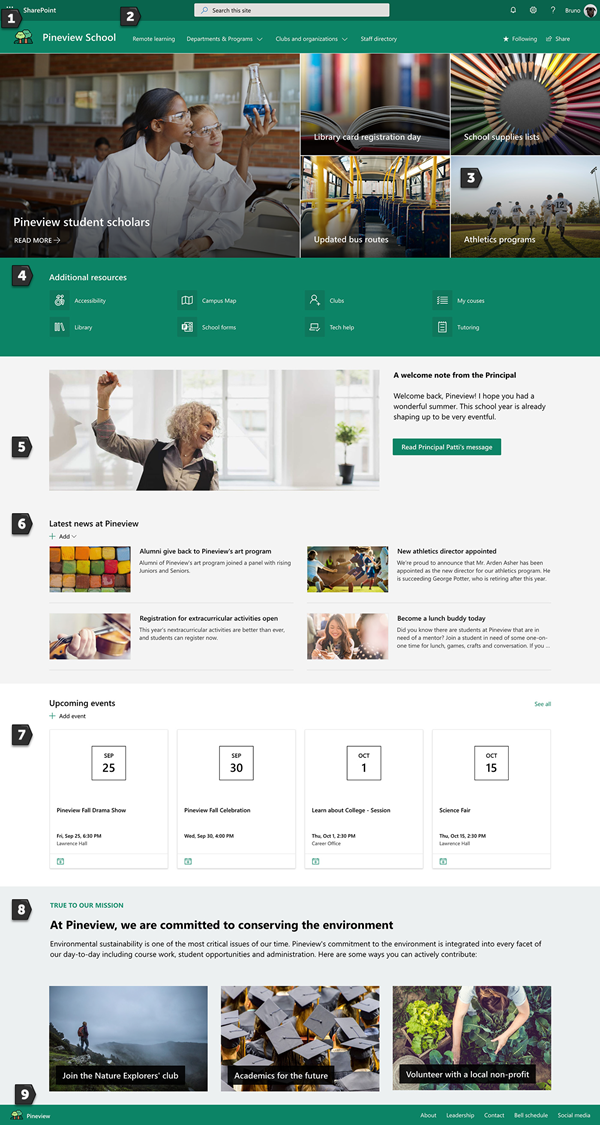
1. Showcase your school colors Use site branding and a logo to inspire school spirit. Learn how 2. Make your site easy to get around Customize navigation to make content discovery easy. Learn how 3. Use imagery to highlight important information At the top of your home page, use eye-catching images that link to the most important resources. Learn how 4. Share resources Share resources for your students, teachers and staff. Learn how 5. Communicate a message Highlight a timely message to students and educators. Learn how 6. Spread the news Create broad awareness about school announcements, initiatives and achievements. Learn how 7. Keep everyone up to date with events Add an event calendar to keep students, teachers, and staff up-to-date on school events. Learn how 8. Showcase the school mission Highlight your school's mission and values. Share mission-aligned initiatives to increase impact. Learn how 9. Share supplemental information Populate the branded footer with information about your school, leadership, contact info, and more. Learn how |
 |
Step 3: Share your School home page
Now, you are ready to share your site!
-
Select Share site from the right hand corner.
-
In the Share site pane, enter the names of people you want to share the site with. You can choose Everyone (except external users) if you would like everyone in your organization to have access to the school landing site. The default permission level is Read only.
-
Enter an optional message to send with the email notification that will be sent when the site is shared, or clear the Send email checkbox if you don't want to send an email.
-
Select Share.
Step 4: Maintain your site
Present the most up-to-date content your institution has to offer by following these tips:
-
Establish a schedule to review the site.
-
Keep web part content updated to ensure you are leveraging the full value of your landing site.
-
Regularly post news to distribute the latest announcements, information, and status across the institution. Learn how to add a News post on a team site or communication site, and show others who will be posting announcements how they can use SharePoint news.
-
Check out usage of your site by using the built-in usage data report to get information on popular content, site visits, and more.
Optional: Add the School home page as a tab in a Teams channel
After you've created your site, you can add it to a Teams channel. To do this:
-
In your team channel, select Add a tab +.
-
In the Add a tab dialog box, choose Website.
-
Enter the name you want to use in the Tab name box.
-
Enter the URL of your School home page.
-
Post to the channel about this tab is selected by default, and will create a post letting everyone in the team know the website has been added. You can deselect the checkbox if you don't want to do this.
When team members select this tab, they'll see the home page. They can go directly to the site by selecting the Go to website button
Customizing your site
Showcase your school colors with branding
You can quickly and easily customize the look of your SharePoint site to reflect your school's logo and colors. To do this, you can select a theme and customize your site header.
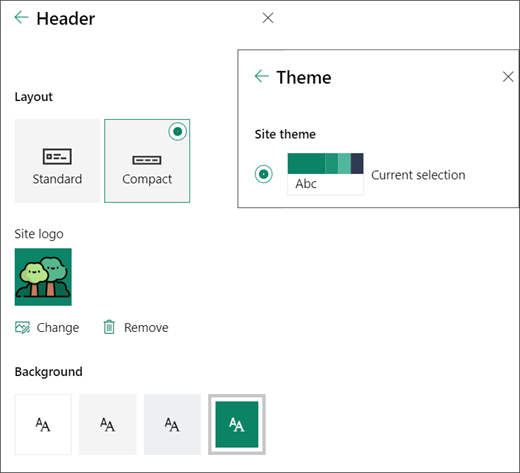
Learn more about how to do this in Change the look of your SharePoint site.
Use imagery to highlight important information with the Hero web part
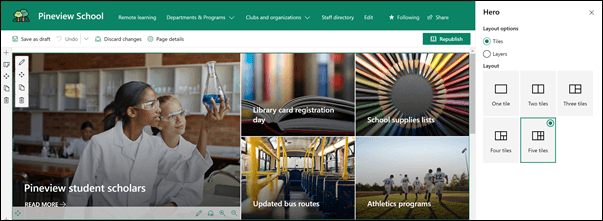
The Hero web part brings focus and visual interest to your page. You can display up to five items in the Hero web part and use compelling images, text, and links to draw attention to each. The School home page template uses a Hero in a full-width section with 5 tiles. To make changes to the Hero web part on your template:
-
If your page is not already in edit mode, select Edit on the top right of the page.
-
Select the Edit details button
-
In the property pane, select Change, and then choose a location from which to get your link: Recent, Stock images, Web search, Your organization, OneDrive, Site, Upload, or From a link.
-
Select your image, page, or document and select Open.
-
Under Background image, select Auto-selected image, Custom image or Color block.
-
Under Options you can show a Call to action link by switching the toggle to Yes. Then add your Call to action text (for example, "Learn more").
If you want to change the layout of the Hero web part, do this:
-
If your page is not already in edit mode, select Edit on the top right of the page.
-
Select the web part Edit button on the left and select the type of layout you want - you can select up to 5 tiles or up to 5 layers.
Learn more in Use the Hero web part.
Share resources with Quick links
-
If your page is not already in edit mode, select Edit on the top right of the page.
-
In the property pane, select a layout, and choose the options you want for that layout. For example, you can choose to Show image in layout for the Compact layout, and you can choose to Show descriptions for List and Button layouts. The School home page template uses Compact and has Show image in layout selected.
Add links
-
Select +Add.
-
Choose a location from which to get your link: Recent, Stock images, Web search, Your organization, OneDrive, Site, Upload, or From a link.
-
Select your image, page, or document and select Open.
-
Choose options for your link. The options depend on the settings you've chosen for the layout. For example, if you chose to Show descriptions for a list layout, you can add a description for the individual link. Other types of options for individual links, depending on the layout options, include changing the image, formatting icons, adding descriptions, and adding alternative text.
Edit links
-
If your page is not already in edit mode, select Edit on the top right of the page.
-
Hover over the item you want to edit, and select the Edit item button
-
Choose options for your link. The options depend on the settings you've chosen for the layout. For example, if you chose to Show descriptions for a list layout, you can add a description for the individual link. Other types of options for individual links, depending on the layout options, include changing the image, formatting icons, adding descriptions, and adding alternative text.
-
To remove links, select the X for the item. To reorder links, drag and drop items to new positions using the Move button. You can also reorder links using Ctrl + Left or Ctrl + Right arrow keys.
Learn more in Use the Quick Links web part.
Communicate a message with a combination of web parts including Image, Text, and Button
In this template, the Image, Text and Button web parts are being used to draw attention to a timely message.
Image web part
-
If your page is not already in edit mode, select Edit on the top right of the page.
-
Open the property pane by selecting the Edit button on the web part.
-
In the property pane, select Change to choose a recent image or an image from one of several sources such as stock images, your computer, your organization, and more.
-
Select Open or Add image (depending on where your image is coming from).
-
Optionally, enter Alternative text.
-
Optionally, type a caption under the image in the web part.
Learn more about how to Use the Image web part.
Text web part
-
If your page is not already in edit mode, select Edit on the top right of the page.
-
Change or add text, and format it using the toolbar at the top. For more formatting options, select the ellipses at the end of the toolbar to open the property pane.
Need more information? See Add text and tables to your page with the Text web part.
Button web part
-
If your page is not already in edit mode, select Edit on the top right of the page.
-
Open the property pane by selecting the edit icon on the web part.
-
In the property pane on the right, enter your label text in the Label box.
-
Enter your link in the Link box. Make sure your link starts with http://, https://, or mailto: If your link is added without one of these protocols, https:// will be added for you.
-
Under Alignment, choose how you want the button aligned (left, center, or right) within its column on the page.
Need more information? See Use the Button web part .
Spread the news with the News web part
Create visually-compelling content with SharePoint news that is distributed across your intranet. Learn more about creating and sharing news.
Add news
To add news posts to your site, do the following:
-
Select + Add in the News section to start creating your post. You'll get a blank news post page ready for you to start filling out.
-
Create the news post using the instructions in Build the news post page.
Edit the news web part
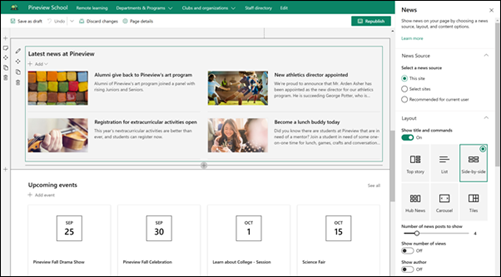
To make changes to the layout, the sources for your news, and other options for how news is displayed on your page, you can edit the News web part. The School home page template uses the Side-by-Side layout and has This site selected as the news source, which means all news posts are pulled from those on this site only.
-
Select the Edit
Layout: You can choose from different layouts for News on communications sites like the School home page template which uses the Side-by-Side layout. Other layouts are Top story, which includes a large image space and three additional stories; List, which shows news posts in a single column; Tiles layout, which shows up to five news items with thumbnails and headlines; and Carousel, which shows a large visual, and allows users to move through stories using back and next buttons, or pagination icons.
News source: You can specify the source for your news posts. Examples of sources are the site you are on while using the web part (This site, which is what the School home page template uses), one or more individual sites (Select sites) and Recommended for current user, which will display posts for the current user from people the user works with;; the user's top 20 followed sites; and the user's frequently visited sites, among others.
There are many more options you can set to fully utilize the power of the news web part. For more information on all options, see Use the News web part.
Keep everyone up to date with the Events web part
Add an event
On a published page, you can start adding events.
Note: You can add events on a saved or published page, but not on a page that is in edit mode.
-
Select Add event.
-
Give your event a name at the top of the page. Optionally, you can add an image to the title area by selecting the Add image button in the upper left.
-
Choose date and times in the When section.
-
In the Where section, enter a location or address. If your location is recognized, you have the option to add a map.
-
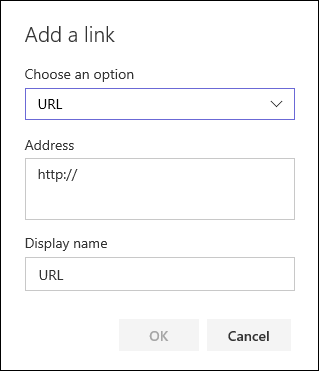
In the Link section, you can enter an online meeting link if you have one. Put the link in the Address box, and then add a Display name. If you don't have an online meeting and enter nothing, this section will not appear in the event.
-
Choose a Category (such as Meeting, Work hours, Business, Holiday, and so on) if you want the event to show when filtered by that category. To add your own category, just enter it in the space.
-
Provide a description in the About this event area.
-
If you have people you'd like to highlight for this event (such as contacts, special guests, or speakers) you can add their names below the event description. Only users within your organization can be added.
-
When you're done, select Save.
Edit the Events web part
-
If you're not in edit mode already, select Edit at the top right of the page.
-
Select Edit web part
-
Select a Source for your events: Events list on this site, This site, This site collection, Select sites, or All sites.
-
Select a date range by which to filter your events in the Date range drop-down list . You can choose All upcoming events (the default), This week, Next two weeks, This month, or This quarter.
-
Select a layout: Filmstrip or Compact. The School home page template has Filmstrip selected.
For more details about the Events web part, see Use the Events web part.
Showcase the school mission with the Text and Image web parts
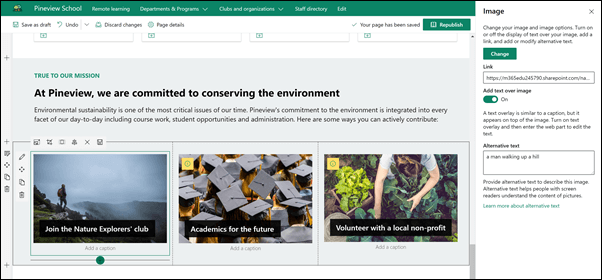
In the School home page template, image web part and a text web part have been used together to highlight the school's mission, along with mission-aligned initiatives.
Text web part
-
If your page is not already in edit mode, select Edit on the top right of the page.
-
Change or add text, and format it using the toolbar at the top. For more formatting options, select the ellipses at the end of the toolbar to open the property pane.
Need more information? See Add text and tables to your page with the Text web part.
Image web part
-
If your page is not already in edit mode, select Edit on the top right of the page.
-
Open the property pane by selecting the Edit button on the web part.
-
In the property pane, select Change to choose a recent image or an image from one of several sources such as stock images, your computer, your organization, and more.
-
Select Open or Add image (depending on where your image is coming from).
-
Optionally, enter Alternative text.
-
Optionally, type a caption under the image in the web part.
Learn more about how to Use the Image web part.
Move or remove an element of your page
Move or remove a web part
-
If you're page is not already in edit mode, select Edit at the top right of the page.
-
Select the web part you want to move or remove, and you'll see a small toolbar on the left of the web part.
To move the web part, click the Move button
To remove the web part, click the Delete button
Move or remove an entire section of the page
-
If your page is not already in edit mode, select Edit on the top right of the page.
-
If you want to move a section, select the Move button
-
To remove the web part, click the Delete button
Delete sample content
If you don't want to use the sample news posts that come with the template, here's how you can delete them:
-
Go to the Site Pages library by selecting the Settings gear
-
Select Site contents.
-
Select Site Pages.
The names of the news posts are:
-
Become a lunch buddy today
-
Registration for extracurricular activities open
-
New athletics director
-
Alumni give back to Pineview
-
-
Select the sample pages you want to delete, and then select Delete on the command bar.
School home page for higher education
Here's an example of how the School home page template can be used to create an internal landing for students, faculty, and staff in higher education. Just change the logo, theme, text, and any other elements you want. The possibilities are endless!
