Setting Up an Automated Workflow Between Microsoft Forms and Excel Through Power Automate
Introduction
This guide will walk you through the process of setting up an automated workflow between Microsoft Forms and Excel using Power Automate. The workflow could automatically add the Forms responses data to the pre-defined Excel file.
Prerequisites
Before you begin, ensure you have the following:
-
A Microsoft 365 account with access to Microsoft Forms and Excel (Check Microsoft 365 service description)
-
Access to Power Automate (Check Power Automate licensing for Power Automate seeded licenses for Microsoft 365 account)
Step-by-Step Guide
1. Create Your Microsoft Form
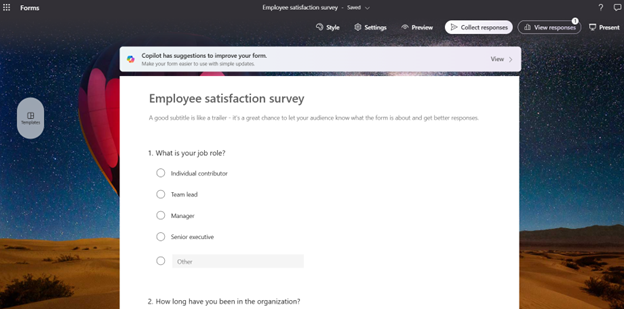
To start, you'll need a Microsoft Form that collects the data you wish to automate. Follow these steps:
-
Sign in to your Microsoft 365 account and navigate to Microsoft Forms.
-
Create a form and design your form by adding questions and configuring as needed.
2. Set Up Your Excel Spreadsheet
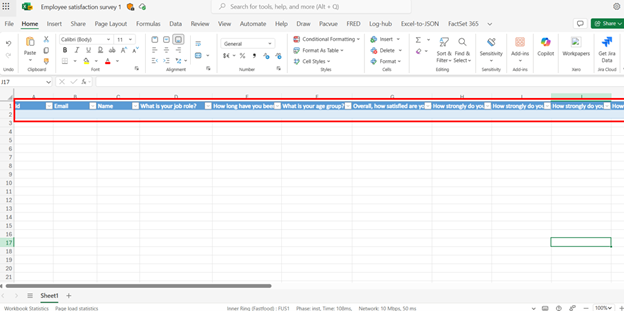
Next, prepare an Excel spreadsheet to store the data collected from your form:
-
Open Excel and create a new workbook or use an existing workbook.
-
Label the columns to match the fields in your Microsoft Form. For example, if your form collects names and email addresses, your columns might be labeled "Name" and "Email."
-
Save the workbook to OneDrive or SharePoint so that it can be accessed by Power Automate.
If you already have an Excel file linked with the Form (via “Open result in Excel” from Forms result page), the columns will be created automatically. You could adjust the columns as needed.
3. Create a New Flow in Power Automate
Now, you'll create a flow in Power Automate to link your form to your Excel spreadsheet:
-
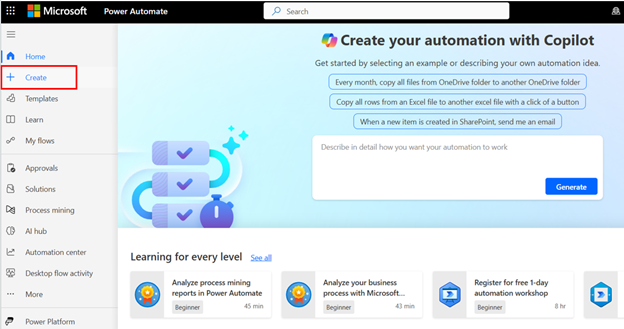
Open and sign in to Power Automate
-
and click on "Create" in the left-hand menu.
-
Select "Automated cloud Flow" and give your flow a name (e.g., "Form to Excel Automation").
-
Under "Choose your flow's trigger," search for and select "Microsoft Forms."
-
Select "When a new response is submitted" as the trigger.
4. Configure the Trigger
Next, you'll configure the trigger to specify which form responses should trigger the flow:
-
From the dropdown list, select the form whose data you want to automate. If your form does not appear, paste the form id from the form URL to add the form.
-
Click on "New step" to proceed.
5. Add an Action to Get Form Responses
After setting up the trigger, add an action to retrieve the form responses:
-
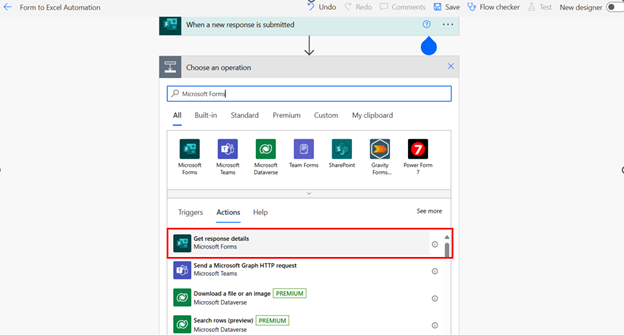
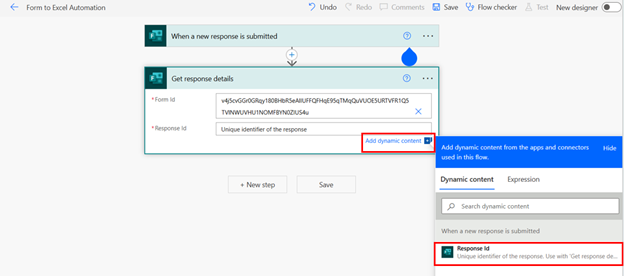
Search for "Microsoft Forms" and select "Get response details."
-
Choose your form from the dropdown list.
-
In the "Response Id" field, select "Response Id" from the dynamic content box.
6. Add an Action to Populate the Excel Spreadsheet
Now, you'll set up an action to write the form responses to your Excel spreadsheet:
-
Click on "New step" and search for "Excel Online (Business)”.
-
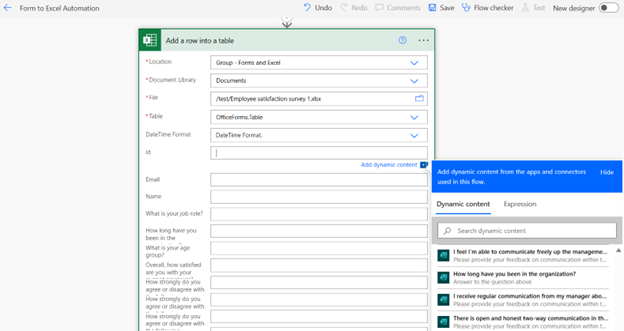
Select "Add a row into a table."
-
Choose the location of your Excel file (OneDrive or SharePoint), select the document library, and navigate to the file you created earlier.
-
Choose the table within your spreadsheet where you want to insert the form data.
-
Map the fields from your form to the columns in your Excel table by selecting dynamic content for each column.
-
Save the flow.
7. Test Your Flow
Before finalizing, it's crucial to test your flow to ensure it works correctly:
-
Submit a test response to your Microsoft Form.
-
Navigate to Power Automate and check the flow history to see if it ran successfully.
-
Open your Excel file to verify that the data has been recorded accurately.
Troubleshooting Tips
If you encounter issues, consider these troubleshooting steps:
-
Ensure all connections (Microsoft Forms, Excel, and Power Automate) are authenticated and have the necessary permissions.
-
Double-check that your Excel table has been formatted as a table (use "Format as Table" in Excel).
-
Review the dynamic content mapping to ensure all fields are correctly aligned.
-
Make sure the Excel file doesn’t have additional data sync connection to avoid duplicated data.

