The Staff home page serves as a dashboard where staff members can find important information like links to tools and resources, highlighted documents, events, and more. The Staff home page is a team site landing page that is intended to be used with Microsoft Teams so staff members get the benefit of the combined functionality of the home page along with real-time conversations and virtual meetings.

In this article, we share the elements that are on the sample Staff home page in the SharePoint look book and how you can customize these elements to make the site your own.
Notes:
-
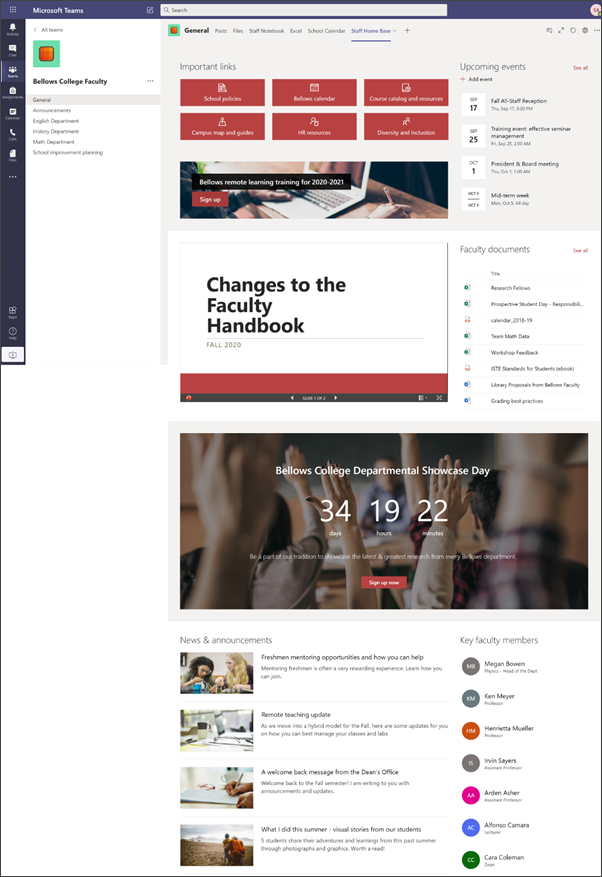
See an example of how this site could look for your higher education staff. The possibilities are endless!
-
Want more? See all of the templates available for educators in Inform and engage your school staff and students with site templates.
-
Not every element of the Staff home page might be relevant for your staff. You can delete elements that you don't need. You can also delete sample news posts and documents.
Step 1: Add the template
The Staff home page template can be added from the SharePoint look book. We recommend that the site is set up and maintained by a designated team or designated individuals. This could be an IT admin, a school leader, or designated staff members.
Notes:
-
You must have site owner permissions to add this template to your site.
-
The staff template is designed to be applied to an existing team site that you specify. When you go through the process of adding this template, you must provide an URL to an existing staff team site. While existing content like documents, lists, other pages, and news posts will not be affected, the template will override layout and content displayed on your existing site's home page. It will also add sample pages and documents. If you want to remove
-
Go to the Staff home page template in the SharePoint look book.
-
Provide the following information:
-
Email: Enter your email address where you will receive a confirmation when the template is successfully added.
-
Site URL: This is the location where your template will be added. The staff template is designed to be applied to an existing team site that you specify when you provide the URL. While existing content like documents, lists, other pages, and news posts will not be affected, the template will override layout and content displayed on your existing site's home page. It will also add sample pages and documents. Learn how to find your site URL.
-
Step 2: Customize
|
 |
Step 3: Add to your Staff home page template to the Team channel
Add the Staff home page template as a tab in Teams for enhanced collaboration and communication features. This procedure assumes you have an existing staff Team. If you don't, learn how to create a staff team in Microsoft Teams.
-
In your staff Team, go to the General channel.
-
Select the Add a tab button + at the top, next to the other tabs.
-
In the search bar, search for SharePoint.
-
From the search results, select Pages, and then select Home. (You may have to scroll down to find Home).
5. Once the page is added as a tab, you can optionally right-click it and rename it. To go back to your site for editing, select the Go to website button on the upper right.
Step 4: Maintain your site
Present the most up-to-date content your institution has to offer by following these tips:
-
Establish a schedule to review the site.
-
Keep web part content updated to ensure you are leveraging the full value of your landing site.
-
Check out usage of your site by using the built-in usage data report to get information on popular content, site visits, and more.
Customizing your site
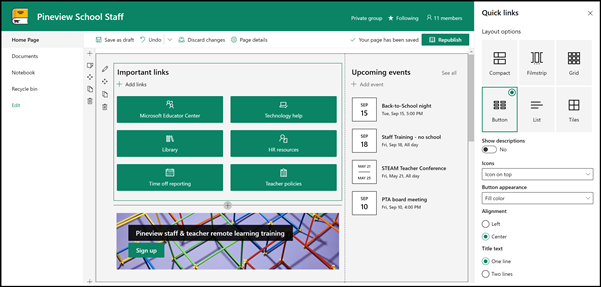
Highlight important resources with the Quick links web part
With Quick links, you can "pin" items to your page for easy access to frequently accessed resources.
-
If your page is not already in edit mode, click Edit at the top right of the page.
-
Rename the title "important links" to the title of your choosing.
-
Select the Edit
-
In the property pane, select a layout, and choose the options you want for that layout. The Staff home template uses Button layout without descriptions or images.
Learn more about the Quick Links web part.
Showcase important events with the Events web part
Add an event
On a published page, you can start adding events.
Note: You can add events on a saved or published page, but not on a page that is in edit mode.
-
Select Add event.
-
Give your event a name at the top of the page. Optionally, you can add an image to the title area by selecting the Add image button in the upper left.
-
Choose date and times in the When section.
-
In the Where section, enter a location or address. If your location is recognized, you have the option to add a map.
-
In the Link section, you can enter an online meeting link if you have one. Put the link in the Address box, and then add a Display name. If you don't have an online meeting and enter nothing, this section will not appear in the event.
-
Choose a Category (such as Meeting, Work hours, Business, Holiday, and so on) if you want the event to show when filtered by that category. To add your own category, just enter it in the space.
-
Provide a description in the About this event area.
-
If you have people you'd like to highlight for this event (such as contacts, special guests, or speakers) you can add their names below the event description. Only users within your organization can be added.
-
When you're done, select Save.
Edit the Events web part
-
If you're not in edit mode already, select Edit at the top right of the page.
-
Select Edit web part
-
Select a Source for your events: Events list on this site, This site, This site collection, Select sites, or All sites.
-
Select a date range by which to filter your events in the Date range drop-down list . You can choose All upcoming events (the default), This week, Next two weeks, This month, or This quarter.
-
Select a layout: Filmstrip or Compact. The School Central template has Filmstrip selected.
Learn more about the Events web part.
Make it happen with the Call to action web part
-
If your page is not already in edit mode, click Edit at the top right of the page.
-
Click +, and then select Call to action from the list of web parts.
-
Start typing in the Add your call to action text here field.
-
Select Edit web part
-
Now you can edit the background, button label, button link, and alignment.
Learn more about the Call to action web part.
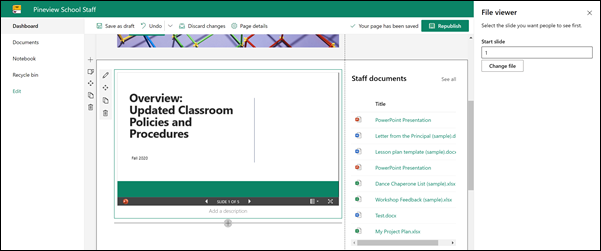
Display a document with File viewer web part
-
If your page is not already in edit mode, click Edit at the top right of the page.
-
Select Edit web part
-
Choose a recent file or get a file from your site, your computer, or a link. If your organization has specified a set of approved images, you'll be able to choose from that set under Your organization.
-
Choose a recent file, or browse, upload, or use a link to insert the file you want.
-
Optionally, you can add a description under the web part.
Use the File viewer web part.
Make documents easy to find with the Highlighted content web part

This web part dynamically displays content from a document library, a site, a site collection, or all sites. By default, this web part shows your most recent documents. If you don't have any documents or pages on your site, you'll first have to create or upload them.
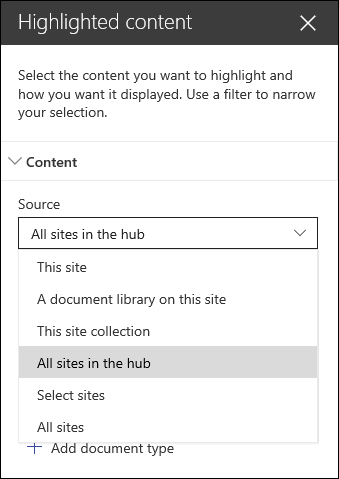
Make changes to the kinds of documents you display:
-
If you're not in edit mode already, click Edit at the top right of the page.
-
Click the Edit button
-
In the Source dropdown, select where you want to show content from: This site, A document library on this site, This site collection, The page library on this site, Select sites, or All sites. (This site is selected by default.) If your site is connected to a hub site, you will also have an option to select All sites in the hub.
When you click Select sites, you can search for the site you want to add, or select one or more sites from Frequent sites, or Recent sites.
-
In the Type dropdown, select the type of content you want to show. The type of content available will depend on your source.
Filter and sort documents
-
In the Filter dropdown, select what you want to filter by, and then enter the specific details for the filter. The filters available will depend on the content type.
-
Title includes the words Enter the search words for the titles you want to find
-
Content includes the words Enter the search words for the content you want to find
-
Recently added Enter the time period since an item was added (such as Today, Yesterday, Earlier this week, and so on).
-
Recently changed Enter the time period since an item was changed (such as Today, Yesterday, Earlier this week, and so on).
-
Created by Enter a user name if you choose Selected user. Otherwise, use Current user, which will filter for items created by whoever is viewing the page at the time.
-
Modified by Enter a user name if you choose Selected user. Otherwise, use Current user, which will filter for items created by whoever is viewing the page at the time.
-
-
In the Sort by dropdown, choose your option. The default is Most recent.
Learn more about using the Highlighted content web part.
Create energy and anticipation with the Countdown web part
-
If your page is not already in edit mode, click Edit at the top right of the page.
-
Select Edit web part
-
In the property toolbox on the right, enter the information you want to display and choose your options. When you add an image, you can also choose an overlay color and opacity level to help with the readability of text.
Learn more about how to use the Countdown timer web part.
Share school news and announcements with the News web part
-
If your page is not already in edit mode, click Edit at the top right of the page.
-
Select Edit web part
-
Select a news source. Choose This site, Select sites, or Recommended for current user. If your site is connected to a hub site, you will see an additional option for All sites in the hub. When you click Select sites, you can search for the site you want to add, or select one or more sites from Sites associated with this hub, Frequent sites, or Recent sites.
Learn more about filtering, adding, and removing news posts in the News web part.
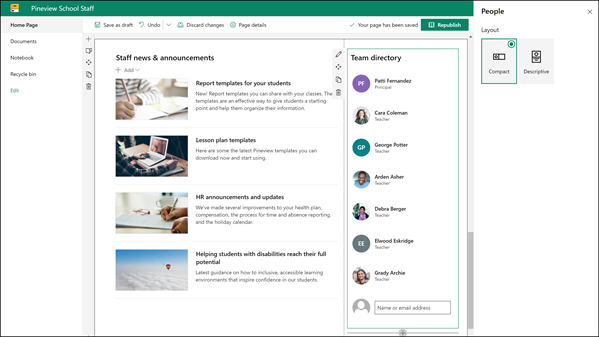
Focus on staff with the People web part
-
If your page is not already in edit mode, click Edit at the top right of the page.
-
Select Edit web part
-
You can change the title of the web part by clicking the text that says People profiles and typing over it.
-
Enter a name or partial name in the box. A list of matching results will display, and you can pick the person you want. Then click Add profile. Continue entering names and selecting profiles until you are done.
Learn more about how to change the type of card or reorder people in the People web part.
Move or remove an element of your staff page
Move or remove a web part
-
If you're page is not already in edit mode, select Edit at the top right of the page.
-
Select the web part you want to move or remove, and you'll see a small toolbar on the left of the web part.
To move the web part, click the Move button
To remove the web part, click the Delete button
Move or remove an entire section of the page
-
If your page is not already in edit mode, select Edit on the top right of the page.
-
If you want to move a section, select the Move button
-
To remove the web part, click the Delete button
Delete sample content
If you want to delete the sample news posts and content that comes with this template, here's how:
Delete sample news posts
-
Go to the Site Pages library by selecting the Settings gear
-
Select Site contents.
-
Select Site Pages.
The news posts are named:
-
HR resources
-
Helping students with disabilities reach their full potential
-
Lesson plan templates
-
Report templates for your students
-
-
Select the sample pages you want to delete, and then select Delete on the command bar.
Delete sample documents
-
Select the Settings gear
-
Select Site contents.
-
Select Documents.
-
Select the folder named Sample content from SharePoint look book.
With the folder selected, select Delete on the command bar to remove the entire folder, or open the folder and select the specific documents you want to remove and select Delete.
Sample documents are named:
-
Dance Chaperone List (sample)
-
Lesson plan template (sample)
-
Letter from the Principal (sample)
-
The importance of Professional Development (sample)
-
Updated Classroom policies and Procedures Workshop Feedback (sample)
-
Staff home page for higher education
Here's an example of how this template could be used to create a Staff team site for higher education, just by changing the logo, theme, text, and any other elements you want. The possibilities are endless!
