When you add a modern page to a site, you can add and customize web parts, which are the building blocks of your page.
This article describes the World clock web part, which allows you to show the time in different locations around the world.
Notes:
-
Some functionality is introduced gradually to organizations that have opted in to the Targeted Release program. This means that you may not yet see this feature or it may look different than what is described in the help articles.
-
World clock web part is not available in SharePoint Server 2019.
-
Go to the page where you want to add the web part.
-
If your page is not already in edit mode, click Edit at the top right of the page. Find the Toolbox (
-
Select See all web parts, then select or drag-and-drop World clock from the list of web parts.
-
Start typing a location in the Add a location box. Then, choose the location from the dropdown.
-
The web part will now show the date, time, and location as you have it set.
-
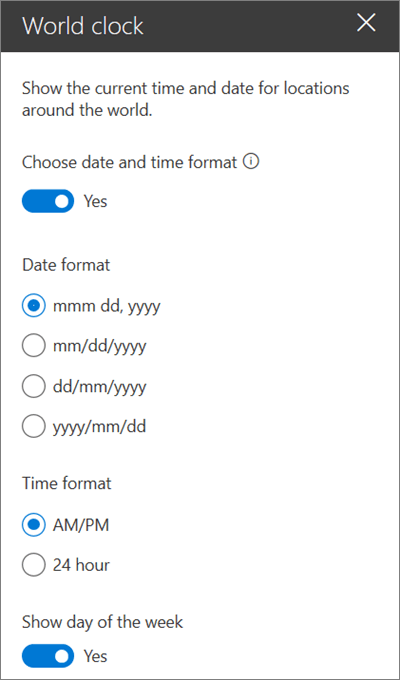
To customize the date/time format, click Edit properties (
-
Date format - Select the date format of how you want the date displayed (for example, mm/dd/yyyy, which would display as 08/01/2019, or mmm dd, yyyy, which would display as Aug 01, 2019).
-
Time format - Select between an AM/PM format, or 24-hour format.
-
Day of the week - To show the day of the week, set the Show day of the week slider to Yes.
-
-
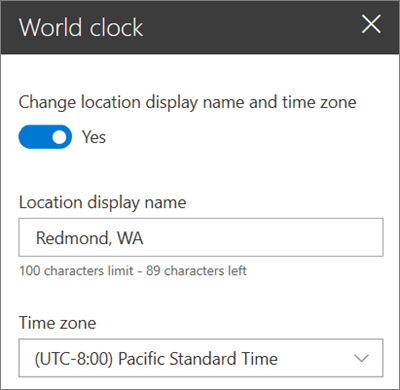
To switch the location, click Edit properties (
-
Location display name - Type what you want to display for the location name.
-
Time zone - Select from the dropdown the appropriate time zone.
-
You can also add additional world clocks for other locations as needed.


