

The junk email filter in Outlook sometimes classifies non-junk messages inaccurately. You can quickly reclassify messages if you need to.
Label a single message or multiple messages as Junk in legacy Outlook for Mac
Select an email message in the reading pane, or open the message you want to classify as junk.
On the Home tab, select Junk, and then select Junk or Mark as Junk.
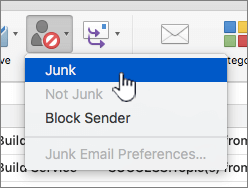
The message is moved to the junk email folder for that account, and it's also assigned to the Junk category.
Note
Selecting the Junk button doesn't instruct Outlook to classify similar messages as junk. To help filter messages more accurately, increase the level of junk email protection or create a rule that sends messages from the same sender to your junk folder.
Label a message as Not Junk in legacy Outlook for Mac
In the message list in your Junk Folder, select the message or messages you want to classify as Not Junk.
On the Home tab, select Junk, and then select Not Junk or Mark as Not Junk.
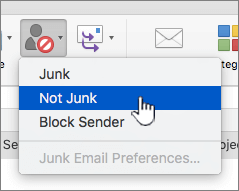
Alternatively, open the message you want to classify as Not Junk. If Outlook filters suspect the message might be junk, you will get a banner at the top of the message. Select Mark as Not Junk.

The message is moved to the Inbox folder of the mail account and removed from the Junk category.
Note
Selecting Not Junk or Mark as Not Junk doesn't instruct Outlook to classify similar messages as non-junk. To help prevent legitimate messages from reaching the junk folder, add a sender to your Outlook contacts or classify all messages from a sender's domain as non-junk. If you're on a mailing list, use Mailing List Manager to ensure that messages are handled by a mailing list rule and not classified as junk.