Symptoms
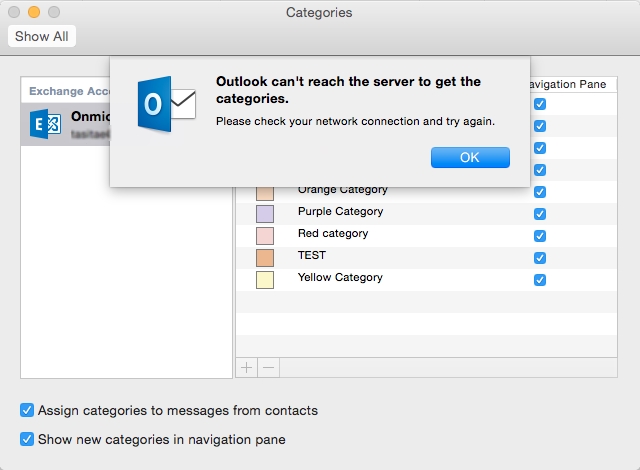
In Microsoft Outlook 2016 for Mac, when you click Categorize and then click Edit Categories, you receive the following error message:
Outlook can’t reach the server to get the categories.Please check your network connection and try again.

You verify that Outlook is communicating successfully with the server. For example, you do this by sending and receiving email. However, you continue to receive this error.
Cause
This issue occurs when the Master Category List (MCL) is corrupted. The MCL is stored in a hidden item in the mailbox on the Exchange server.
Resolution
To fix this issue, reset the corrupted MCL. To do this, follow these steps:Note Following these steps may reset your categories to their default values. Therefore, you may lose your custom categories. Because of this, we recommend that you document the categories for later reference so that you can re-create them.
Step 1: Document the current categories
-
Click Categorize , click Edit Categories, and then click OK when you receive the error message. You will now be able to view the categories.
-
Take a screen shot of the categories by pressing Command+Shift+3 on the keyboard. The screen shot will be saved on the desktop.
Step 2: Reset the corrupted Master Category List
-
Sign in to Outlook Web App.
-
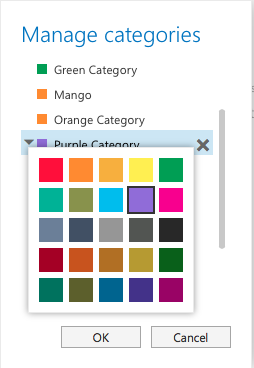
Right-click any email message, click Categorize, and then click Manage categories.
-
Change the color of any category by clicking the arrow to the left of the color block, and then click a different color.
-
Click OK.
-
Change the category color that you changed in step 3 back to the original color by following steps 2 through 4 again.Note When you manage the categories again, you may notice that custom categories are missing from the Category List.
Step 3: Restore missing custom categories
-
Click Categorize , and then click Edit Categories.
-
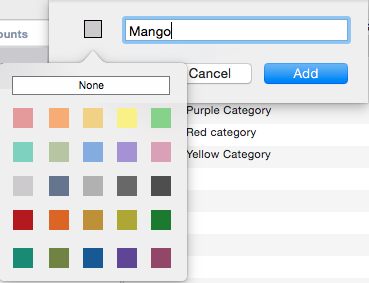
Click the plus sign (+).
-
Enter the exact name of missing custom category, and reference the screen shot that you took in step 1b.
-
Click the color block, and then select the color for this category.
-
Click Add.
-
Repeat steps 2 through 4 until you have all the missing categories added.
More Information
Any items in your mailbox that had custom categories assigned still have the category names assigned. When you add them to the MCL and assign a color to them by following these steps, the items will also display the color.


