|
For information about this issue with CrowdStrike on Windows endpoints (clients), see KB5042421. |
Summary
Microsoft has identified an issue impacting Windows Servers hosted on-premises that are running the CrowdStrike Falcon agent. These servers might encounter error messages 0x50 or 0x7E on a blue screen and experience a continual restarting state.
We have received reports of successful recovery from some customers attempting multiple restart operations on affected Windows servers.
We are working with CrowdStrike to help provide customers with the most up-to-date remediation steps to resolve this issue. Please check back for updates on this ongoing issue.
Resolution
Important: We have released a USB tool to help automate this manual repair process. For more information, see New recovery tool to help with CrowdStrike issue impacting Windows devices.
To resolve this issue, follow these instructions for your Windows server environment.
To mitigate this issue on VMs hosted on Hyper-V hosts, follow these steps:
IMPORTANT To complete the following steps, you must have a recovery image saved on a DVD.
-
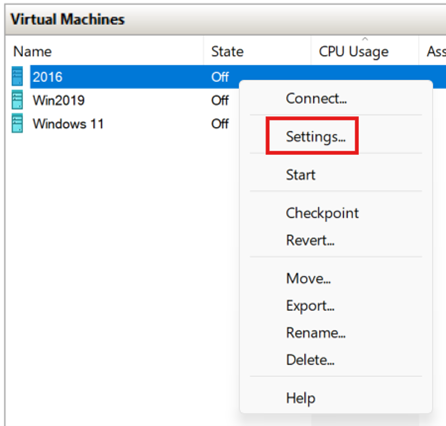
Power off the affected server from the Hyper-V Management console. Right-click the VM and then click Settings.
-
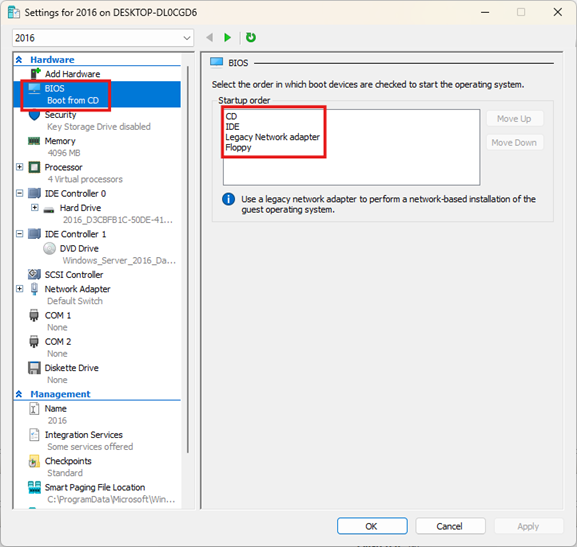
Under IDE controller in the left navigation pane, click DVD Drive and then click Browse to select the Windows Server OS ISO. The ISO should be of the same Windows version as the affected server.
-
Once the ISO is loaded, click BIOS in the left navigation pane and then move CD to the top of the Startup order in the right-side pane.
-
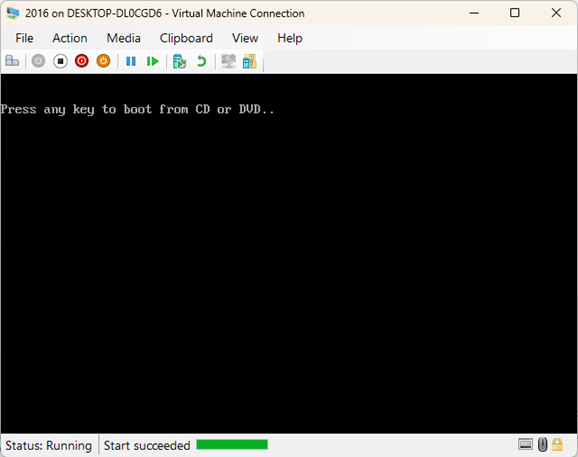
Start the VM from the console and then press any key once you are on the Press any key to boot from CD or DVD screen. This starts the VM into Windows Pre-Installation Environment.
-
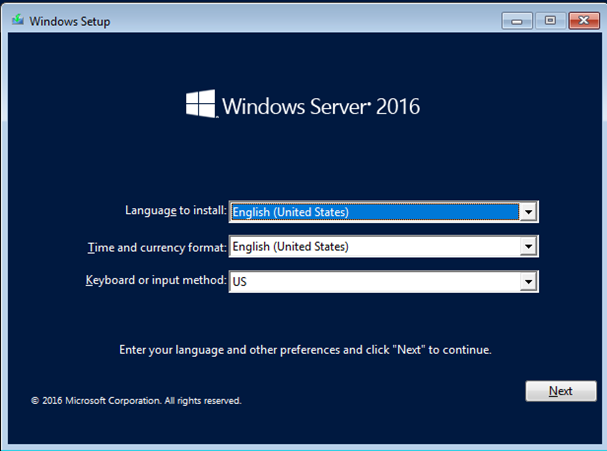
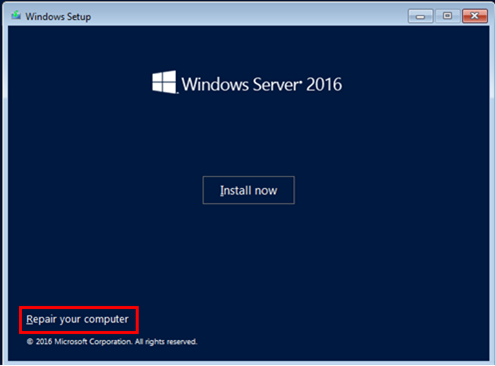
On the Windows Setup screen, click Next and then click the Repair your computer option.
-
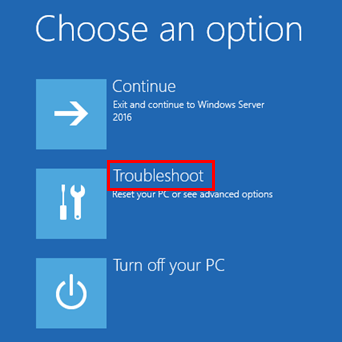
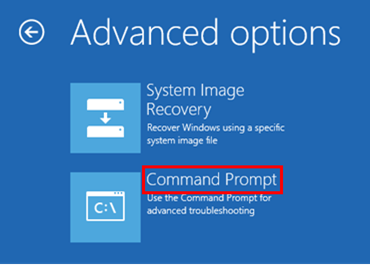
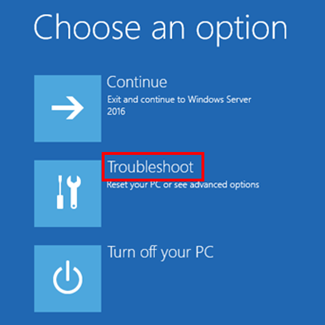
On the Choose an option screen, click Troubleshoot and then click Command prompt.
-
If your System drive is different than C:\, type C: and then press Enter. This will switch you to the C:\ drive.
-
Type the following command and then press Enter:
CD C:\Windows\System32\drivers\CrowdStrike
Note In this example, C is your system drive. This will change to the CrowdStrike directory.
-
Once in the CrowdStrike directory, locate the file matching “C-00000291*.sys”. To do this, type the following command and then press Enter:
dir C-00000291*.sys
-
Permanently delete the file(s) found. To do this, type the following command and then press Enter:
del C-00000291*.sys
-
Restart your device.
To resolve this issue on Physical servers, follow the steps in the following methods.
In the following methods, we use the Dell iDRAC remote management console. For example, access the Remote Management Interface for the affected server. This might be different for each vendor depending on the OEM (such as iLO for HP, iDRAC for Dell, CIMC for Cisco).
Navigate to the section of the interface that allows you to start the remote console or virtual console.
Method 1: Mounting the ISO from Remote Console
-
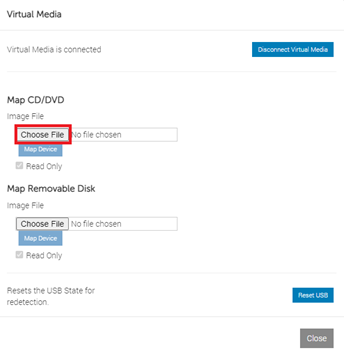
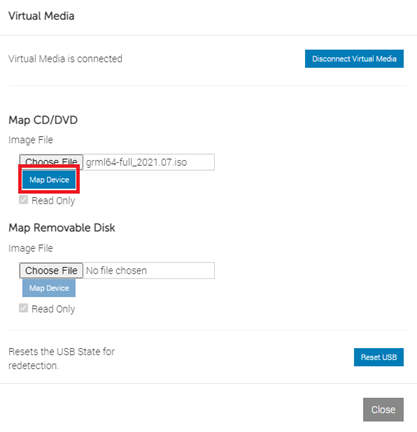
Navigate to Virtual Media in the Remote Console section of the management console.
-
Locate the option for mounting an ISO or inserting virtual media. This option might be labeled as Virtual Media, Virtual DVD, or so on.
-
Select the option to mount or attach an ISO image. You will be prompted to browse for the ISO file on your local system.
-
Browse and select the ISO file which is of the same version as the affected server version.
-
Confirm the selection and wait for the management console to upload and mount the ISO to the server.
-
Once the ISO is mounted, open the server’s operating system or management interface.
-
On the Choose an option screen, select Troubleshoot and then select Command Prompt.
-
If your system drive is different than C:\, type C: and then press Enter. This will switch you to the C:\ drive.
-
Type in the following command and then press Enter:
CD C:\Windows\System32\drivers\CrowdStrike
Note In this example, C is your system drive. This will change the directory to the CrowdStrike directory.
-
Once in the CrowdStrike directory, locate the file matching “C-00000291*.sys”. To do this, type the following command and then press Enter:
dir C-00000291*.sys
-
Permanently delete the file(s). To do this, type the following command and then press Enter.
del C-00000291*.sys
-
Restart your device.
Method 2: Mounting the ISO from Web console
-
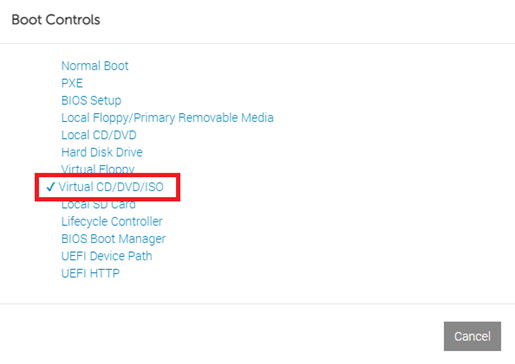
In the Virtual Console window, click the Boot button to access the Boot menu.
-
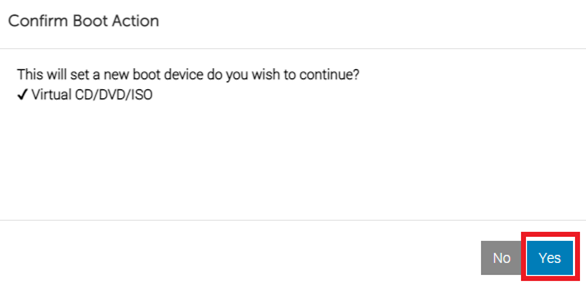
From the Boot menu, select Virtual CD/DVD/ISO. Confirm your selection by clicking Yes in the Boot Controls dialog box.
-
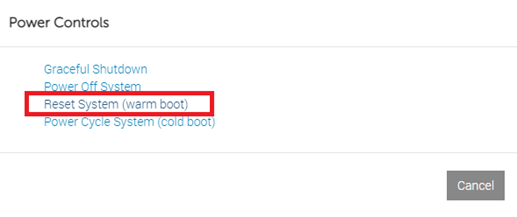
Click the Power button in the Virtual Console window.
-
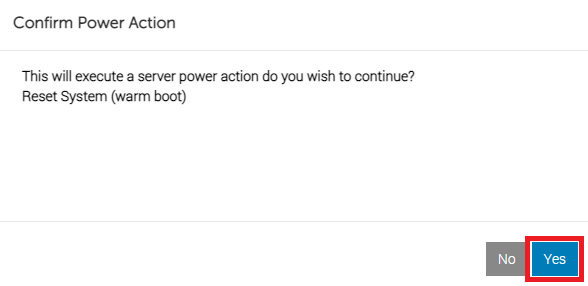
Choose Reset system (warm boot) from the Power Controls menu.
-
Confirm the selection by clicking Yes in the Confirm Power Action dialog box.
-
After the server completes the POST process, it will start from the selected .ISO image. Select the virtual CD/DVD drive as the boot device. Restart the server to enter the Windows Pre-Installation Environment.
-
After your device restarts to the Choose an option screen, click Troubleshoot and then click Command Prompt.
-
If your system drive is different than C:\, type C: and then press Enter. This will switch you to the C:\ drive.
-
Type the following command and then press Enter:
CD C:\Windows\System32\drivers\CrowdStrike
Note In this example, C is your system drive. This will change to the CrowdStrike directory.
-
Once in the CrowdStrike directory, locate the file matching “C-00000291*.sys”. To do this, type the following command and then press Enter:
dir C-00000291*.sys
-
Permanently delete the file(s). To do this, type the following command and then press Enter:
del C-00000291*.sys
-
Restart your device.
Contact CrowdStrike
If after following the above steps, if you still experience issues logging into your device, please reach out to CrowdStrike for additional assistance.
References
The third-party products that this article discusses are manufactured by companies that are independent of Microsoft. We make no warranty, implied or otherwise, about the performance or reliability of these products.
We provide third-party contact information to help you find technical support. This contact information may change without notice. We do not guarantee the accuracy of this third-party contact information.

