You use a scroll bar or spin button to quickly enter or change a range of values.
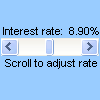
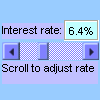
Scroll bar Scrolls through a range of values when you click the scroll arrows or when you drag the scroll box. You can move through a page (a preset interval) of values by clicking the region between the scroll box and either scroll arrow. Typically, a user can also type a text value directly in the associated cell or text box. Use a scroll bar for setting or adjusting a large range of values, or for cases when precision is not important. For example, use a scroll bar for a range of percentages that are estimates, or for adjusting color selection in a graduated way.
|
Scroll bar (Form control)
|
Scroll bar (ActiveX control)
|
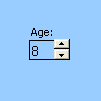
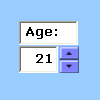
Spin button Makes it easier to increase or decrease a value, such as a number increment, time, or date. To increase the value, click the up arrow; to decrease the value, click the down arrow. A user can also type a text value directly in the associated cell or text box. Use a spin button, for example, to make it easier to enter a month, day, year number, or to increase a volume level.
|
Spin button (Form control)
|
Spin button (ActiveX control)
|
Note: Before you add controls to your worksheet, you have to enable the Developer tab. For more information, see Show the Developer tab.
Add a scroll bar (Form control)
-
On the Developer tab, in the Controls group, select Insert, and then under Form Controls, select Scroll Bar
-
Click the worksheet location where you want the upper-left corner of the scroll bar to appear.
Note: The scroll bar is added in a top-down orientation.
-
To orient the scroll bar from left to right, drag one of the sizing handles in a diagonal direction.
-
On the Developer tab, in the Controls group, select Properties
Tip: You can also right-click the control, and then select Format Control.
Note: Before you select Properties, make sure that the object for which you want to examine or change properties is already selected.
To specify the control properties, do the following:
-
In the Current value box, enter the initial value in the range of allowed values below that corresponds to the position of the scroll box in the scroll bar. This value must not be:
-
Less than the Minimum value; otherwise, the Minimum value is used.
-
Greater than the Maximum value; otherwise, the Maximum value is used.
-
-
In the Minimum value box, enter the lowest value that a user can specify when they position the scroll box closest to the top of a vertical scroll bar or the left end of a horizontal scroll bar.
-
In the Maximum value box, enter the largest value that a user can specify when they position the scroll box farthest from the top of a vertical scroll bar or the right end of a horizontal scroll bar.
-
In the Incremental change box, enter the amount that the value increases or decreases and the degree to which the scroll box moves when the arrow at either end of the scroll bar is clicked.
-
In the Page change box, enter the amount that the value increases or decreases and the degree to which the scroll box moves when you click the area between the scroll box and either of the scroll arrows. For example, in a scroll box with a minimum value of 0 and a maximum value of 10, if you set the Page change property to 2, the value will increase or decrease by 2 (in this case, 20% of the value range of the scroll box) when you click the area between the scroll box and either of the scroll arrows.
-
In the Cell link box, enter a cell reference that contains the current position of the scroll box.
The linked cell returns the current value corresponding to the position of the scroll box.
Use this value in a formula to respond to the value of the cell specified in the Cell link box that corresponds to the current position of the scroll box. For example, if you create a risk factor scroll bar with the following properties:
-
|
Property |
Value |
|---|---|
|
Current value |
100 |
|
Minimum value |
0 |
|
Maximum value |
100 |
|
Incremental change |
1 |
|
Page change |
5 |
|
Cell link |
C1 |
With these settings, the user can use the scroll bar to enter a precise number or click the area between the scroll bar and arrow to change the value in increments of 5.
The following formula in cell D1 returns the exact value that is based on the current value in the linked cell:
=IF(C1 > 50, "Acceptable", "Unacceptable")
The following array formula in cell D1 assigns a grade to the risk factor, based on the current value in the linked cell.
=LOOKUP(C1,{0,20,40,60,80},{"F","D","C","B","A"})
Note: Clicking the left or top scroll arrow after the minimum value has been reached or clicking the right or bottom arrow after the maximum value has been reached has no effect on the value returned. The scroll bar remains at either the minimum or maximum value and does not cycle through the range of allowed values.
Add a scroll bar (ActiveX control)
-
On the Developer tab, in the Controls group, select Insert, and then under ActiveX Controls, select Scroll Bar
-
Click the worksheet location where you want the upper-left corner of the scroll bar to appear.
-
To edit the control, make sure that you are in design mode. On the Developer tab, in the Controls group, select Design Mode
-
To specify the control properties, on the Developer tab, in the Controls group, select Properties
Tip: You can also right-click the control, and then click Properties.
The Properties dialog appears. For detailed information about each property, select the property, and then press F1 to display a Visual Basic Help topic. You can also type the property name in the Visual Basic Help Search box. The following section summarizes the properties that are available.
Summary of properties by functional categories:
|
If you want to specify |
Use this property |
|---|---|
|
General: |
|
|
Whether the control is or isn't loaded when the workbook is opened. (Ignored for ActiveX controls.) |
AutoLoad (Excel) |
|
Whether the control can receive the focus and respond to user-generated events. |
Enabled (Form) |
|
Whether the control can be edited. |
Locked (Form) |
|
The name of the control. |
Name (Form) |
|
The way the control is attached to the cells below it (free floating, move but do not size, or move and size). |
Placement (Excel) |
|
Whether the control can be printed. |
PrintObject (Excel) |
|
Whether the control is visible or hidden. |
Visible (Form) |
|
Data and binding: |
|
|
The range that is linked to the control's value. |
LinkedCell (Excel) |
|
The content or state of the control. |
Value (Form) |
|
Size and position: |
|
|
The height or width in points. |
Height, Width (Form) |
|
The distance between the control and the left or top edge of the worksheet. |
Left, Top (Form) |
|
Whether the orientation is vertical or horizontal. |
Orientation (Form) |
|
Formatting: |
|
|
The background color. |
BackColor (Form) |
|
The foreground color. |
ForeColor (Form) |
|
Whether the control has a shadow. |
Shadow (Excel) |
|
Keyboard and mouse: |
|
|
A custom mouse icon. |
MouseIcon (Form) |
|
The type of pointer that is displayed when the user positions the mouse over a particular object (for example, standard, arrow, or I-beam). |
MousePointer (Form) |
|
Specific to scroll bar: |
|
|
The delay in milliseconds after you click the scroll bar once. |
Delay (Form) |
|
The amount of movement that occurs when the user clicks the area between the scroll box and either of the scroll arrows. |
LargeChange (Form) |
|
The maximum and minimum allowed values. |
Max, Min (Form) |
|
Whether the size of the scroll box is either proportional or fixed to the scrolling region. |
ProportionalThumb (Form) |
|
The amount of movement that occurs when the user clicks a scroll arrow in the control. |
SmallChange (Form) |
Add a spin button (Form control)
-
On the Developer tab, in the Controls group, select Insert, and then under Form Controls, select Spin Button
-
Click the worksheet location where you want the upper-left corner of the spin button to appear.
-
On the Developer tab, in the Controls group, select Properties
Tip: You can also right-click the control, and then select Format Control.
To set the control properties, do the following:
-
In the Current value box, enter the initial value of the spin button within the range of allowed values below. This value must not be:
-
Less than the Minimum value, otherwise the Minimum value is used.
-
Greater than the Maximum value, otherwise the Maximum value is used.
-
-
In the Minimum value box, enter the lowest value that a user can specify when they click the bottom arrow in the spin button.
-
In the Maximum value box, enter the highest value that a user can specify when they click the top arrow in the spin button.
-
In the Incremental change box, enter the amount that the value increases or decreases when the arrows are clicked.
-
In the Cell link box, enter a cell reference that contains the current position of the spin button.
The linked cell returns the current position of the spin button.
Use this value in a formula to respond to value of the cell specified in the Cell link box that corresponds to the current position of the spin button. For example, you create a spin button for setting the current age of an employee with the following properties:
-
|
Property |
Value |
|---|---|
|
Current value |
35 |
|
Minimum value |
21 |
|
Maximum value |
70 |
|
Incremental change |
1 |
|
Cell link |
C1 |
With these settings, the user can click the spin button to enter an age that falls within a minimum and maximum age range. The median age of the employees is 35, and therefore 35 is a good choice to set as the starting value.
The following formula in cell D1 determines the length of employment that is based on the current age value in the cell that is linked to the spin button and the employee's age at hire date. The age at hire date is the value in B1 (retrieved from another data source). The formula then computes a holiday bonus percentage that is based on years of service:
=(C1 - B1)* .01
Note: Clicking the top arrow after the minimum value has been reached or clicking the bottom arrow after the maximum value has been reached has no effect on the value returned. The spin button remains at either the minimum or maximum value and does not cycle through the range of allowed values.
Add a spin button (ActiveX control)
-
On the Developer tab, in the Controls group, select Insert, and then under ActiveX Controls, select Spin Button
-
Click the worksheet location where you want the upper-left corner of the spin button to appear.
-
To edit the control, make sure that you are in design mode. On the Developer tab, in the Controls group, select Design Mode
-
To specify the control properties, on the Developer tab, in the Controls group, select Properties
Tip: You can also right-click the control, and then select Properties.
The Properties dialog appears. For detailed information about each property, select the property, and then press F1 to display a Visual Basic Help topic. You can also type the property name in the Visual Basic Help Search box. The following section summarizes the properties that are available.
Summary of properties by functional categories:
|
If you want to specify |
Use this property |
|---|---|
|
General: |
|
|
Whether the control is or isn't loaded when the workbook is opened. (Ignored for ActiveX controls.) |
AutoLoad (Excel) |
|
Whether the control can receive the focus and respond to user-generated events. |
Enabled (Form) |
|
Whether the control can be edited. |
Locked (Form) |
|
The name of the control. |
Name (Form) |
|
The way the control is attached to the cells below it (free floating, move but do not size, or move and size). |
Placement (Excel) |
|
Whether the control can be printed. |
PrintObject (Excel) |
|
Whether the control is visible or hidden. |
Visible (Form) |
|
Data and Binding: |
|
|
The range that is linked to the control's value. |
LinkedCell (Excel) |
|
The content or state of the control. |
Value (Form) |
|
Size and Position: |
|
|
The height or width in points. |
Height, Width (Form) |
|
The distance between the control and the left or top edge of the worksheet. |
Left, Top (Form) |
|
Whether the orientation is vertical or horizontal. |
Orientation (Form) |
|
Formatting: |
|
|
The background color. |
BackColor (Form) |
|
The foreground color. |
ForeColor (Form) |
|
Whether the control has a shadow. |
Shadow (Excel) |
|
Keyboard and Mouse: |
|
|
A custom mouse icon. |
MouseIcon (Form) |
|
The type of pointer that is displayed when the user positions the mouse over a particular object (for example, standard, arrow, or I-beam). |
MousePointer (Form) |
|
Specific to spin button: |
|
|
The delay in milliseconds after you click the spin button once. |
Delay (Form) |
|
The maximum and minimum allowed values. |
Max, Min (Form) |
|
The amount of movement that occurs when the user clicks a spin arrow in the control. |
SmallChange (Form) |


