Note: Office 2021 for Mac is a continuation of the same code base that Office 2019 for Mac ran under, so there is no benefit to be had by going back to Office 2019 for Mac once you have upgraded to Office 2021 for Mac from there. However, if you have upgraded to Office 2021 for Mac from Office 2016 for Mac and need to go back to Office 2016 for Mac, the steps are the same as below.
These instructions are for customers who have purchased a one-time version or volume license version of Office for Mac, not Microsoft 365 customers.
Microsoft released Office 2019 for Mac on September 24th, 2018 (Version 16.17). While these builds contain advanced new features, if you run into any work-stopping issues after installing Office 2019 for Mac, you can go back to Office 2016 for Mac (Version 16.16) if you had it previously installed.
Before you begin
-
Confirm that you're on Office 2019 for Mac. Open any Office app, like Word.
-
In the top menu, click Word > About Word.
-
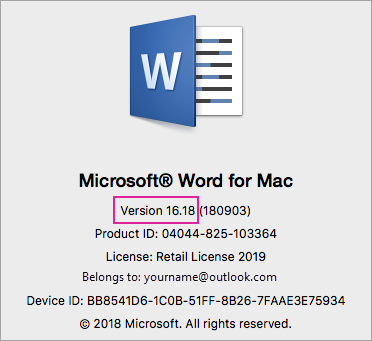
In the dialog box that opens, if you're on Office 2019 for Mac, you'll see a version number that starts with "16.17" or higher and license type will say Retail License 2019 or Volume License.
Uninstall Office 2019 for Mac
-
Quit out of all Office 2019 for Mac apps.
-
Go to Finder > Applications.
-
For the following Office 2019 for Mac apps, right-click and select Move to Trash:
-
Microsoft Word
-
Microsoft Excel
-
Microsoft PowerPoint
-
Microsoft OneNote
-
Microsoft Outlook (if available)
Important: If you're using a POP/IMAP server, make sure you export your mailbox before deleting your profile. To do this, open Outlook and go to File > Export and then follow the steps above.
-
-
If you uninstalled Outlook, you'll also want to delete your Outlook profile. To do this, go to your Library > Group Containers > UBF8T346G9 > Office > Outlook > Outlook 16 Profiles. Delete the "Main Profile" folder and all its contents.
Important: This will also delete mailbox data stored on your computer. If you have a Microsoft 365, Outlook.com, or Exchange email account, you'll be able to re-sync your data after setting up your Outlook profile again.
-
Follow these instructions to Remove the Office licenses from your Mac. You can always reinstall and reactivate again.
Reinstall and reactivate Office 2016 for Mac
-
Download and install the Office 2016 for Mac (Version 16.16) installer that applies to you:
Note: What's the difference? Home & Business includes Outlook while Home & Student doesn't. If you have a Home & Student license but install Home & Business you won't be able to use Outlook.
-
Activate and confirm you're using Office 2016 for Mac using one of two methods:
For Office 2016 for Mac (one-time purchase)
-
Launch any Microsoft Office app, like Word.
-
On the Sign in to activate Office screen, sign in with your Microsoft account associated with your purchase of Office 2016 for Mac.
-
In the top menu, select Word > About Word.
-
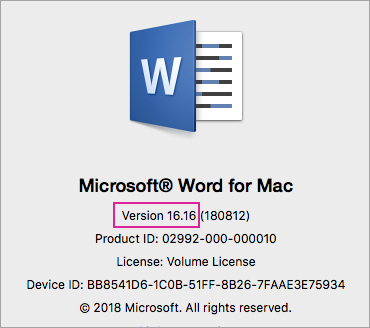
In the dialog box, confirm that the version number you see starts with 16.16. This means you're on Office 2016 for Mac.
For Office 2016 for Mac (volume license)
-
Select the Download and Keys tab.
-
Select the Download button for Office for Mac 2016.
-
Select Continue on the pop-up window and download the VL serializer.
-
Once the download is complete, double-click to open the Office_2016_Mac.iso file and run the installer package - Microsoft_Office_2016_VL_Serializer.pkg.
-
Launch any Office app, like Word. In the top menu, select Word > About Word.
-
In the dialog box, confirm that the version number you see starts with 16.16. This means you're on Office 2016 for Mac.
-


