Change the page orientation for a document
-
Click or tap in the document.
-
Go to Layout > Orientation, and then select Landscape.
-
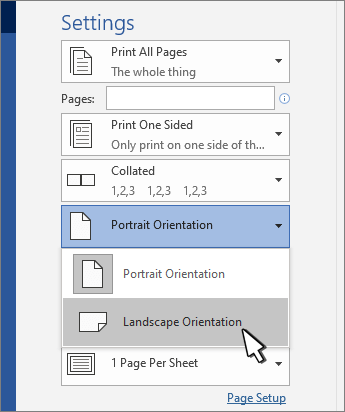
Go to File > Print.
-
Under Settings, make sure the orientation box says Landscape Orientation.
-
Select Print.
Change the orientation for specific pages
-
Select all the text on the pages you want to change.
-
Go to Layout, and select Page Setup dialog launcher
-
Under Orientation, select Portrait or Landscape.
-
Next to Apply to, choose Selected text, and then select OK.
-
On the File menu, select Print.
Change orientation from cursor forward
-
Click or tap where you want to start the new page orientation.
-
Go to Layout, and select Page Setup dialog launcher
-
Under Orientation, select Portrait or Landscape.
-
Next to Apply to, select This point forward.
-
Select OK.
Change the orientation for a specific section
To change the orientation for a specific section, your document must be divided by section breaks. Learn how to add section breaks.
-
Go to Home and select Show/Hide
-
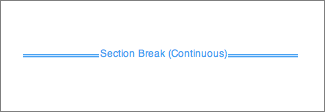
Double-click the section break that follows the section you want to change.
-
Select Margins.
-
Under Orientation, choose Portrait or Landscape.
-
Next to Apply to, choose This section, and then select OK.
-
On the File menu, select Print.
Change the page orientation for a document
-
On the Layout tab, choose Orientation, and then select Portrait or Landscape.
-
On the File menu, select Print.
Change the orientation for specific pages
-
Select all the text on the pages you want to change.
-
On the Format menu, select Document.
-
Select Page Setup at the bottom of the dialog box.
-
Next to Orientation, choose the orientation you want, and then select OK.
-
Next to Apply to, choose Selected text, and then select OK.
-
On the File menu, select Print.
Change the orientation for all pages after the cursor
-
Click or tap where you want to start the new page orientation.
-
On the Format menu, select Document.
-
Select Page Setup, choose the orientation you want, and then select OK.
-
Next to Apply to, select This point forward.
-
Select OK.
Change the orientation for a specific section
To change the orientation for a specific section, your document must be divided by section breaks. Learn how to add section breaks.
-
To display nonprinting characters, such as paragraph markers (¶), select Show all nonprinting characters
-
Double-click the section break that follows the section you want to change.
-
Click Page Setup.
-
Next to Orientation, choose the orientation you want, and then select OK.
-
Next to Apply to, choose This section, and then select OK.
-
On the File menu, choose Print.
Important: If you need printer troubleshooting or driver information, see your printer’s manual or the printer manufacturer’s website.


