
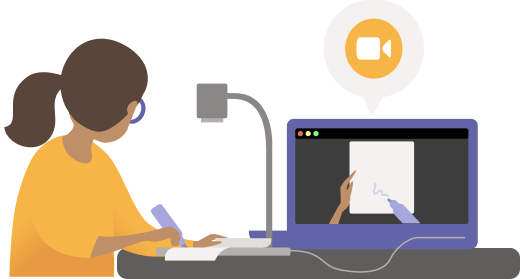
Make whiteboards, printed documents, books, and other physical objects the focus of your Teams meeting. With minimal setup, you can help meeting attendees who aren’t in the room feel more included and engaged in your next class, demo, or brainstorming session.
For example, Teams can frame and resize a whiteboard in the room so it’s clearly visible on even mobile screens. The presenter’s body is also somewhat transparent, so they don’t block or obscure the board. What’s written or sketched is optimized for visibility.
Camera options
Teams can optimize the camera based on what you want to share.
-
Whiteboard: Use to focus on a nearby whiteboard with your device's camera.

-
Document: Use to focus on a document, worksheet, book, or something similar with a document camera.
-
Video: Use to focus on objects in the room. For example, help students see your science experiment demonstration. In a business setting, help potential customers see your product demo.
Before you begin
Make sure you have the following:
-
Laptop or desktop (Windows or Mac)
-
Built-in or USB-connected camera (specifically a document camera if you're sharing something on a table, desk, or other flat surface)
-
Teams desktop app
Share a whiteboard using your camera
For this setup, we recommend you use a laptop with a built-in or USB-connected camera.
Note: Blackboards currently aren't supported.
-
Start the meeting.
-
In the meeting controls, select Share content.
-
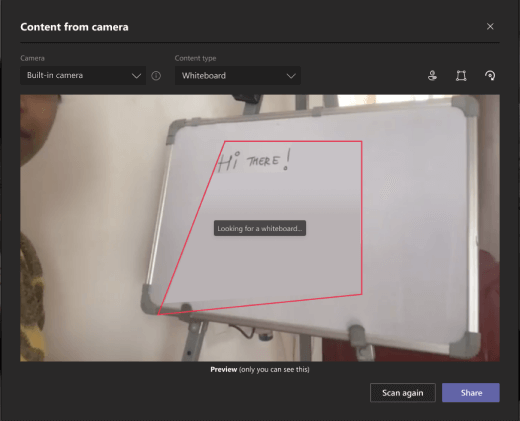
Select Content from camera and choose Whiteboard.
-
Using the preview screen to guide you, point your camera towards the whiteboard.
-
Place the camera about 3-4 feet away and center it with the whiteboard as much as you can.
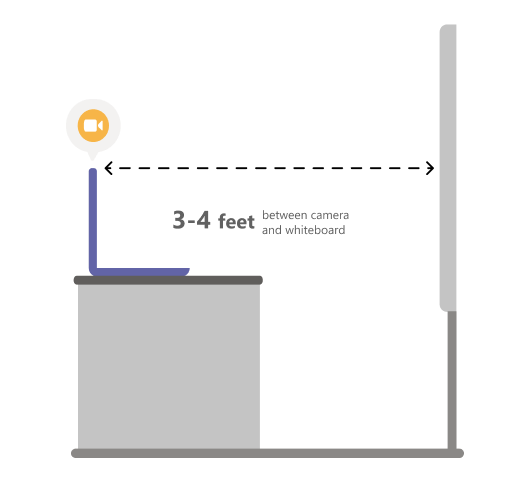
When the camera detects the whiteboard, it automatically puts it into focus.
-
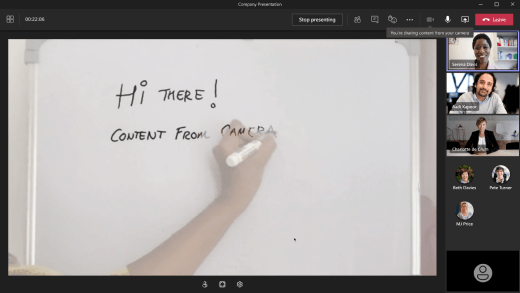
Select Share.
Everyone in the meeting gets a focused, clear view of the whiteboard.
Share a document using your camera
For this setup, we recommend you use a USB-connected document camera.
-
Start the meeting.
-
In the meeting controls, select Share content.
-
Select Content from camera and choose Document.
-
Using the preview screen to guide you, place your camera above the document.
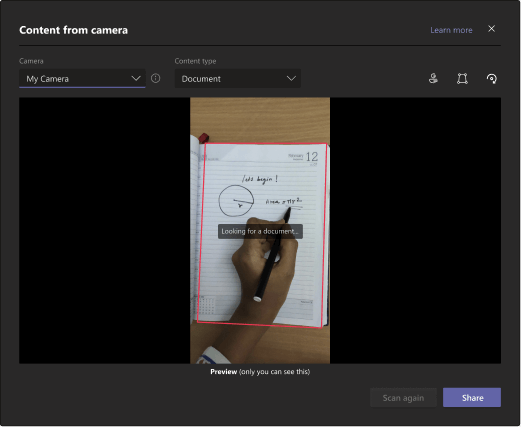
When the camera detects the document, it automatically puts it into focus.
-
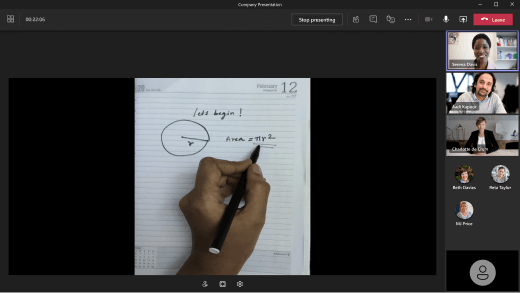
Select Share.
Everyone in the meeting gets a focused, clear view of the document.
Tips
-
If you’re sharing a whiteboard, keep these things in mind:
-
For best results, place you camera about 3-4 feet away and center it with the whiteboard as much as you can.
-
Darker markers show up better than lighter ones.
-
-
Make sure the room is well-lit.
-
If you're using laptop microphones, try to stay close by so the online attendees can hear you well.


