SharePoint in Microsoft 365 is constantly evolving to better serve your communication and collaboration needs. We've expanded the in-product help that appears at the top-right of your SharePoint team and communication sites.
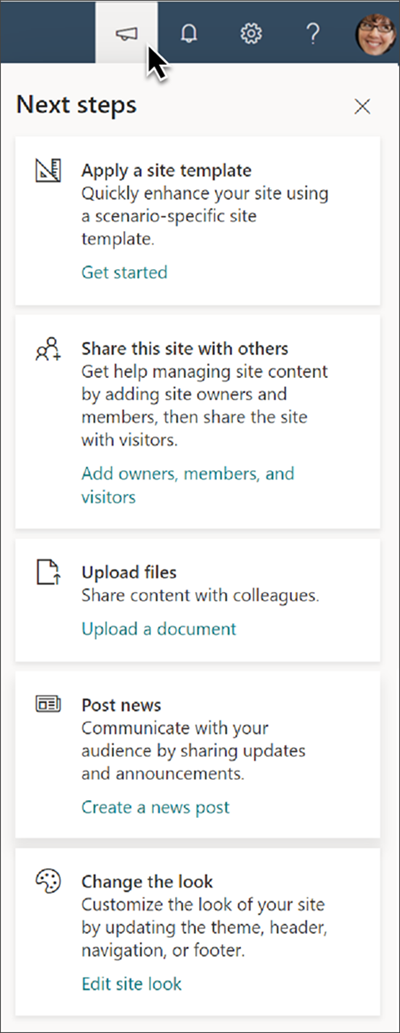
Now, you have access to SharePoint productivity tips in the "Next steps" panel in your site's suite navigation. The megaphone is the Next step tips icon.
Benefits to using Next steps:
-
Makes SharePoint sites easier to manage for new site owners by providing actionable steps to increasing audience engagement and improving your site's effectiveness.
-
Helps accelerate site owner's understanding of how to get the most out of SharePoint as your organization scales and grows.
-
Tips are useful for anyone learning more about SharePoint or setting up a new site for the first time.
Learn how to use Next steps
Tips in the Next steps panel depend on the type of SharePoint site you are using and the types of actions you have already taken. For team sites, tips also differ between Microsoft 365 group-connected team sites and non-grouped team sites.
Note: The “Power your site with apps” card will appear only on SharePoint team sites that have not been connected to a new Microsoft 365 Group. Once this update has run, that option will no longer appear for that team site and the additional “Invite team members” may then appear.
|
Group-connected team site view |
Next steps tips |
|---|---|
|
|
Apply a site template – Quickly enhance your site using a scenario-specific site template. Get started Invite team members – Engage with your team by adding them to your site's group. Add members Upload files – Collaborate on shared content with your team. Upload a document Post news – Communicate with your team by sharing updates and announcements. Create a news post Add real-time chat – Add Microsoft Teams to collaborate in real time and share resources with your team. Add apps to your site Change the look – Customize the look of your site by updating the theme, header, or navigation. Edit site look |
|
Communication site view |
Next steps tips |
|---|---|
|
|
Apply a site template – Quickly enhance your site using a scenario-specific site template. Get started Share the site with others – Get help managing site content by adding site owners and members, then share the site with visitors. Add owners, members, and visitors Upload files – Share content with colleagues. Upload a document Post news – Communicate with your audience by sharing updates and announcements. Create a news post Change the look – Customize the look of your site by updating the theme, header, navigation, or footer. Edit site look |
More information about Next steps tips
Learn more about how to take advantage of Next steps tips in order to get the most out of your SharePoint site.
Use and customize site templates
SharePoint now offers several site templates that contain pre-populated content, pages, and web parts that can be customized to fit the needs of your organization. Use a SharePoint site template when you create a new site, or apply a template to an existing site. Then, customize your site to meet the needs of your organization.
Change the look of your site
You can quickly and easily customize the look of your SharePoint site to reflect your organization's style and brand. Depending on the type of site you are using, edit the header, theme, navigation, and footer. Edit these details anytime by navigating to Settings and then Change the look.
Upload files
Connect your team to commonly accessed documents and resources. You can drag files from your computer to upload them to your SharePoint team site. Upload files and folders to a document library
After you drag or upload a file to SharePoint, you'll see an option to notify your team after uploading a file to SharePoint. Select Notify your team, and then select SharePoint individuals or groups to alert about the new file.
Consider using the File viewer web part and Quick links web part to personalize the file viewing experience for your users.
Post news
You can keep everyone in the loop and engage your audience with important or interesting stories by creating and sharing news on your SharePoint site.
You can quickly create eye-catching posts like announcements, people news, status updates, and more that can include graphics and rich formatting using the News web part on a SharePoint page.
Invite team members
If you're a communication site owner, you can share your team site with team members by adding them as owners, members, or visitors. Go to Settings, and then Site permissions, and then Advanced site permissions.
If you're a team site owner, connect your team site to an Microsoft 365 group. You can also Add guests to Microsoft 365 groups to share your site. Go to Settings, and then Site permissions, and then Invite people.
Note: Some tasks to connect to an Microsoft 365 group can only be completed by your SharePoint administrator.
Add apps to your site
Groups in Microsoft 365 let you choose a set of people that you wish to collaborate with and easily set up a collection of resources for those people to share. Resources such as a shared Outlook alias, team calendar, Microsoft OneNote, and Microsoft Planner.
You don’t have to worry about manually assigning permissions to all those resources because adding members to the group automatically gives Microsoft 365 group members the permissions they need to the tools your group provides.
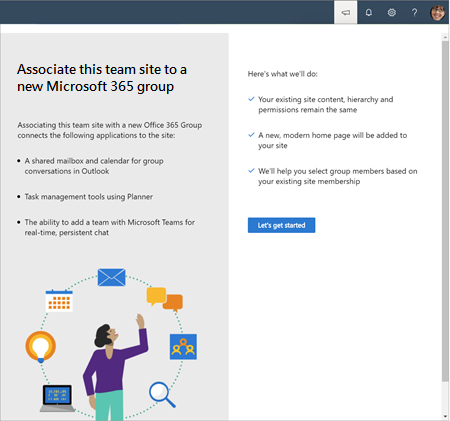
Connect your team site to an Microsoft 365 group by selecting Power your site with apps from the Next steps tip andthenAdd apps to your site.
Follow the steps to associate your team site to a Microsoft 365 group. When you are done, your team site will have access to the following resources:
-
A shared team Outlook email address, inbox, team calendar, and OneNote books.
-
Microsoft Planner, a task management tool that creates transparency about project status and deadlines. Use the Planner web part on your team site.
-
Now you can add real-time chat, online meetings, and screen sharing by integrating Microsoft Teams.
Create a Microsoft Team channel from your team site
Add real-time chat, virtual meeting capabilities, and extended collaboration features to your SharePoint team site by adding Microsoft Teams. Team sites that are connected to a Microsoft 365 group in SharePoint can easily add Microsoft Teams. Team sites that are not already connected to a group will first need to connect to a Microsoft 365 group before they can be added to Microsoft Teams.
Learn more about how to create a Teams channel from SharePoint.
Learn more about SharePoint suite navigation
The in-product help that appears at the top-right of your SharePoint suite navigation gives you access to Microsoft 365 notifications, productivity tips, and more. The icons in the header image below correspond with the icon descriptions reading from left to right:
Next steps (megaphone icon) – The Next steps panel helps you communicate and collaborate more effectively using SharePoint sites by providing tips to improve your site.
Notifications (bell icon) – Various alerts from across Microsoft 365 services are displayed here and are based on the user's notification preferences.
Settings (gear icon) – Get access to deeper level site settings, like Site contents, Change the look, Site usage and more.
Help (question mark) – Learn more about how to create and manage SharePoint sites.
Your Office profile (your initials or profile picture) – Adjust your account settings and Microsoft profile.


