
Note: Some products might not be available in your country or region.
Feel confident that your photos, files, mail, and more are safely on your new Surface.
Note: Some of the info on this page doesn’t apply to Surface Laptop running Windows 10 S. We’ll point out where things don’t apply.
Get to files you’ve stored in the cloud
Any files you’ve saved to iCloud, OneDrive, Dropbox, or another online storage service by using your Mac will also be available on your Microsoft Surface. Just visit the site for the service you use and sign in, or download the app for the service you use from Microsoft Store.
Move files stored on your Mac
For files stored locally on your Mac, you’ll need to copy them to your Surface by using an external drive. The drive must be compatible with both Mac and Windows—we recommend using a USB drive (USB 3.0 will be the fastest).
Note: For Surface Laptop running Windows 10 S: You can only open files using apps from Microsoft Store. Some of the files from your Mac might not have associated apps in Microsoft Store, so you might not be able to open them on Surface Laptop.
Get a USB drive with more storage than the storage used on your Mac
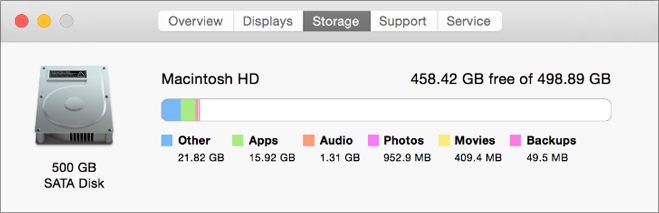
Here’s how to figure out what size hard drive you need:
-
On your Mac, click to open the Apple menu in the upper-left corner of the screen.
-
Select About this Mac.
-
Select the Storage tab in the window that appears. We recommend getting an external drive that has more storage than the amount of storage being used on the Mac.
Ready to move your files? Let’s do it!
Note: If you have more than one user account on your Mac, you’ll need to follow these steps for each account. You’ll probably also want to create separate accounts on your Surface. Learn how to set up accounts.
Copy photos to the external drive
-
Connect the external drive to your Mac. (You might need to plug the drive into a power source.)
-
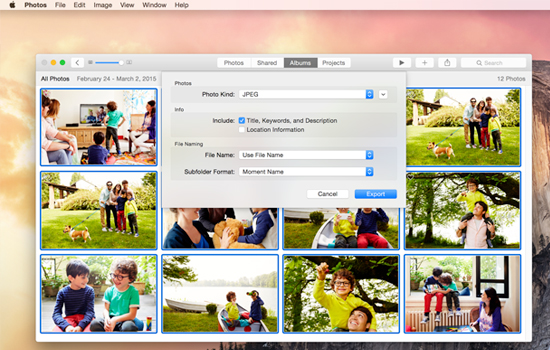
Open Photos on your Mac.
-
On the menu bar at the top of your screen, select Edit > Select all.
-
Select File > Export.
-
In the pop-up window, set Subfolder Format to Moment Name, select your external drive from the Devices section, and then select Export.
-
When the export is done, select the icon for your external hard drive on the desktop.
-
On the menu bar at the top of the screen, select File > Eject.
-
Unplug the external drive from your Mac.
Copy photos to your Surface
-
Connect the external drive to your Surface.
-
If the folder doesn’t open automatically, you’ll see a notification on the right side of the Surface screen that says Removable disk: Tap to choose. Select the notification and choose Open folder to view files.
-
Press Ctrl + A on your Surface keyboard to select all folders, and then press Ctrl + C to copy them.
-
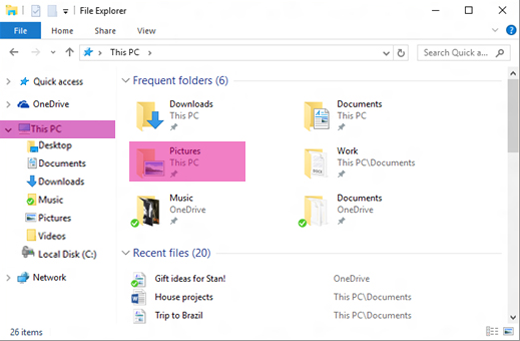
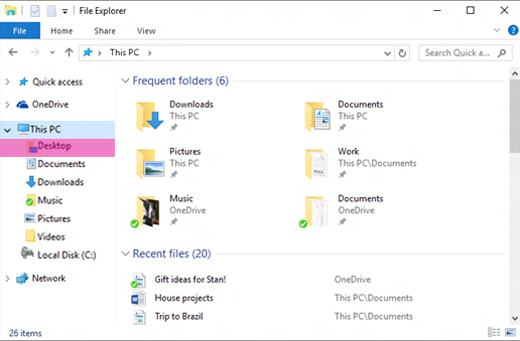
In the left pane under This PC, select Pictures.
-
Press Ctrl + V to paste your photo folders into the Pictures folder.
-
When the transfer is done, select This PC from the left pane.
-
Press and hold (or right-click) the icon for your external hard drive, and choose Eject.
-
Unplug the external hard drive from your Surface.
Tip: To get to your photos on your Surface, type Pictures in the search box on the taskbar. Or, try the Photos app.
Copy music, documents, and other files
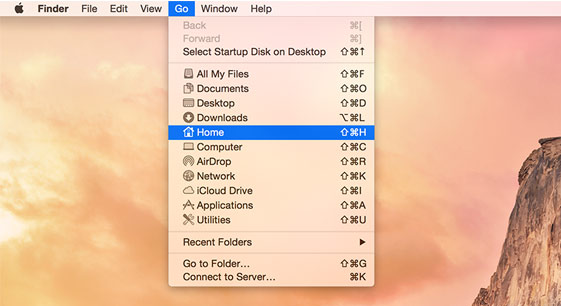
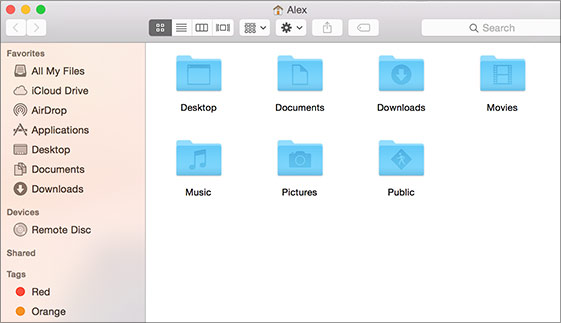
Before you start, figure out what files you want on your Surface. On your Mac, open Finder, and then on the menu bar at the top of your screen, select Go and then Home.
Note: Almost everything you move from your Mac will work with corresponding Windows apps on your Surface, but files created with Apple apps (like GarageBand or iMovie) won’t work on Surface. iWork files can be exported and opened with Microsoft Office (Pages to Word, Keynote to PowerPoint, and Numbers to Excel). Keep this in mind when you’re deciding what to copy to your Surface.
When you’re ready, here’s how to copy your files.
Copy files to the external drive
-
Connect the external hard drive to a USB port on your Mac and a power source (if required).
-
Click inside the Home window with your personal folders.
-
Select the folders you want to move to your Surface. To select all folders, press Command + A.
-
Press Command + C to copy the selected folders.
-
Select your external hard drive from the Devices section in the left pane.
-
Press Command + V to paste your folders.
-
When the export is done, select the icon for your external hard drive on the desktop.
-
On the menu bar at the top of the screen, select File > Eject.
-
Unplug the external drive from your Mac.
Copy files to your Surface
-
Connect the external drive to your Surface.
-
If the folder doesn’t open automatically, you’ll see a notification on the right side of the Surface screen that says Removable disk: Tap to choose. Select the notification and choose Open folder to view files.
-
Double-click the Desktop folder on your removable disk.
-
Press Ctrl + A on your Surface keyboard to select all files, and then press Ctrl + C to copy them.
-
In the left pane under This PC, select Desktop.
-
Use the keyboard shortcut Ctrl + V to paste your files.
-
When the transfer is complete, select This PC from the left pane.
-
Double-click the icon for your external hard drive, and repeat steps 4-7 for the remaining folders on your external hard drive.
Note: You don’t need to copy the Photo Library folder in Pictures if you already moved your photos over.
-
When you’ve finished copying all your files, click This PC in the left pane, press and hold (or right-click) the icon for your external hard drive, and choose Eject.
-
Disconnect the external hard drive from your Surface.
Access your email, contacts, and calendar
Use your browser to get to webmail
If you use webmail (like Gmail, Yahoo!, iCloud, or Outlook.com) and you like using a browser to check your mail, just open Microsoft Edge, go to the website, and sign in.
Use the Mail app on Surface for all your mail accounts
Like Apple Mail on your Mac, the Mail app on Surface can be used for all your email accounts, including Outlook, Gmail, Yahoo!, and other mail accounts. Here’s how to add them:
-
Type Mail in the search box on the taskbar, and then select the Mail app from the search results.
-
If it’s your first time using the app, it’ll walk you through setting up your accounts. Or, select Settings.
-
Select Manage Accounts and then Add an account.
-
Select the type of account you want to add and follow the on-screen instructions.
Access your contacts and calendar
Getting to your contacts and calendar from your Surface depends on which type of mail account you use.
|
If you use |
Get to your contacts using… |
Get to your calendar using… |
|---|---|---|
|
Hotmail.com, Live.com, or Outlook.com |
||
|
Gmail |
||
|
iCloud.com, Me.com, or Mac.com |
||
|
Yahoo! |
*The iCloud for Windows app doesn’t work on Surface Laptop running Windows 10 S.
For more info, see Set up email and calendar.
Use Microsoft Outlook or Entourage
If you use Microsoft Outlook or Entourage on your Mac, you can use Microsoft Outlook on your Surface in the same way. Learn how to set up email accounts in Outlook 2016 for Windows.
Note: For Surface Laptop running Windows 10 S: Microsoft Outlook and Entourage aren’t available in Microsoft Store, so they won’t work on a Surface Laptop running Windows 10 S. Instead, add your email accounts to the Mail app. See the section Use the Mail app on Surface for all your mail accounts to see how.
Transfer your web browser favorites to Surface
Note: For Surface Laptop running Windows 10 S: This section (including all of the sub-sections) doesn’t apply to Surface Laptop running Windows 10 S. Instead, go to Add a site to my favorites in Microsoft Edge.
Sync Safari favorites with iCloud
If you use Safari on your Mac, sign in to the iCloud for Windows app on your Surface. Your Safari favorites are automatically added to Microsoft Edge. Open System Preferences on your Mac and make sure iCloud is set up to sync Safari favorites.
Import favorites into Microsoft Edge
If you use Chrome or Firefox on your Mac, it’s just a few short steps to import your favorites to Microsoft Edge, the browser designed for Windows 10. Microsoft Edge is more battery efficient than Chrome (up to 32%) and Firefox (up to 75%). Here’s how to import your favorites:
-
If you haven’t already, install Chrome or Firefox (whichever one you use) on your Surface.
-
Open Microsoft Edge (select Microsoft Edge from the taskbar, or type Edge into the search box on the taskbar, and then select Microsoft Edge).
-
Select More > Settings > View favorites settings.
-
Under Import favorites, select Chrome or Firefox (or both if you use both on your Mac).
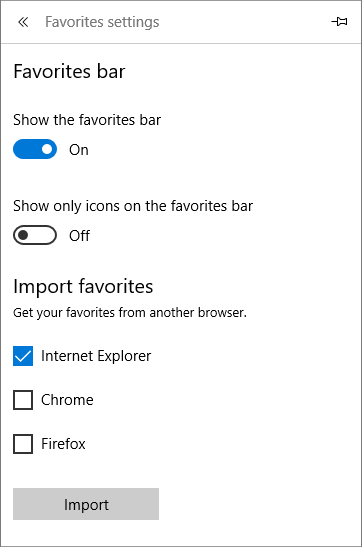
Note: If you don’t have Chrome or Firefox installed on your Mac, you won’t see them listed under "Import favorites."
Sync favorites from Firefox or Chrome
If you’d prefer to keep using Firefox or Chrome as your browser, here’s how to sync your bookmarks on all your devices, including Surface:


