
If some shapes will contain similar data types (such as names, ID, dates, or descriptions), add data sets to make the data fields consistent for each shape. Add data sets to shapes on the drawing, or to master shapes in a custom stencil.
After the data sets are added, you can add data to the shapes in the drawing, as described in Add data to shapes.
Notes:
-
Only add data sets to shapes that will not receive data imported from an external source, such as an Excel spreadsheet, Access or SQL Server database, or other data source. Shapes that receive imported data take the data fields of the imported data, and adding fields could cause importing to fail.
-
For more information about importing data to shapes, see Import data to shapes in your drawing.
-
Click the shapes you want data sets added to.
-
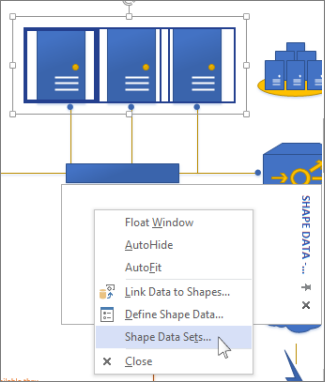
Right-click the selected shapes, point to Data and click Shape Data to open the Shape Data task pane, then right-click in Shape Data and click Shape Data Sets.
-
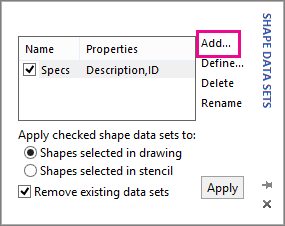
In Shape Data Sets, click Add.
-
In Add Shape Data Set, enter a name for the data set, then click one of the following:
-
Create a new set if you want to set data fields from scratch. For example, you might do this if you import an image as a new shape, or draw a new shape.
-
Create a new set from the shape selected in Visio to use the data sets that come with most shapes. For example, shapes in the Flowchart stencils come with data sets including fields such as cost, end date or owner.
-
Create a new set from an existing set if you want to modify a data set that already exists for that shape.
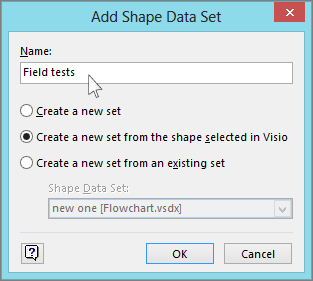
Click OK.
-
-
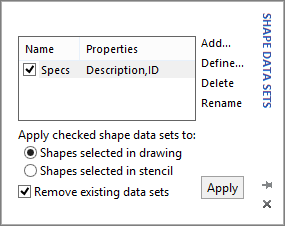
In the Shape Data Sets box, if the shape you’re adding a data set to is on the drawing page, click Shapes selected in drawing. If it’s on a custom stencil, click Shapes selected in stencil.
-
To replace the existing data sets with the selected sets, select Remove existing data sets. To add the selected data sets and keep the existing sets, clear the Remove existing data sets check box.
Note: If the selected shapes are in a stencil that can’t be edited, Visio prompts you to copy the shapes to a new stencil.
-
Click Apply.
Build or change a data set
If a shape already has data sets, or if you’re building a new data set, make changes in Shape Data Sets.
-
Click the shapes with the data sets you want to change.
-
Right-click the selected shapes, point to Data and then click Shape Data to open the Shape Data task pane, then right-click in Shape Data and click Shape Data Sets.
-
Select the name of a data set, and then do one of the following:
-
To change properties of the selected data set’s fields—for example, to change the date field’s format—click Define.
-
To remove a data set from the selected shape, click Delete.
-
To change the data set’s name, click Rename.
-
-
If you clicked Define, in Shape Data Sets, click a property in the Properties list and then use the fields in Define Shape Data to define and format it.
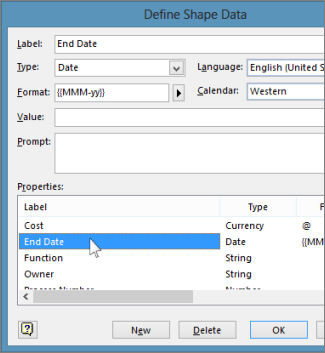
If you are building a new data set, the Properties list probably shows a blank data type called Property1. Select it, and then use the fields in Define Shape Data to set the property’s details, such as its Type, Format, or initial Value. If you want, add a Prompt to help describe the purpose of the shape data.
To add another property, click New and then repeat step 4.
Tip: If you aren’t sure what data type the property will contain, it’s simplest to set Type to String, because it can accept the data of all of the other types (though that data won't be identified as anything but a string).


