
Surface Unified Extensible Firmware Interface (UEFI) replaces the standard basic input/output system (BIOS) with new features including faster startup and improved security. You can use Surface UEFI to manage the firmware features on your Surface.
These Surface models use the new firmware UEFI interface:
-
Surface Pro 6, Surface Pro 7, Surface Pro 7+, Surface Pro 8, Surface Pro 9 (all models), Surface Pro 10 for Business, Surface Pro X
-
Surface Laptop 2, Surface Laptop 3, Surface Laptop 4, Surface Laptop 5, Surface Laptop 6 for Business, Surface Laptop Go, Surface Laptop Go 2, Surface Laptop Go 3, Surface Laptop Studio, Surface Laptop Studio 2, Surface Laptop SE
-
Surface Studio 2, Surface Studio 2+
-
Surface Book 2, Surface Book 3
-
Surface Go 2, Surface Go 3, Surface Go 4
Note: If you don't see your device listed, switch to the Windows 10 tab at the beginning of this article.
Select the menu option that you want to learn more about.
Important: Under normal circumstances, there’s no need for you to change UEFI settings. If you change these settings, you risk the security and functionality of your Surface.
How to get to the UEFI settings on a Surface

Note: This video is available in English only.
You can adjust the UEFI settings only during system startup. To load the UEFI firmware settings menu:
-
Shut down your Surface and wait about 10 seconds to make sure it's off.
-
Press and hold the volume-up button on your Surface, and, at the same time, press and release the power button.
-
The Microsoft or Surface logo appears on your screen. Continue to hold the volume-up button. Release the button when the UEFI screen appears.
You can also load the UEFI firmware settings menu through Windows. To do this:
-
Select Start > Settings > System > Recovery .
-
Next to Advanced startup, select Restart Now.
-
Under Choose an option, select Troubleshoot > Advanced Options > UEFI Firmware Settings, and then select Restart.
UEFI menu options
The UEFI settings you can modify depend on which Surface you have.
PC information
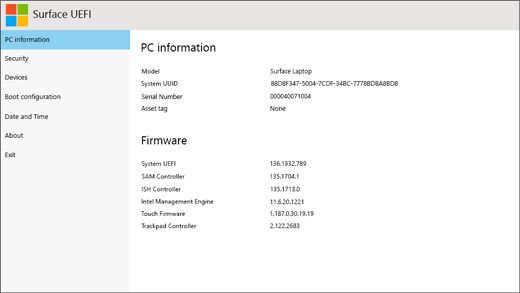
In the PC information section, you can see important information about your Surface, such as the universally unique identifier (UUID), serial number, and firmware version. You can use this information for troubleshooting or for working with warranty support.
Security
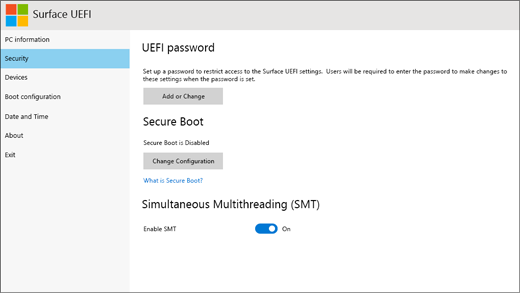
In the Security section, you can set or change your UEFI password, turn Secure Boot on or off, and change your Simultaneous Multithreading (SMT) settings. Typically, only enterprises will need to change security settings—the default, out-of-the-box settings will be perfect for most users.
Note: UEFI passwords are used primarily by enterprises and IT professionals to limit the types of changes that employees can make to their devices. If you're part of an enterprise, contact your IT administrator if you have any questions or issues with your UEFI password. If you aren't part of an enterprise and choose to create a UEFI password, make sure to document your password in a safe place. You can't reset your UEFI password, and Microsoft can't retrieve it.
Devices
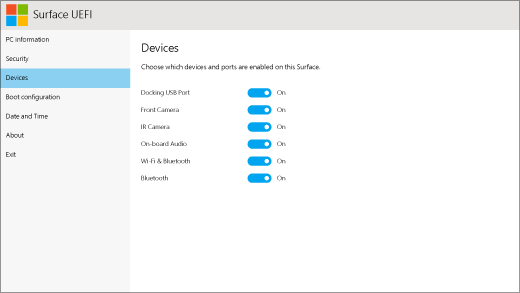
In the Devices section, you can turn on or off various connected devices and hardware on your Surface, such as the infrared (IR) camera, Bluetooth®, and on-board audio.
Notes:
-
If you turn off hardware in the Surface UEFI, you can’t turn it back on in Windows. You must turn it back on in the Surface UEFI.
-
The Devices menu doesn't appear on Surface Pro X.
Boot configuration
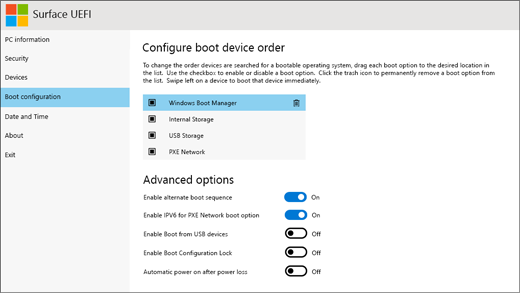
In the Boot configuration section, you can change how your Surface boots into Windows.
If your Surface is part of an enterprise, these settings may be locked or configured to your enterprise specifications. Contact your IT administrator for more information. If you aren't part of an enterprise, the default, out-of-the-box settings should be perfect for you.
Note: If you accidentally delete Windows Boot Manager from your Master Boot Record, simply restart your Surface and Windows Boot Manager will reinstall automatically. If you delete Windows Boot Manager and your Surface is part of an enterprise, contact your IT administrator for support.
Date and time

In the Date and Time section, you can manually enter a new date and time.
About
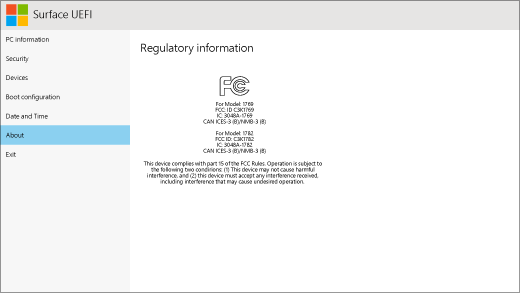
When you select About, you'll see regulatory information. For more info, see Product safety warnings and instructions.
Exit
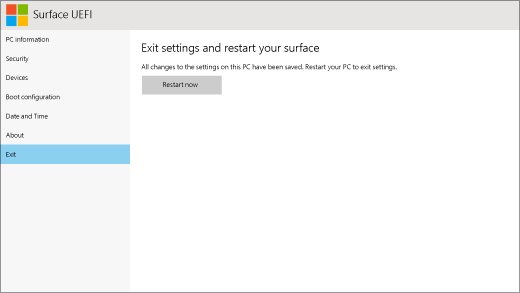
You can select Exit > Restart now to save your changes and restart your Surface.
Related topics
Surface Unified Extensible Firmware Interface (UEFI) replaces the standard basic input/output system (BIOS) with new features including faster startup and improved security. You can use Surface UEFI to manage the firmware features on your Surface.
These Surface models use the new firmware UEFI interface:
-
Surface Pro 4, Surface Pro (5th Gen), Surface Pro 6, Surface Pro 7, Surface Pro 7+, Surface Pro X
-
Surface Laptop (1st Gen), Surface Laptop 2, Surface Laptop 3, Surface Laptop 4, Surface Laptop Go
-
Surface Studio (1st Gen), Surface Studio 2
-
Surface Book, Surface Book 2, Surface Book 3
-
Surface Go, Surface Go 2
Select the menu option that you want to learn more about.
For Surface Pro, Surface Pro 2, Surface Pro 3, and Surface 3, we continue to support standard BIOS.
Important: Under normal circumstances, there’s no need for you to change UEFI settings. If you change these settings, you risk the security and functionality of your Surface.
How to get to the UEFI settings on a Surface
Note: This video is available in English only.
You can adjust the UEFI settings only during system startup. To load the UEFI firmware settings menu:
-
Shut down your Surface and wait about 10 seconds to make sure it's off.
-
Press and hold the volume-up button on your Surface, and, at the same time, press and release the power button.
-
The Microsoft or Surface logo appears on your screen. Continue to hold the volume-up button. Release the button when the UEFI screen appears.
You can also load the UEFI firmware settings menu through Windows. To do this:
-
Select Start > Settings > Update & security > Recovery.
-
Under Advanced startup, select Restart Now.
-
Under Choose an option, select Troubleshoot > Advanced Options > UEFI Firmware Settings, and then select Restart.
UEFI menu options
The UEFI settings you can modify depend on which Surface you have. The menu options in this section apply to the Surface models that use the new firmware UEFI interface.
PC information
In the PC information section, you can see important information about your Surface, such as the universally unique identifier (UUID), serial number, and firmware version. You can use this information for troubleshooting or for working with warranty support.
Security
In the Security section, you can set or change your UEFI password, turn Secure Boot on or off, and change your Simultaneous Multithreading (SMT) settings. Typically, only enterprises will need to change security settings—the default, out-of-the-box settings will be perfect for most users.
Note: UEFI passwords are used primarily by enterprises and IT professionals to limit the types of changes that employees can make to their devices. If you're part of an enterprise, contact your IT administrator if you have any questions or issues with your UEFI password. If you aren't part of an enterprise and choose to create a UEFI password, make sure to document your password in a safe place. You can't reset your UEFI password, and Microsoft can't retrieve it.
Devices
In the Devices section, you can turn on or off various connected devices and hardware on your Surface, such as the infrared (IR) camera, Bluetooth®, and on-board audio.
Notes:
-
If you turn off hardware in the Surface UEFI, you can’t turn it back on in Windows. You must turn it back on in the Surface UEFI.
-
The Devices menu doesn't appear on Surface Pro X.
Boot configuration
In the Boot configuration section, you can change how your Surface boots into Windows.
If your Surface is part of an enterprise, these settings may be locked or configured to your enterprise specifications. Contact your IT administrator for more information. If you aren't part of an enterprise, the default, out-of-the-box settings should be perfect for you.
Note: If you accidentally delete Windows Boot Manager from your Master Boot Record, simply restart your Surface and Windows Boot Manager will reinstall automatically. If you delete Windows Boot Manager and your Surface is part of an enterprise, contact your IT administrator for support.
Date and time
In the Date and Time section, you can manually enter a new date and time.
About
When you select About, you'll see regulatory information. For more info, see Product safety warnings and instructions.
Exit
You can select Exit > Restart now to save your changes and restart your Surface.
Standard BIOS continues to support these Surface devices
UEFI replaces the standard BIOS only in the Surface models listed in this article. The following models do not feature UEFI and still use the earlier BIOS.
Trusted Platform Module (TPM)
The currently configured state of TPM (Enabled or Disabled) is highlighted. To change the state, select the unselected option. When you’re finished, select Exit Setup > Yes.
Secure Boot Control
The currently configured state of Secure Boot (Enabled or Disabled) is highlighted. To change the state, select the unselected option. When you’re finished, select Exit Setup > Yes.
Delete All Secure Boot keys
To delete all of the installed Secure Boot keys, including the default ones that were installed with Windows, select Yes. When you’re finished, select Exit Setup > Yes.
Note: When Secure Boot keys are deleted, Windows displays a red screen during startup.
Install Default Secure Boot Keys
To reinstall all of the Secure Boot keys that were originally installed with Windows (and only those), select Yes. When you’re finished, select Exit Setup > Yes.
Note: If you enter the administrator password incorrectly three times, you’ll be locked out of the UEFI. Restart your Surface to enter the password again.
Trusted Platform Module (TPM)
The currently configured state of TPM (Enabled or Disabled) is highlighted. To change the state, select the unselected option. When you’re finished, select Exit Setup > Yes.
Secure Boot Control
Select Secure Boot Control to enable or disable this feature. When Secure Boot Control is enabled, you have two additional options:
-
If Secure Boot keys are installed, you can delete them by selecting Delete All Secure Boot Keys.
-
If Secure Boot keys aren't installed, you can select Install All Factory Default Keys and select either Windows & 3rd-party UEFI CA (Default) or Windows only.
Configure Alternate System Boot Order
To choose the order in which your Surface boots, select Configure Alternate System Boot Order and select one of the following options:
-
SSD only
-
Network > USB > SSD
-
USB > Network > SSD
-
USB > SSD
-
Network > SSD
Advanced Device Security
This option lets you disable ports and features you don’t want anyone to use. For example, you can disable the microSD card reader so no one can use a microSD card to copy data.
The current setting appears in bold. Select Advanced Device Security and select the option you want.
Selecting Side USB disables the ability to boot from a USB device. The USB port remains enabled in Windows.
Disabling Wi-Fi also disables the Bluetooth®.
-
Network Boot
-
Side USB
-
Docking Port
-
Front Camera
-
Rear Camera
-
OnBoard Audio
-
microSD
-
WiFi
-
Bluetooth
Device Information
This option displays your Surface’s universally unique identifier (UUID) and serial number.
Administrator Password
This option lets you create a password to prevent others from changing the UEFI settings. Organizations that need to protect sensitive information typically use an administrator password.
Exit Setup
-
Save and exit. To save your changes and exit, select Exit Setup > Yes.
-
Exit without saving. To exit without saving your changes when you’re using a Surface Typing Cover, press Esc and select Yes. If you aren’t using a Cover, press the power button.
Trusted Platform Module (TPM)
The currently configured state of TPM (Enabled or Disabled) is highlighted. To change the state, select the unselected option. When you’re finished, select Exit Setup.
Secure Boot Control
Select Secure Boot Control to enable or disable this feature. While Secure Boot Control is enabled, and if Secure Boot keys are installed, you have the additional option of selecting Delete All Secure Boot Keys to delete them.
Configure Alternate System Boot Order
To select the order in which your Surface boots, select Configure Alternate System Boot Order and select one of the following options:
-
SSD Only
-
Network > USB > SSD
-
USB > Network > SSD
-
USB > SSD
-
Network > SSD
-
Administrator password
This option lets you create a password to prevent others from changing the UEFI settings. Organizations that need to protect sensitive information typically use an administrator password.
Exit Setup
-
Save and exit. To save your changes and exit, select Exit Setup > Yes.
-
Exit without saving. To exit without saving your changes when you’re using a Surface Type Cover, press Esc and select Yes.


