
Edit photos and videos in Windows
Whether you like to apply changes that affect your photo's quality, feel, and look—or you want to add information on top of your photos, the Photos app in Windows gives you all kinds of options for getting your photos and videos looking their best.
Edit a photo
With the Photos app, you can easily crop, rotate, adjust look and feel, add a filter, and write or draw on your photo to communicate and provide context.
In the search box on the taskbar, type Photos . From the list, select Photos . Then select the photo you’d like to change.
-
Select Edit image ( Ctrl + E )

-
Select either Crop , Adjustment , Filter , Markup , Retouch , or Background to start editing.
-
Use these features to tweak the light, color, look, and feel of your photo.
Tip: To cancel all the edits that have been applied to your photo, select Reset on the top left of your screen.
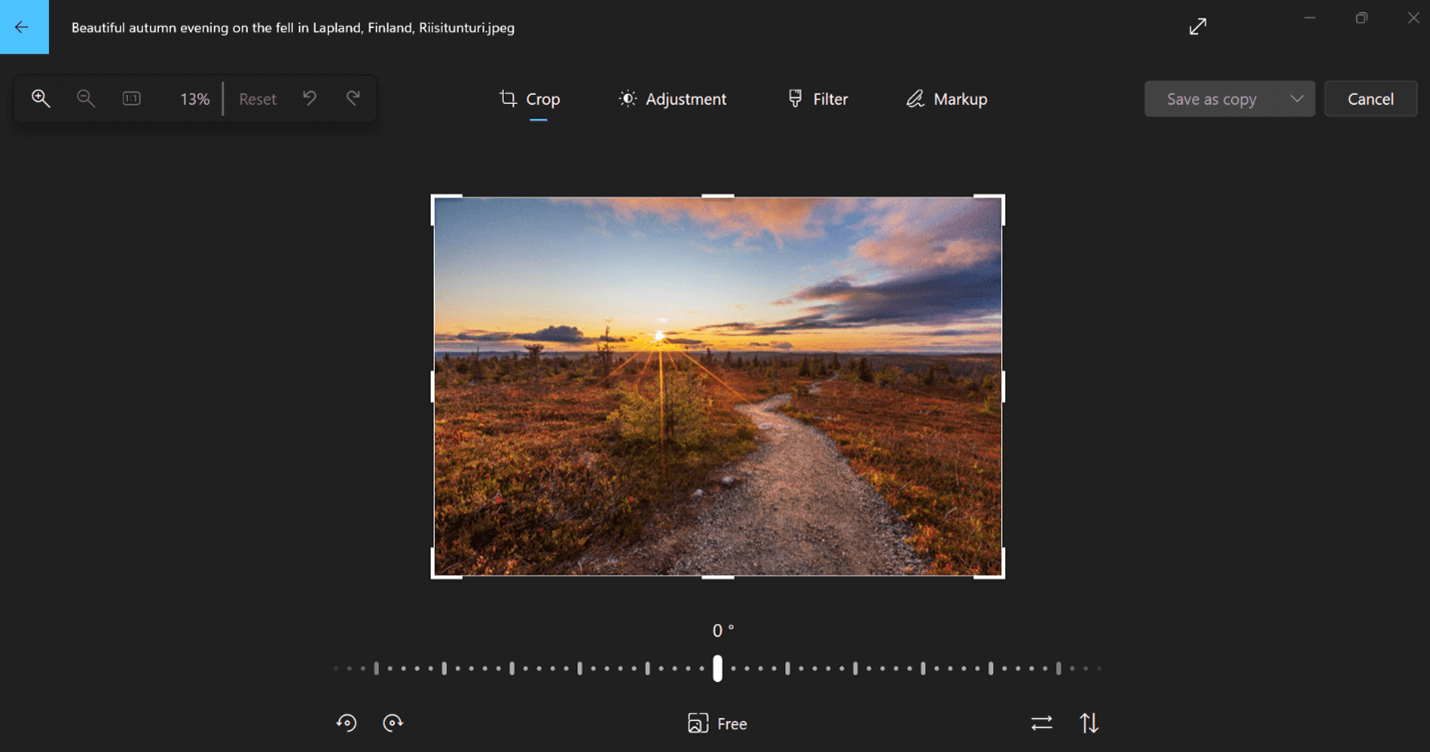
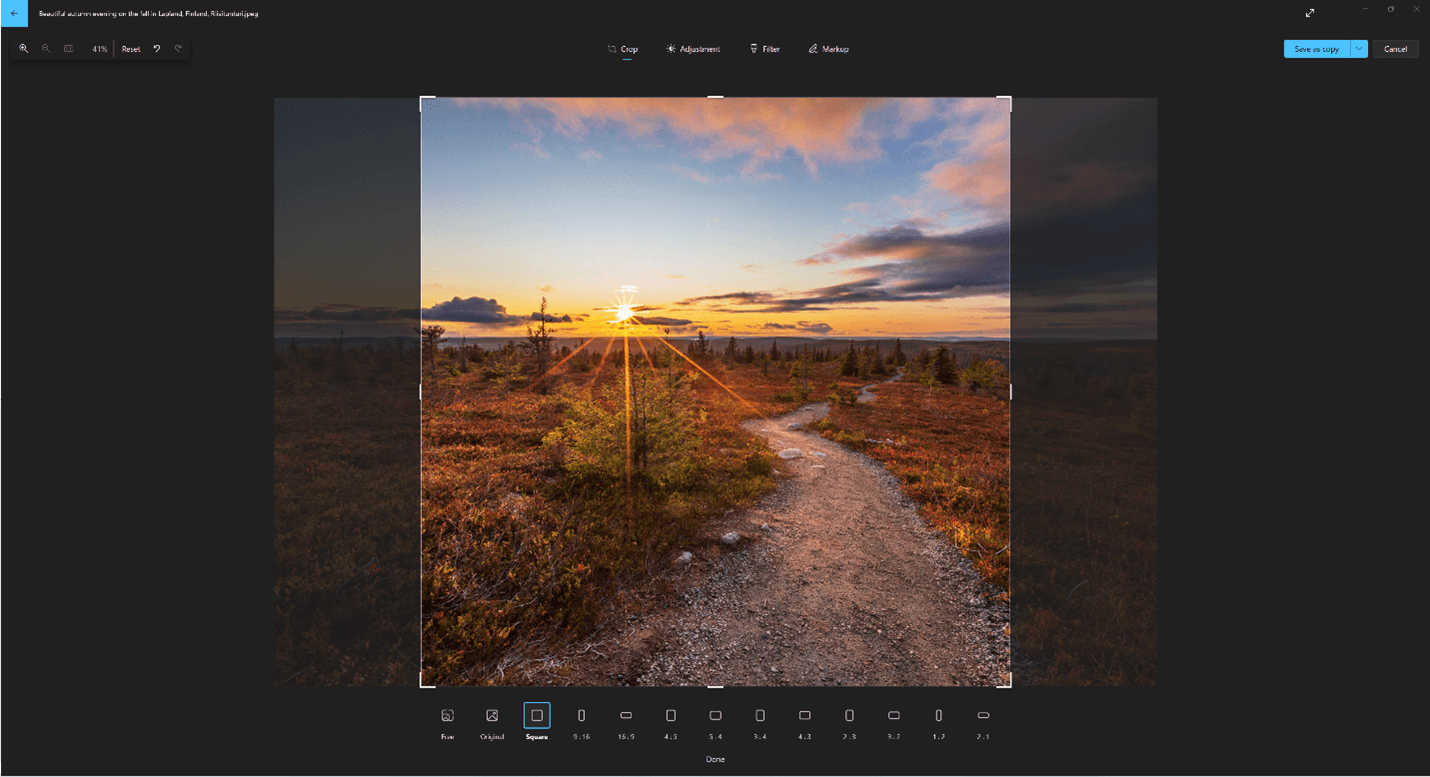
Crop
Crop, flip, or rotate photos to trim out the unwanted parts manually or use preset aspect ratios. You can also rotate a photo left and right by 90 degrees or by incremental degrees—or flip an image by 180 degrees.
-
While viewing an image, select Edit image from the top of your screen.
-
Select Crop and then, from the tool bar at the bottom, select an option:
-
Rotate clockwise


-
Use the preset aspect ratio

-
Flip image vertically


-
Freely rotate your photo using the slider
-
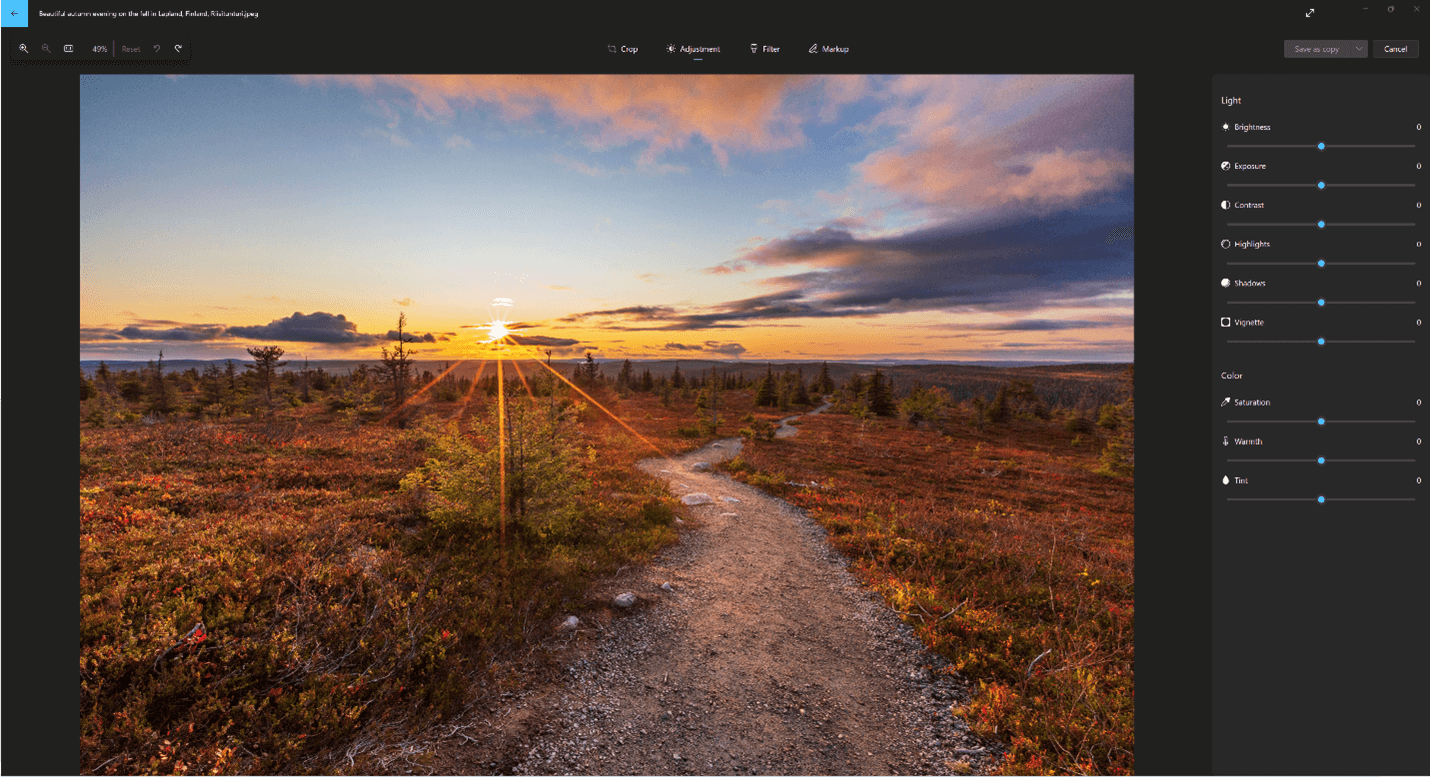
Adjustment
Adjust light and color to set the mood and quality of photos.
-
Select Edit image from the top of your screen.
-
Select Adjustment and then, from the adjustment panel on your right, adjust light and colors sliders.
-
You can click and hold or press the spacebar to view the original photo.
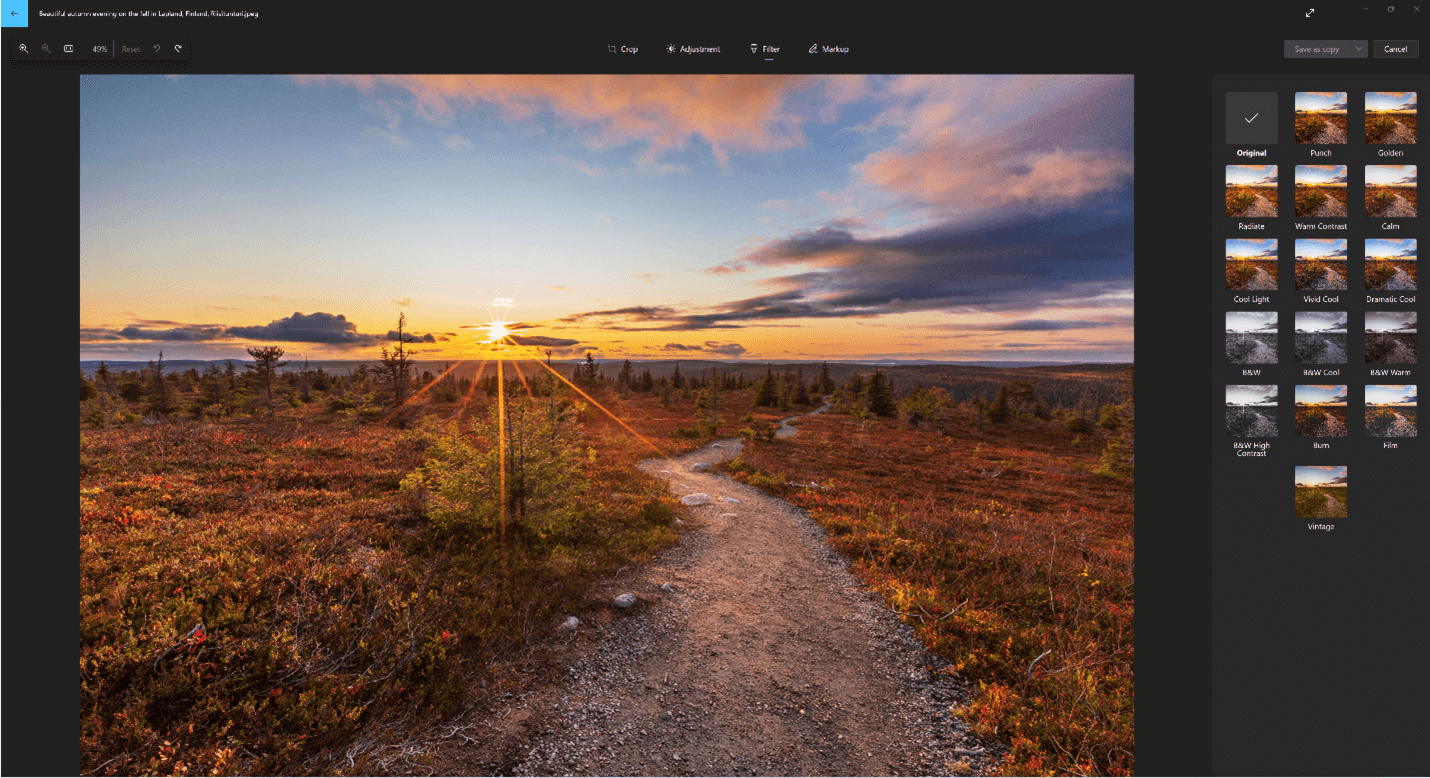
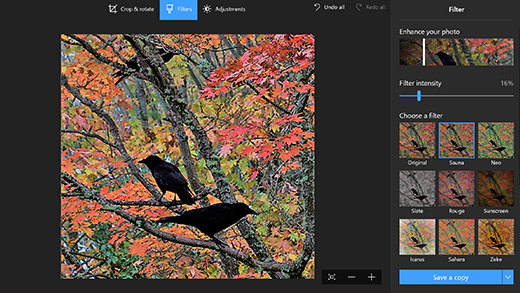
Filter
Use filters to refine the tone of images or add special effects to transform photos using only one click. To get started, open a photo.
-
Select Edit image from the top of your screen.
-
Select Filter and then, from the Filter panel on your right, select one of fifteen available filters. No worries if you don’t want to apply any filters—you always have the Original option available.
-
You can click and hold or press the spacebar to view the original photo.
Markup
Markup photos: Sometimes, there's more to the story than what pictures can convey on their own. Add a personal touch to your favorite moments by drawing on your photos.
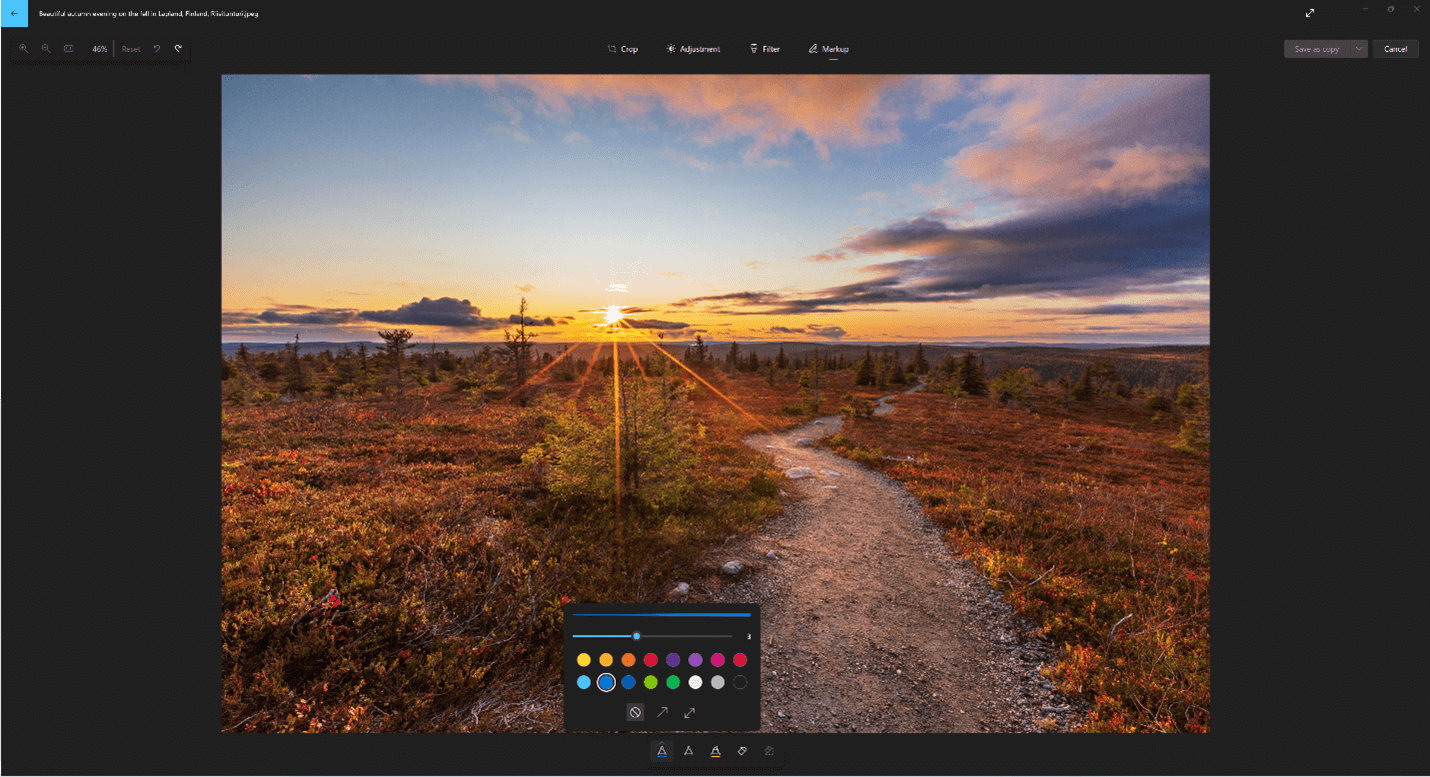
To get started, open the photo or video you'd like to mark up.
-
Select Edit image from the top of your screen.
-
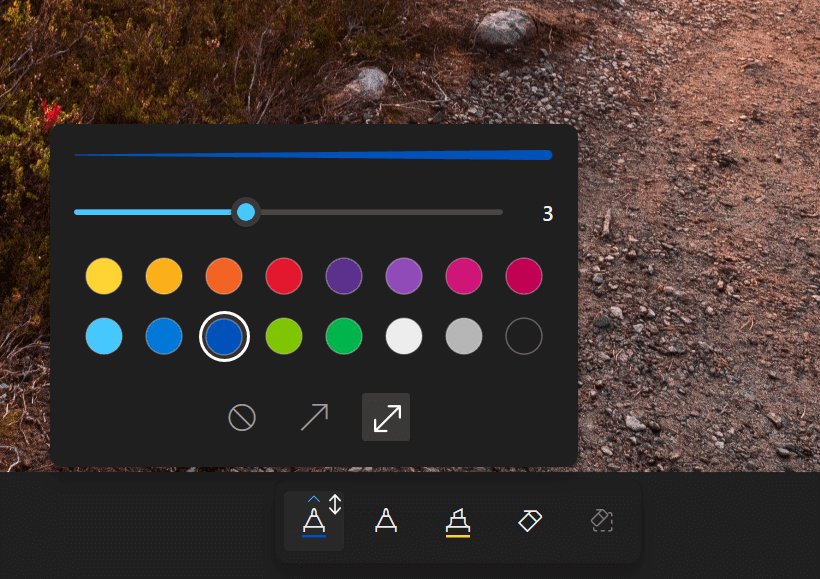
Select Markup and then, from the toolbar, select one of three drawing tools (2 available pens, and one highlighter).
-
Select the type of line (plain line, line with single arrow, line with double arrow) and the color and size from the pen options.
-
Go ahead and draw right on your image, and no worries if you mess up—you can always erase markings you don't like with the Eraser tool. Or clear your whole drawing by selecting Clear all ink strokes next to the Eraser tool.
Retouch
To retouch photos to remove blemishes or unwanted parts:
-
Select Edit image from the top of your screen.
-
Select Retouch and then, place the Spot fix tool over the area that you'd like to correct and click to confirm the spot you'd like to correct.
-
You can adjust the Size of the tool to match the size of the area to be corrected.
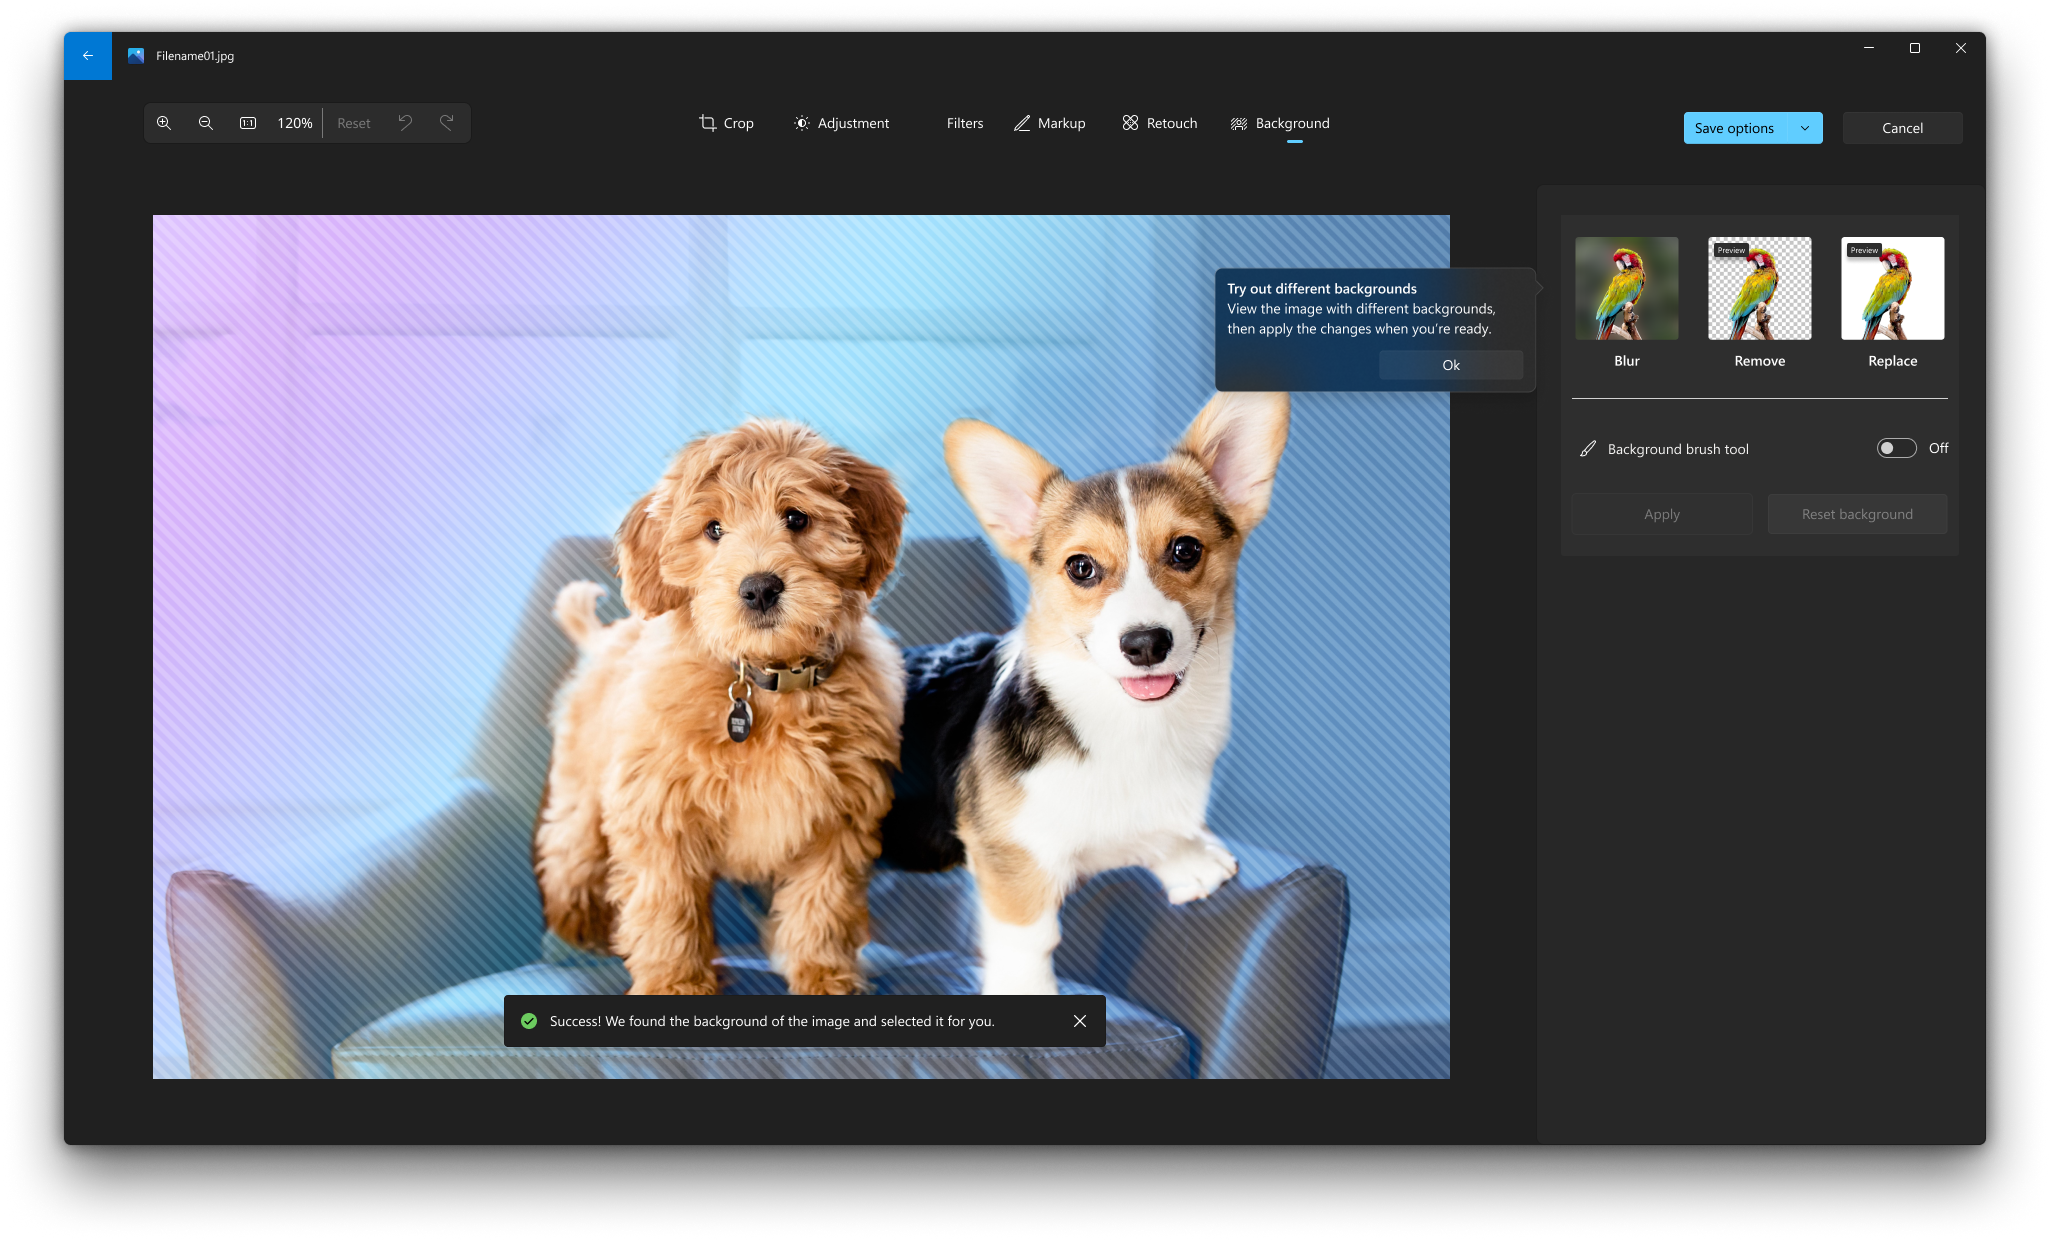
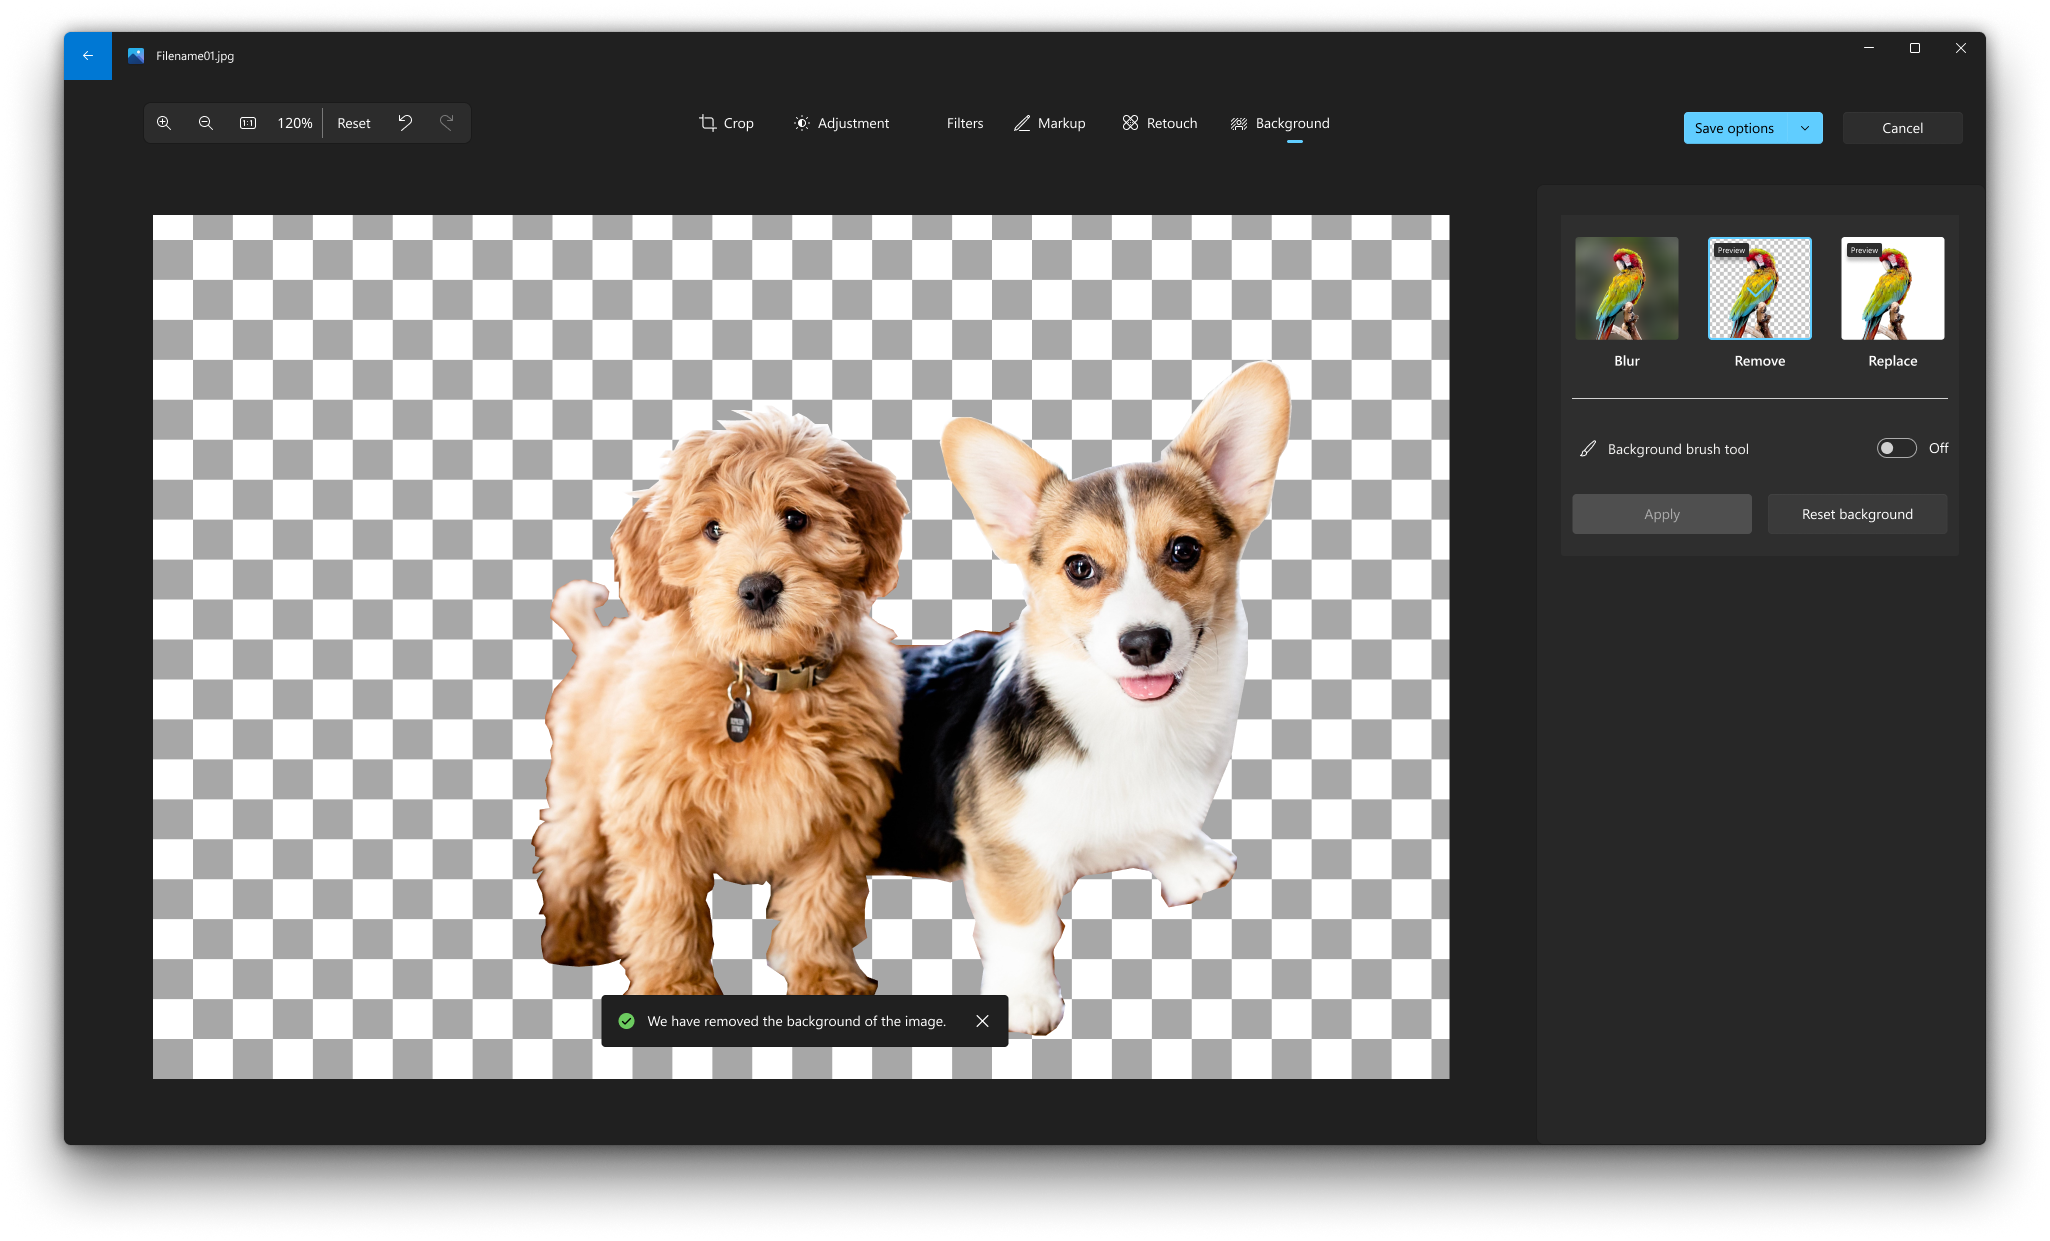
Background
Sometimes you may need to separate a subject from the background in a photo and then either apply a blur effect on the background, replace it or completely remove it.
Important:
-
Background editing capabilities are currently not available on Arm64 devices.
-
AI is used to separate the background, but the separation process is done locally on your device. This means that your data never leaves your device. For more about our responsible AI journey, the ethical principles that guide us, and the tooling and capabilities we’ve created to assure that we develop AI technology responsibly, see Responsible AI.
-
Select Edit image from the top of your screen.
-
Select Background. The image background will be automatically selected but you also have the option to turn On the Background brush tool to display more options.
-
Use Add to add more areas as part of the background.
-
Use Subtract to remove parts of the selection that you don't want as part of the background.
-
You can also change the Brush size or Brush softness.
-
-
Select Blur, Remove or Replace.
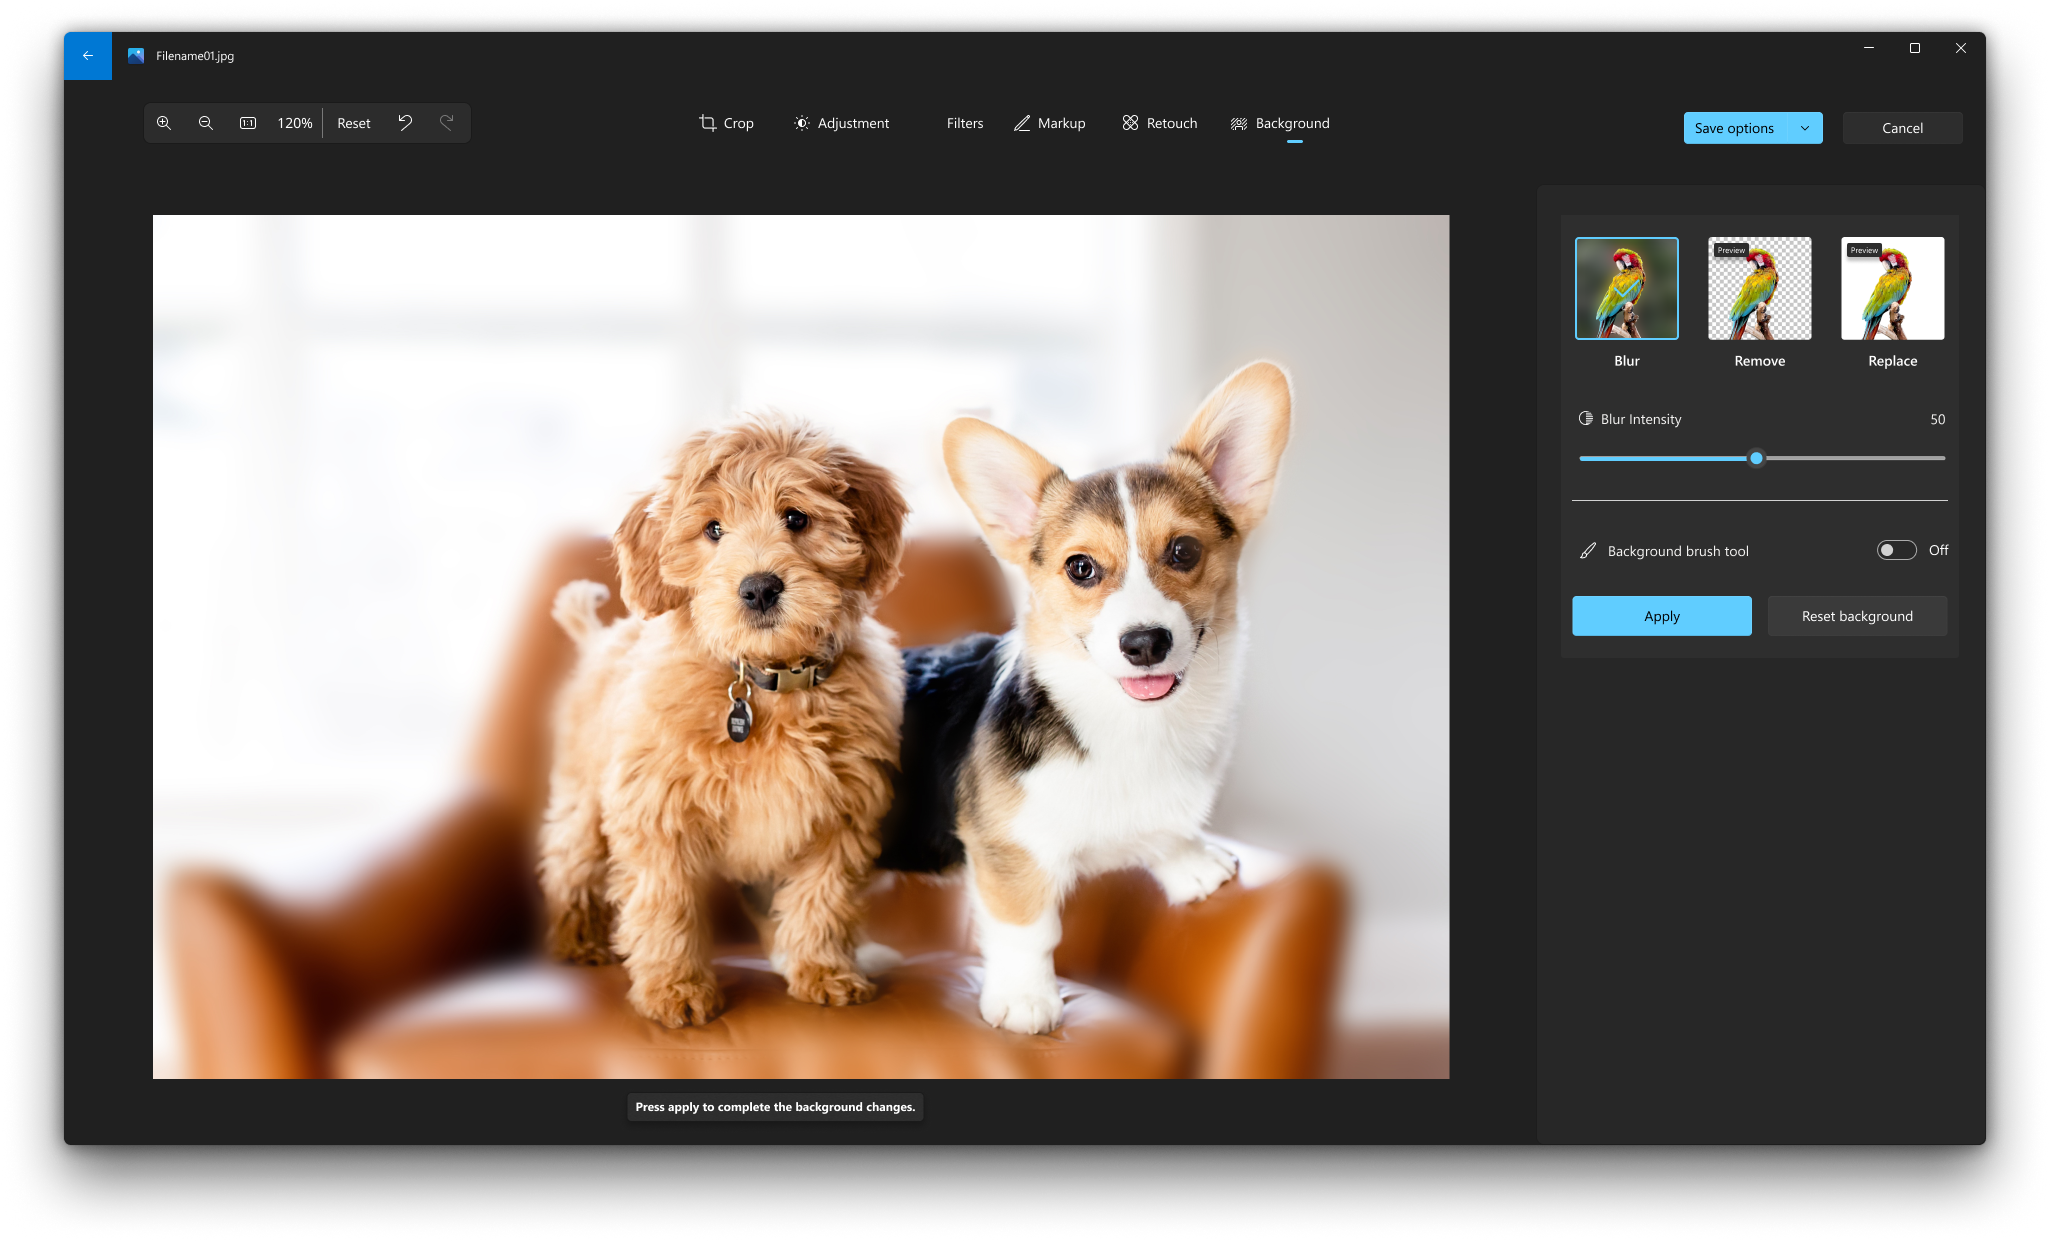
Blur
Select the Blur option, then use the slider to adjust the Blur intensity, then select Apply to blur the background.
Remove
Select the Remove option, then select Apply to remove the image background.
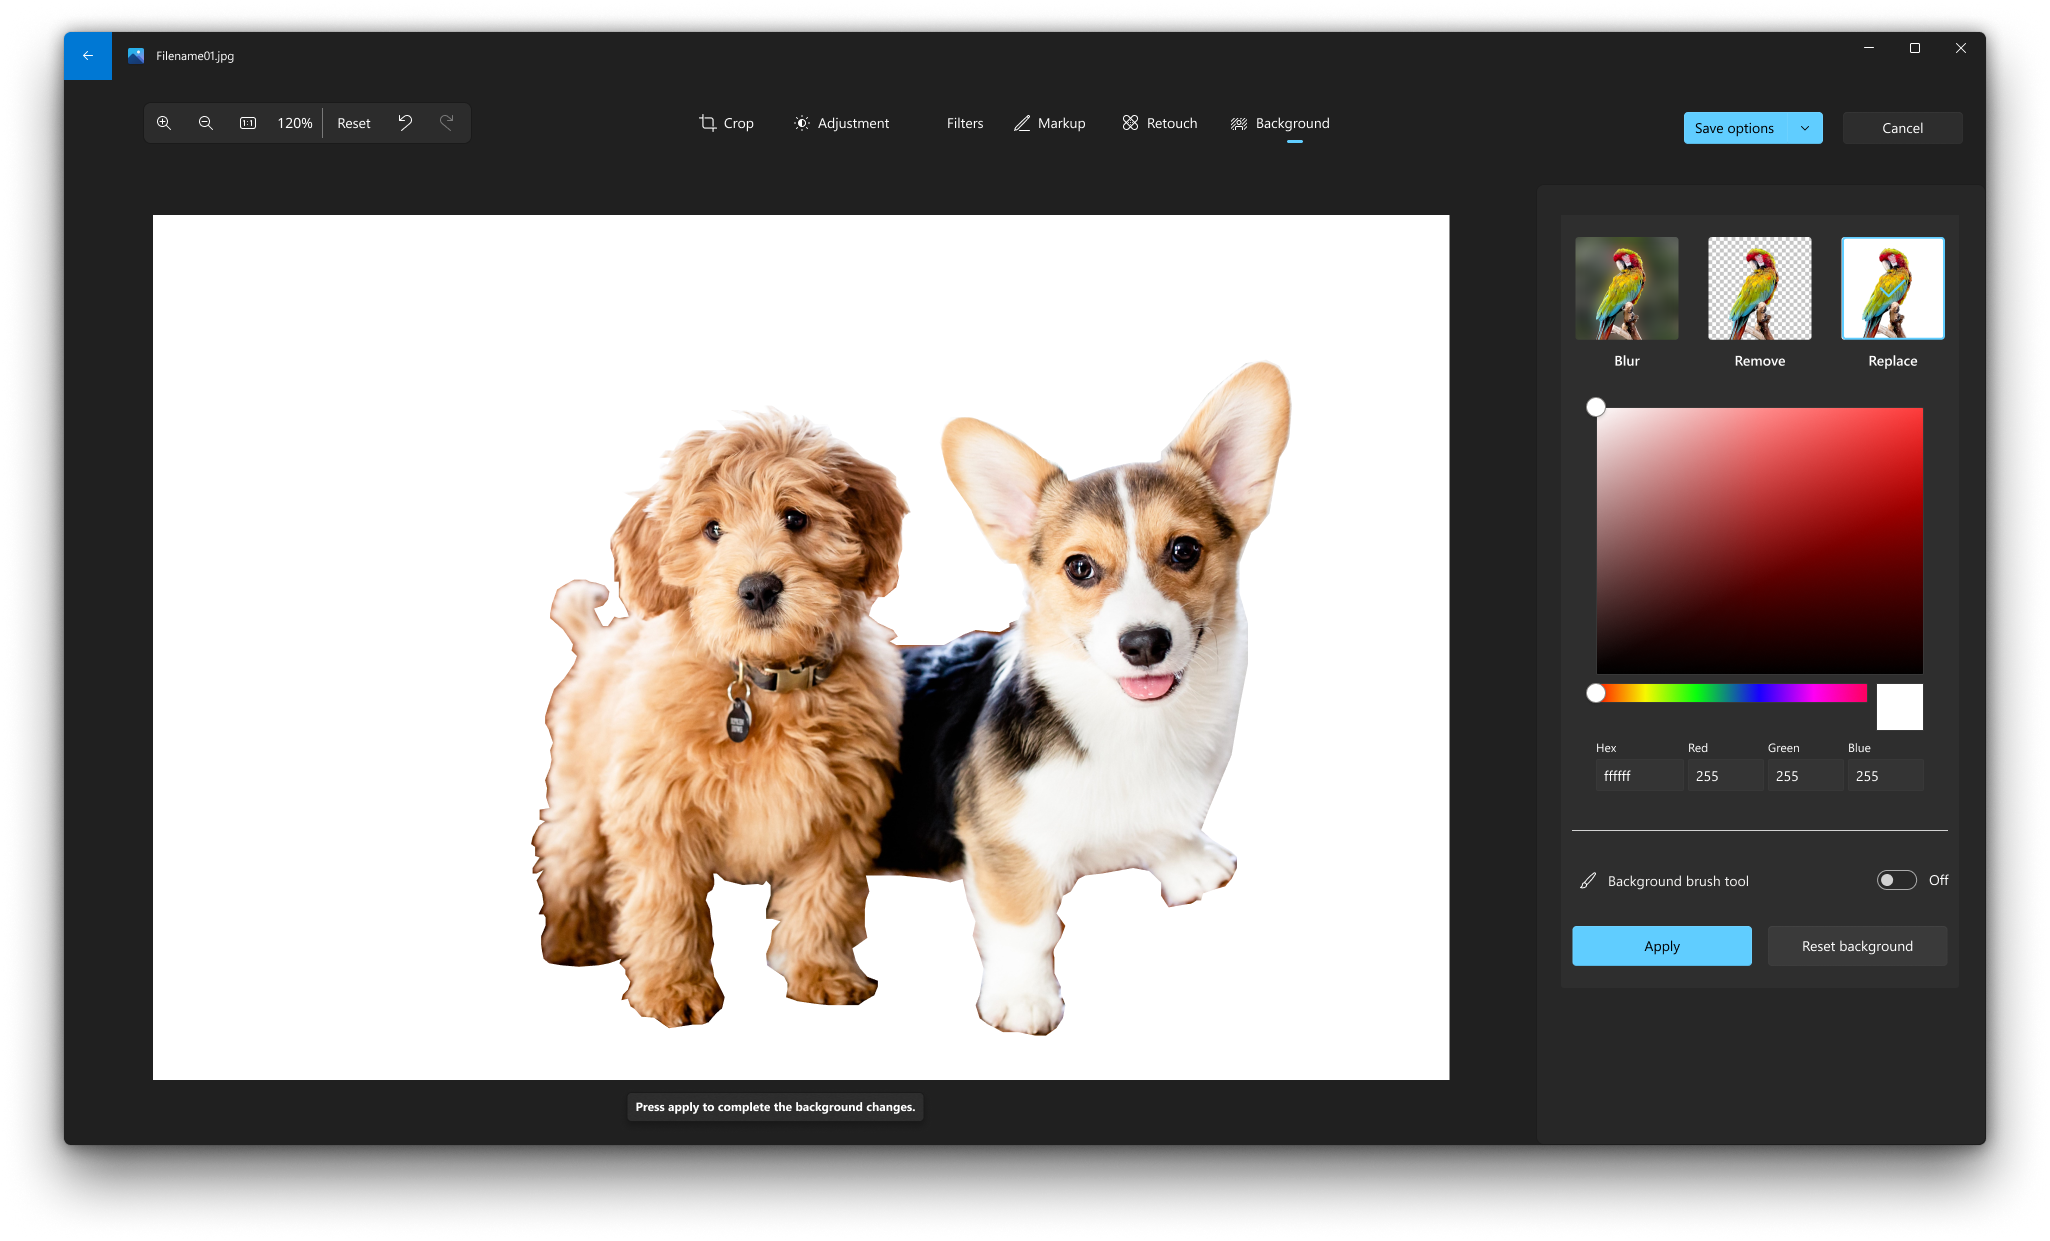
Replace
Select the Replace option, then use the color palette to select the background color. Alternatively, you can specify the RGB values for the desired color. Select Apply to replace the image background with the selected color.
Edit a photo
With the Photos app, you can easily crop, rotate, add a filter, and automatically enhance your photos.
In the search box on the taskbar, enter photos. From the list, select Photos . Then select the photo you’d like to change.
-
Select Edit & Create at the top of your screen.
-
Select Edit, and then select either Crop & rotate , Filters , or Adjustments .
-
Use these features to tweak light, color, clarity, and remove red eyes.
Tip: To make minor changes or touch up blemishes, select Edit & Create > Edit > Adjustments. Then choose Red eye or Spot fix .
For more creative options, select Edit & Create, and then select Add 3D effects or Edit with Paint 3D .
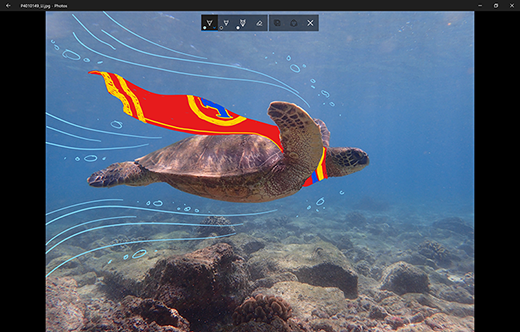
Get creative with your photos and videos
Sometimes, there's more to the story than what pictures and videos can convey on their own. Add a personal touch to your favorite moments by drawing on your photos and videos.
To get started, open the photo or video you'd like to enhance.
-
Select Edit & Create from the top of your screen.
-
Select Draw and then, from the toolbar, select one of three drawing tools.
-
Select your chosen tool a second time to see options for color and size.
-
Go ahead and draw right on your image, and no worries if you mess up—you can always erase markings you don't like with the Eraser tool. Or, clear your whole drawing by selecting Clear all ink strokes .

For more creative options, select Edit & Create , and then select Add 3D effects or Edit with Paint 3D .
Share your creations
When you're happy with your drawing, share it! To share a still of your new image or an animated playback of your drawing, with your creation open, select Share .
For more info on videos, see Create videos .
See Also


Need more help?
Want more options?
Explore subscription benefits, browse training courses, learn how to secure your device, and more.


Communities help you ask and answer questions, give feedback, and hear from experts with rich knowledge.


Find solutions to common problems or get help from a support agent.
