
Bookings with me in Outlook facilitates scheduling meetings between you and others per mutual calendar availability and your specified meeting preferences. Proceed through following steps to enable and use this feature.
Access your Bookings with me page
-
Go to https://outlook.office.com/bookwithme/
Note: You can also get started via the Create bookings page menu item in your Calendar on Outlook for web. That menu item text will change to Edit bookings page after setup is complete.
-
Upon opening your new Bookings with me page (Bookings dashboard) notice the "Get started..." pane. Once you begin the setup process, a colored bar here will indicate progress to completion.
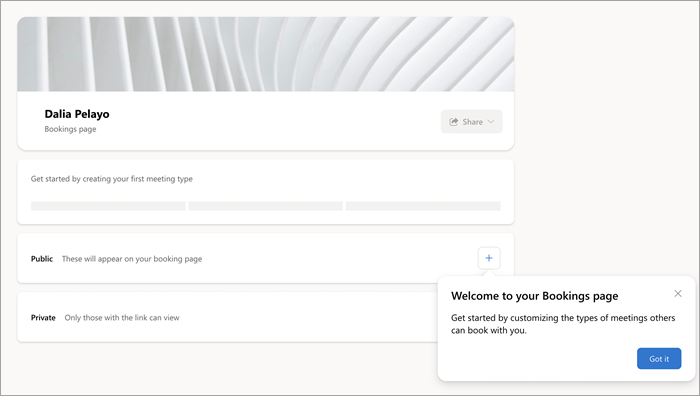
You will be able to create meeting types for various purposes and name them accordingly. To get started, you can just create a simple public meeting. -
Click the plus sign within the Public meeting pane to create a meeting type. Doing so will also initiate the Bookings page setup process.
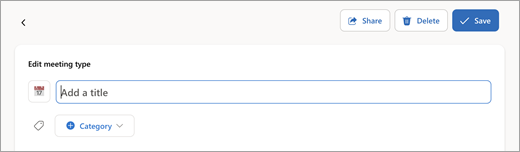
Create a new meeting type
-
In the first field of your displayed public meeting page, enter a Title which will automatically appear on invitations created from this meeting type (e.g., "Coffee Chat" temporary title).
-
To proceed with Bookings setup, simply click Save to return to your dashboard page. You can also explore and customize your meeting with the following settings either now or later.
-
Category Same as Outlook categories. Visible only to you.
-
Description Purpose of meeting, etc.
-
Location Physical or online (e.g., Teams).
-
Duration Default is 30 minutes.
-
Public (anyone with page link can see) or Private (access only via meeting link).
Detailed Timing Specifications
-
Meeting hours. Use regular hours per your Outlook or specify custom availability.
-
Buffer before mtg. Ensures a stated duration remains unbooked prior to meeting start.
-
Buffer time after. Specified amount of post-meeting time remains unbooked for you.
-
Limit start time to. Sets interval of suggested start times (independent of meeting duration).
-
Minimum lead time. Booking must be done at least this far in advance of meeting time.
-
Maximum lead time. Booking must be done within this number of days before meeting time.
Allow for setup processing time
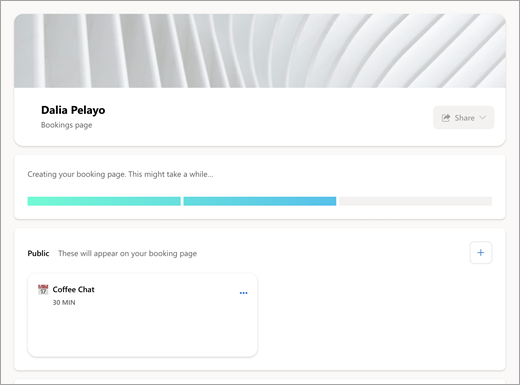
Only on initial use, some processing time will be necessary to complete the creation of your Bookings page.
-
Upon return to the dashboard, which now shows your new meeting type, note the status of your Bookings setup progress bar.
-
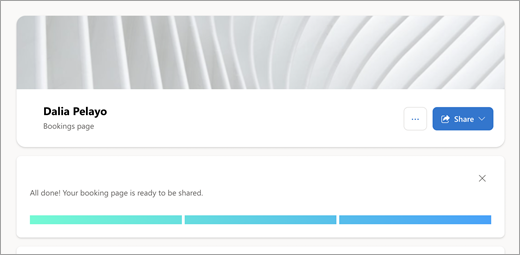
Check back on this page to confirm that the setup is done with the progress bar fully colored and the Share button enabled.
-
Click to dismiss the progress bar.
Prepare and share your page
With setup complete, you can now personalize your page and let others know it’s available for them to schedule meetings with you.
-
To change your banner image, click the [...] icon by Share then select Edit banner image to proceed.
-
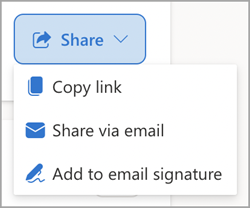
Select the Share button for available page-sharing options:
-
Copy link puts a link to your public Booking page into the clipboard for easy sharing.
-
Share via email opens an automated send function in Bookings with me.
-
Add to email signature automates adding to your Outlook email signature.


