
Use breakout rooms during class meetings to divide students into smaller groups for discussions, group projects, and more. Open and close rooms more than once during a session or move individuals between rooms. Only meeting organizers using the desktop versions of Teams (Windows or Mac) can create and manage breakout rooms.
Notes:
-
Organizing a meeting with breakout rooms is currently only available in the Teams for Education desktop app for Windows or Mac. Make sure you have updated to the latest version.
-
Participants can join breakout rooms from Windows, Mac, mobile, or web browsers including Edge, Chrome, and others. On mobile, check to see that you have the minimum build required to run this feature by tapping Settings > About. Learn how to update to the latest version.
-
Minimum desktop app version (Windows or Mac): 1.3.00.24755
-
Minimum iOS build: 1.0.77.2020100603
-
Minimum Android build: 1.0.0.2020091301
Before you get started, make sure you have the desktop app
You can create meetings in any version of Teams, but you'll need Teams for Windows or Mac to create breakout rooms for your students. Students can join from any version of Teams.
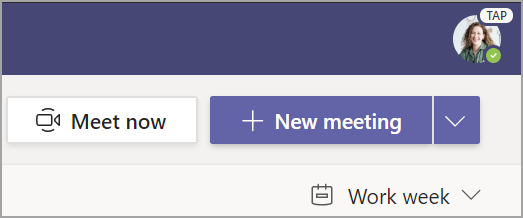
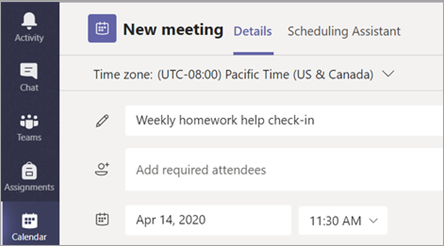
Next, schedule a meeting or Meet now
-
Select Calendar

-
Choose a channel to meet in or add students from your class as attendees.
Note that any meeting options you select before or during your meeting will apply to meetings with breakout rooms as well. Learn more about meeting options.
Important: These features are not currently supported in breakout rooms:
-
Using Meet now from a channel conversation
-
Call me
-
Copying the link to room meeting
-
Adding a guest to meeting or meeting chat
Create breakout rooms before meeting
-
Go to your Teams meeting and open the meeting invite.
-
Go to Breakout rooms and select Create rooms.
-
From the dropdown, choose how many rooms you'd like to create.
-
Select Assign participants and choose whether you'd like students to be assigned to rooms Automatically or Manually.
As soon as the meeting starts, you can open the breakout rooms.


Create breakout rooms during meeting
-
Join your meeting at its scheduled time and wait for your students to join.
Important: Make sure you join your meeting from the Teams desktop app (Windows or Mac) so you can create breakout rooms.
-
When your students have joined and you are ready, select Breakout rooms

-
From the dropdown, choose how many rooms you'd like to create.
-
Choose if you'd like students to be assigned to rooms Automatically or Manually.
-
Select Create Rooms.

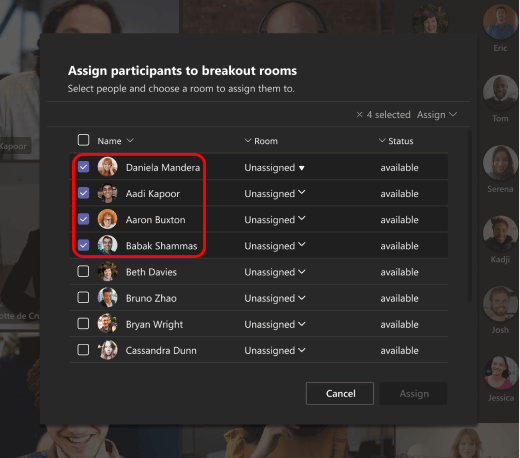
Assign participants to rooms
If you chose Automatically, participants will be assigned to different breakout rooms.
If you chose Manually, you'll be able to sort participants into specific rooms:
-
Select Assign participants. From this window, organize participants by selecting the down arrow next to Name or Room.
-
Group students together to place in a particular breakout room by selecting the checkboxes next to their names.
-
Select the down arrow next to Assign and choose a room for them.
-
Repeat steps 2 and 3 until each student has been assigned to a room.
-
Select Confirm.
If students join the class meeting late, you can still assign them to a room by selecting Assign participants.
Note: For recurring class meetings, the same rooms and room assignments will be available for the next meeting.

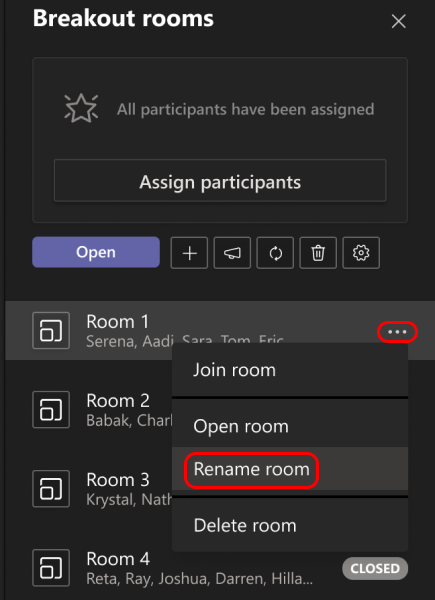
Rename rooms
Name your breakout rooms to represent smaller student groups or projects.
-
Select Breakout rooms
-
Hover over the room and select More options

-
Type in the new name and select Rename room.
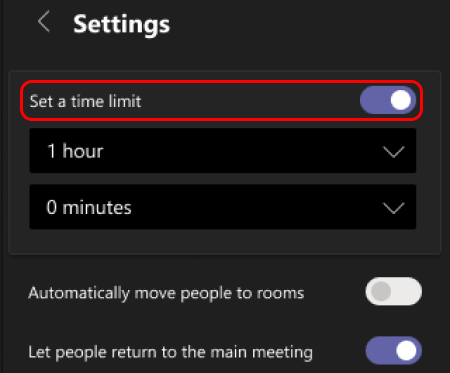
Set a time limit for the breakout session
Keep your class on schedule and aware of the time they have left by setting a timer. A timer will be visible in each breakout room. When time is up, breakout rooms will close automatically, and your students will return to the main class meeting.
-
In the meeting controls, select Breakout rooms
-
Select Rooms settings

-
Select Set a time limit. Select the down arrow and choose a session length.
-
When you're done, select the back button to save your changes.
Start breakout rooms
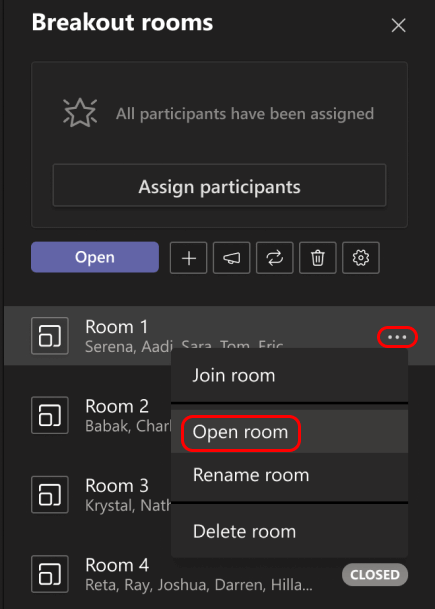
First, select Breakout rooms
To start rooms individually:
-
Hover over the room and select More options
To start rooms all at once:
-
Select Open.
You'll know rooms have successfully opened when their status changes to Open.

Join a breakout room
To join a room and check on its progress:
-
Select Breakout rooms
-
Hover over the room and select More options
-
Select Return when you're ready to leave the breakout room and return to the main meeting.
Send an announcement to breakout rooms
Once breakout rooms have started, send announcements to share time updates or prompts.
-
In the meeting controls, select Breakout rooms
-
Select Make an announcement

-
Type in your announcement and then select Send.
-
Students will receive a notification in their meeting chat for your announcement.
Move students to different rooms
Move participants to different breakout rooms individually.
-
In the meeting controls, select Breakout rooms
-
Select Assign participants and select the checkbox next to the person's name you want to move.
-
Choose a new room for the person and select Assign, then Move.
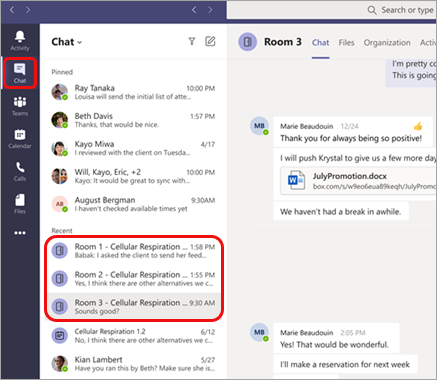
Chat with participants in a breakout room
Each breakout room will have its own chat. You and your students will be able to access it from your chats list and from Chat 
-
Students will be added to a breakout room chat when you open the room and removed when the room is closed.
-
You will have access to all breakout room chats.
-
After a breakout room is closed, so is the chat; no more messages can be sent.
-
You and your students can still access chat history and shared files after the breakout room is closed.

Add or delete a breakout room
To add an additional breakout room:
-
In the meeting controls, select Breakout rooms
-
Select Add room

-
Add participants to the room using the instructions above.
To delete an individual breakout room:
-
In the meeting controls, select Breakout rooms
-
Hover over the room, select More options
To delete all breakout rooms at once:
-
In the meeting controls, select Breakout rooms
-
Select Remove rooms

Close breakout rooms
When you close a breakout room, the participants will automatically return to the main meeting.
To close rooms individually:
-
Select Breakout rooms
-
Hover over the room, then select More options

To close rooms all at once:
-
Select Breakout rooms
-
Select Close.
You'll know rooms have successfully closed when their status changes to Closed.
-
Select Resume when everyone is back from their breakout rooms and you're ready to meet as a larger group again.
Tip: If you reopen rooms later on, room assignments will remain the same unless you reassign participants or recreate rooms from scratch.
Save files, recordings, and notes from breakout rooms
Files, recordings, and notes from a breakout room can be accessed in its chat. You and your students will be able to access these materials after the room has closed, but students will not be able to continue chatting or add additional materials.
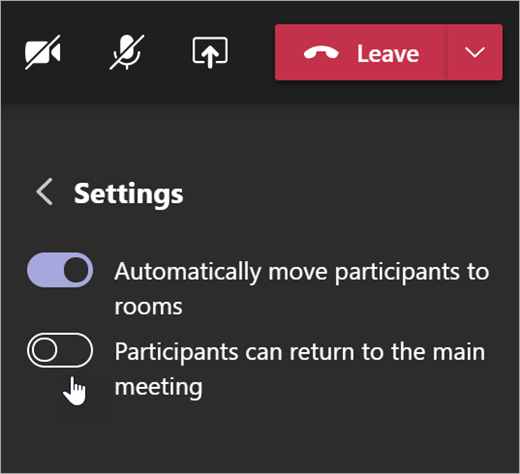
Edit breakout room settings
To edit settings, select Breakout rooms
-
Automatic room setting
By default, breakout rooms will be set to automatically move students into opened rooms. If you'd like to change this setting, switch the toggle for Automatically move people into opened rooms to off.
When the automatic setting is turned off, students will receive a message asking them to join a breakout room. They will need to select Join room before being moved.
-
Allow students to return to main meeting
By default, this setting will be off. To turn it on, switch the toggle next to Participants can return to the main meeting on.
This will allow students to leave their breakout rooms and return to the main meeting.
View breakout room participation in attendance reports
Gain insight into your students’ activity in their class meeting breakout rooms with attendance reports. See which room each student joined, when they entered, and when they left.
To see breakout room details from your class meeting:
-
Open Teams and select Calendar.
-
Select the class meeting you'd like insight into and expand it to view details.
-
Select Attendance.
-
Under Participants, select a student to see which breakout room they entered and what time they joined and left it.
Note: Attendance reports don’t include data from deleted breakout rooms.
Recreate rooms from scratch
Reconfigure rooms and assignments by returning to the meeting controls and repeating the breakout room creation process.
-
In the meeting controls, select Breakout rooms
-
Select Recreate rooms

-
Follow the instructions mentioned in the beginning of this article to create new breakout rooms and assign students to rooms.
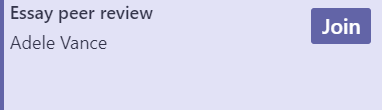
First, join a class meeting
Students can join breakout rooms from Teams on Windows, Mac, mobile, or web browsers including Edge, Chrome, and others.
-
Navigate to Calendar
-
Find the class meeting, open it, and select Join.
Note: Only meeting organizers can create breakout rooms.
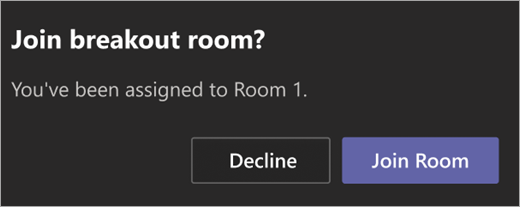
Join a breakout room
-
By default, you'll be moved into your assigned breakout room as soon as your instructor opens the room. No action is required on your part.
-
If your instructor has turned off the automatic setting, you'll receive a notification to join the breakout room when it opens. Select Join Room on desktop or Join on mobile to enter the room.
-
If you're joining from your mobile device, do not leave the meeting while your instructor is setting up rooms.
-
You'll also receive notifications to rejoin the main meeting or if you are moved into another room.
-
If you switch devices during the meeting or join with two devices, you'll still remain in the same breakout room.

Chat in a breakout room
Each breakout room will have its own chat. You'll be able to access it from your chats list and from Chat
-
You will be added to a breakout room chat when your instructor starts the room. You'll be removed from the chat when the room is closed.
-
Chat history and any files shared can still be accessed after the breakout room is closed, as well as meeting recordings.

Return to the main meeting
-
If your instructor has enabled it, select Return to rejoin the main meeting.
-
To return to your breakout room from the main meeting, select Join room.
Related Topics
Why can't I use breakout rooms?


