
Notes:
-
The information in this article applies to Clipchamp for personal accounts.
-
Information incl. plans & pricing for Clipchamp's work version are available here.
Clipchamp offers a free tier with core editing features and integrations and allows exports up to 1080p.
Microsoft 365 personal or family subscribers have access to some additional premium features.
For access to all paid features including 4K exports, brandkit, content backup, and premium stock media, users can upgrade to the Clipchamp Premium plan.
Read on to find out:
How to upgrade to the Premium plan
You can start the checkout on Clipchamp's pricing page by selecting Upgrade in the Premium plan column of the plan comparison table.
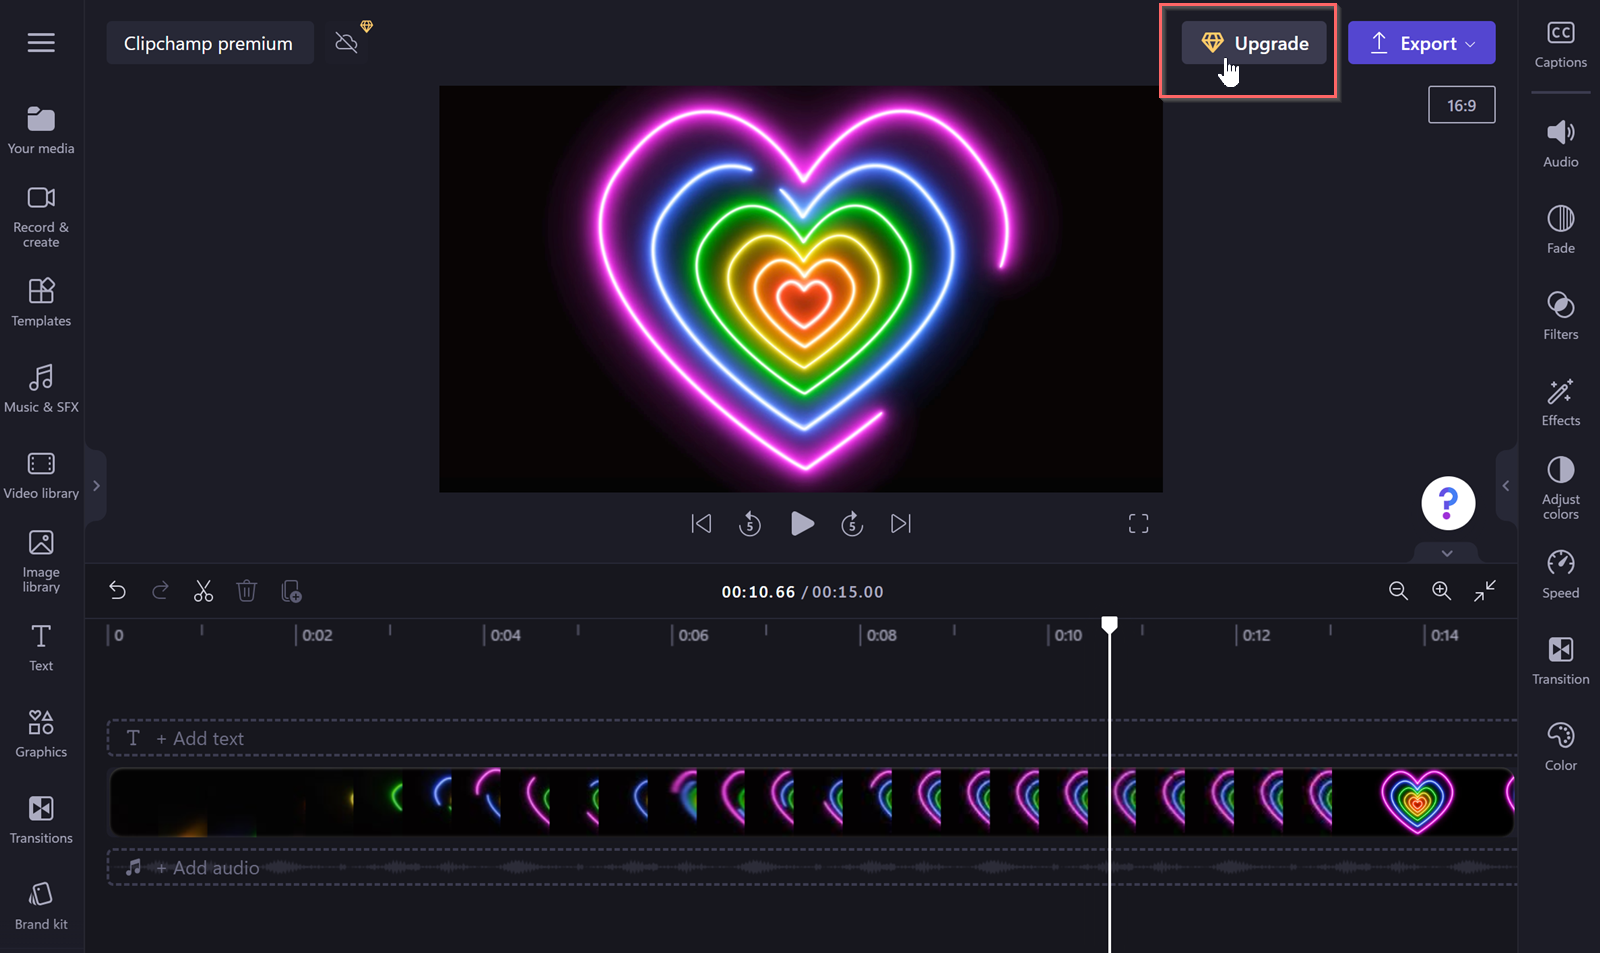
If you're already in Clipchamp, you can select one of the Upgrade buttons that are visible when your account is on the free tier. The steps below show you the steps to complete the purchase.
Select the Upgrade button
If you have used premium features in an editing project, you will need to upgrade to export the finished video. If you do not wish to upgrade, you can remove premium content from your video to export for free.
In the modal that appears, select Upgrade now
This will open a plan selection table.
In the comparison, hover over the (i) icons to see more information about each feature. You can also choose between the monthly and annual billing periods.
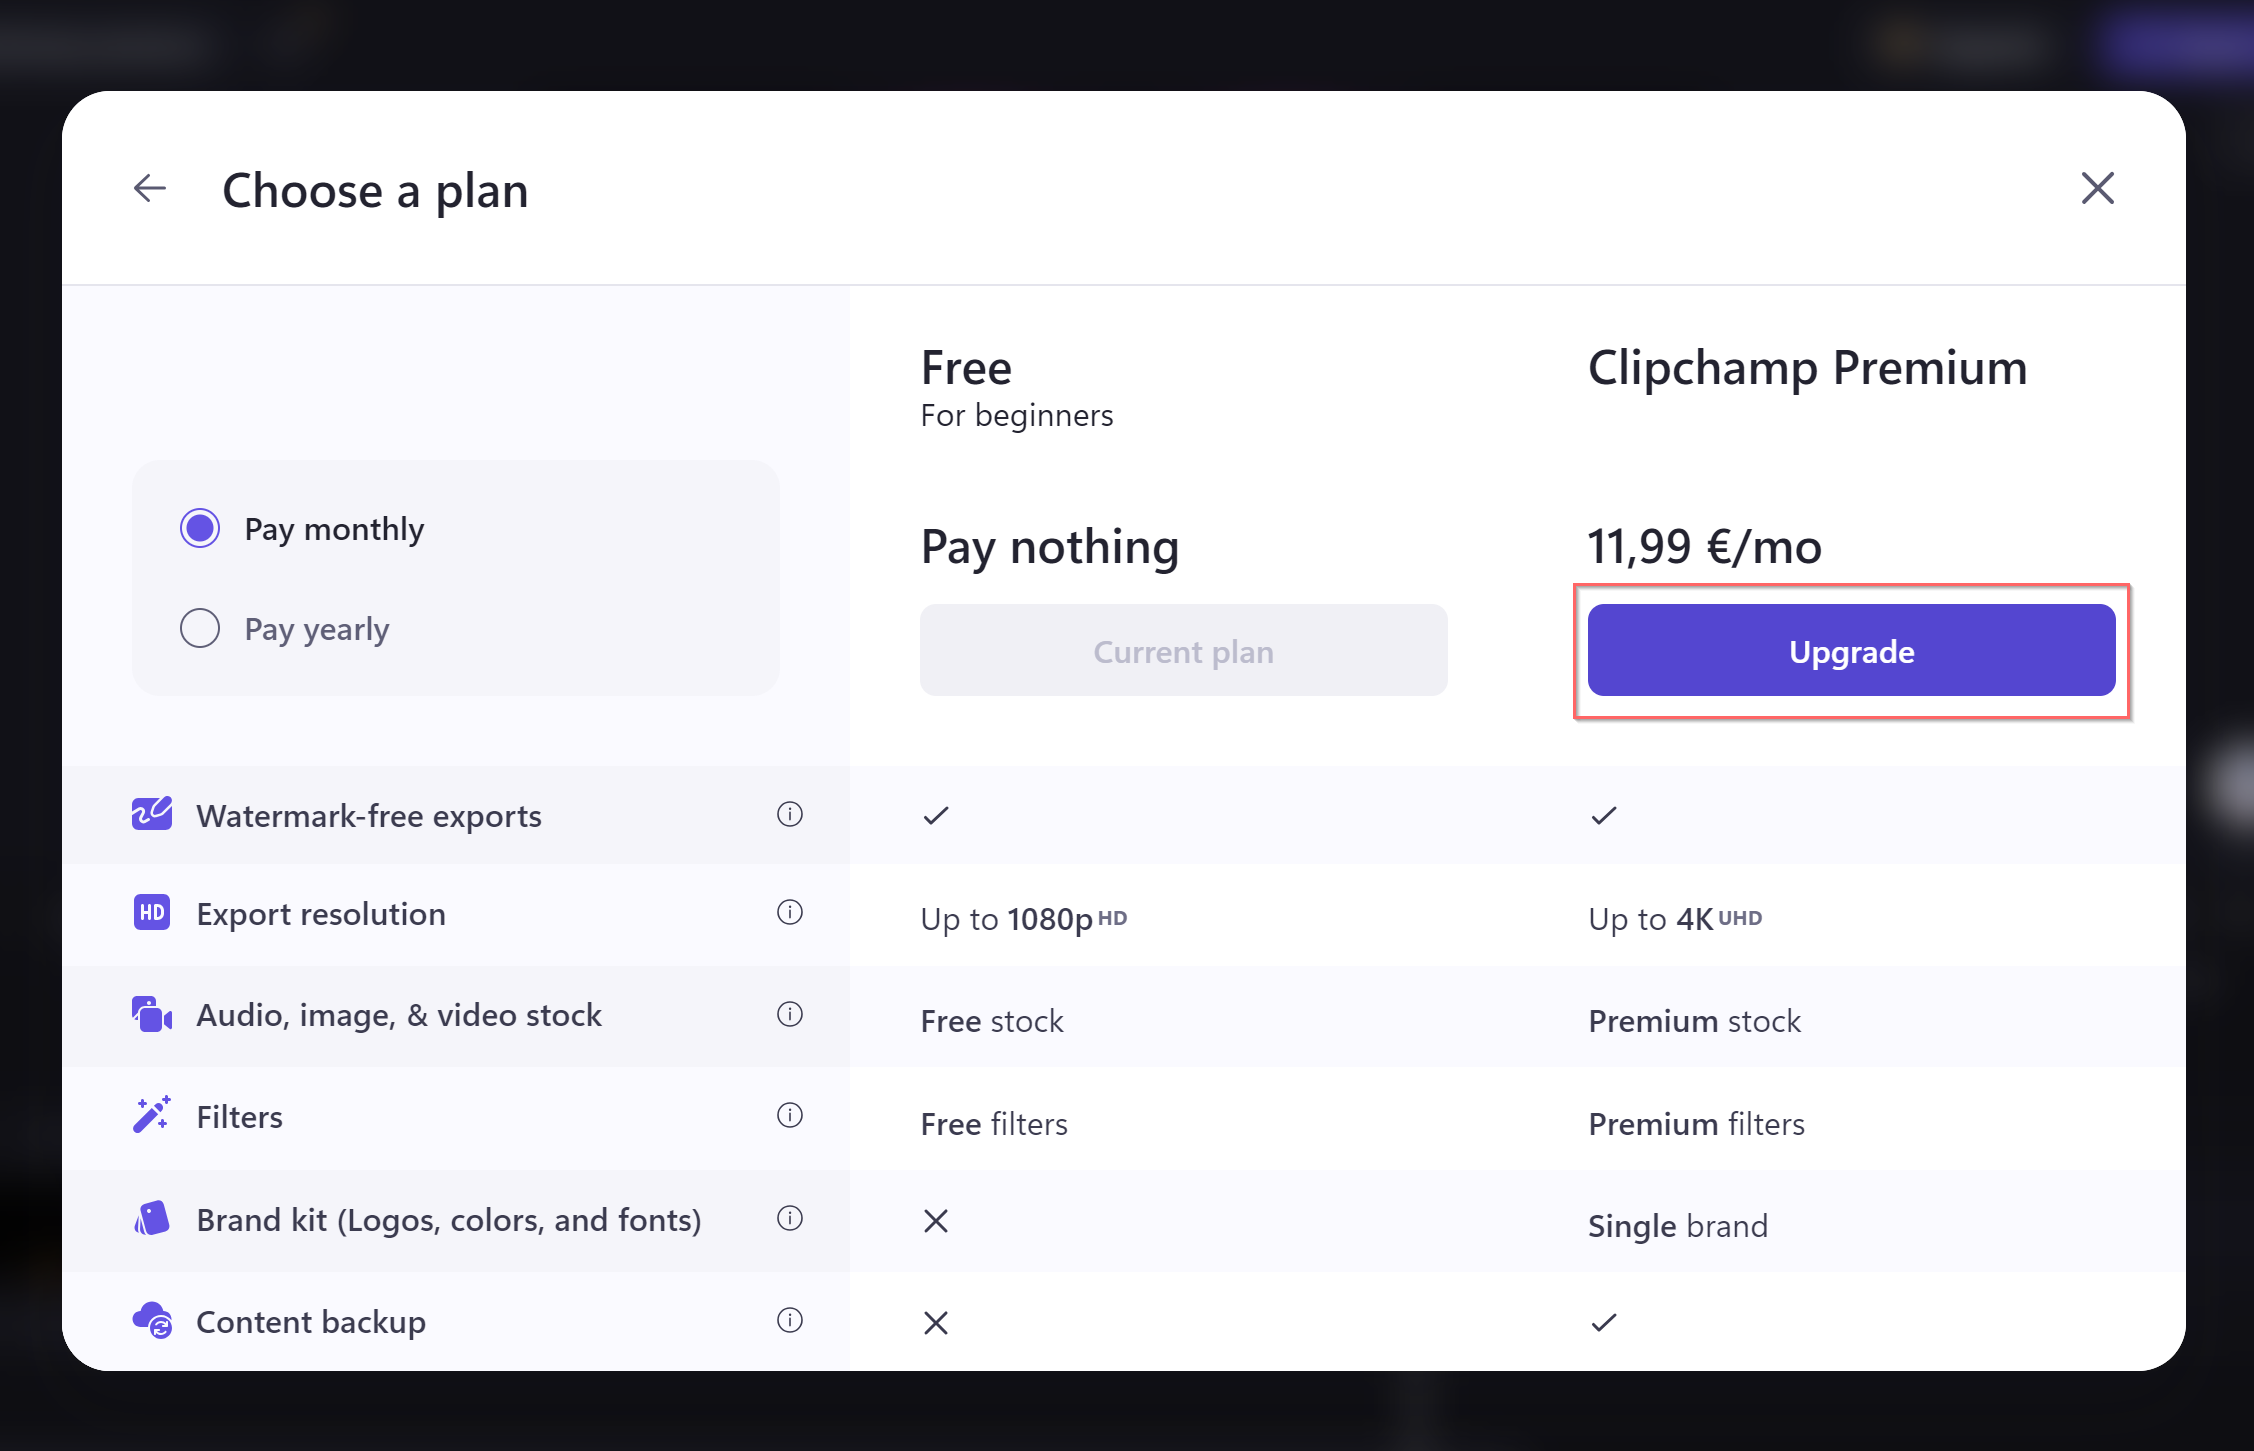
The price will get adjusted accordingly, the currency and price shown are the one for your region.
To continue, select the Upgrade button in the Clipchamp Premium column.
Connect a Microsoft account
If your Clipchamp account isn't connected to a personal or family Microsoft account yet, you'll get asked to connect one to proceed with the purchase. Select Sign in with Microsoft and follow the prompts to continue.
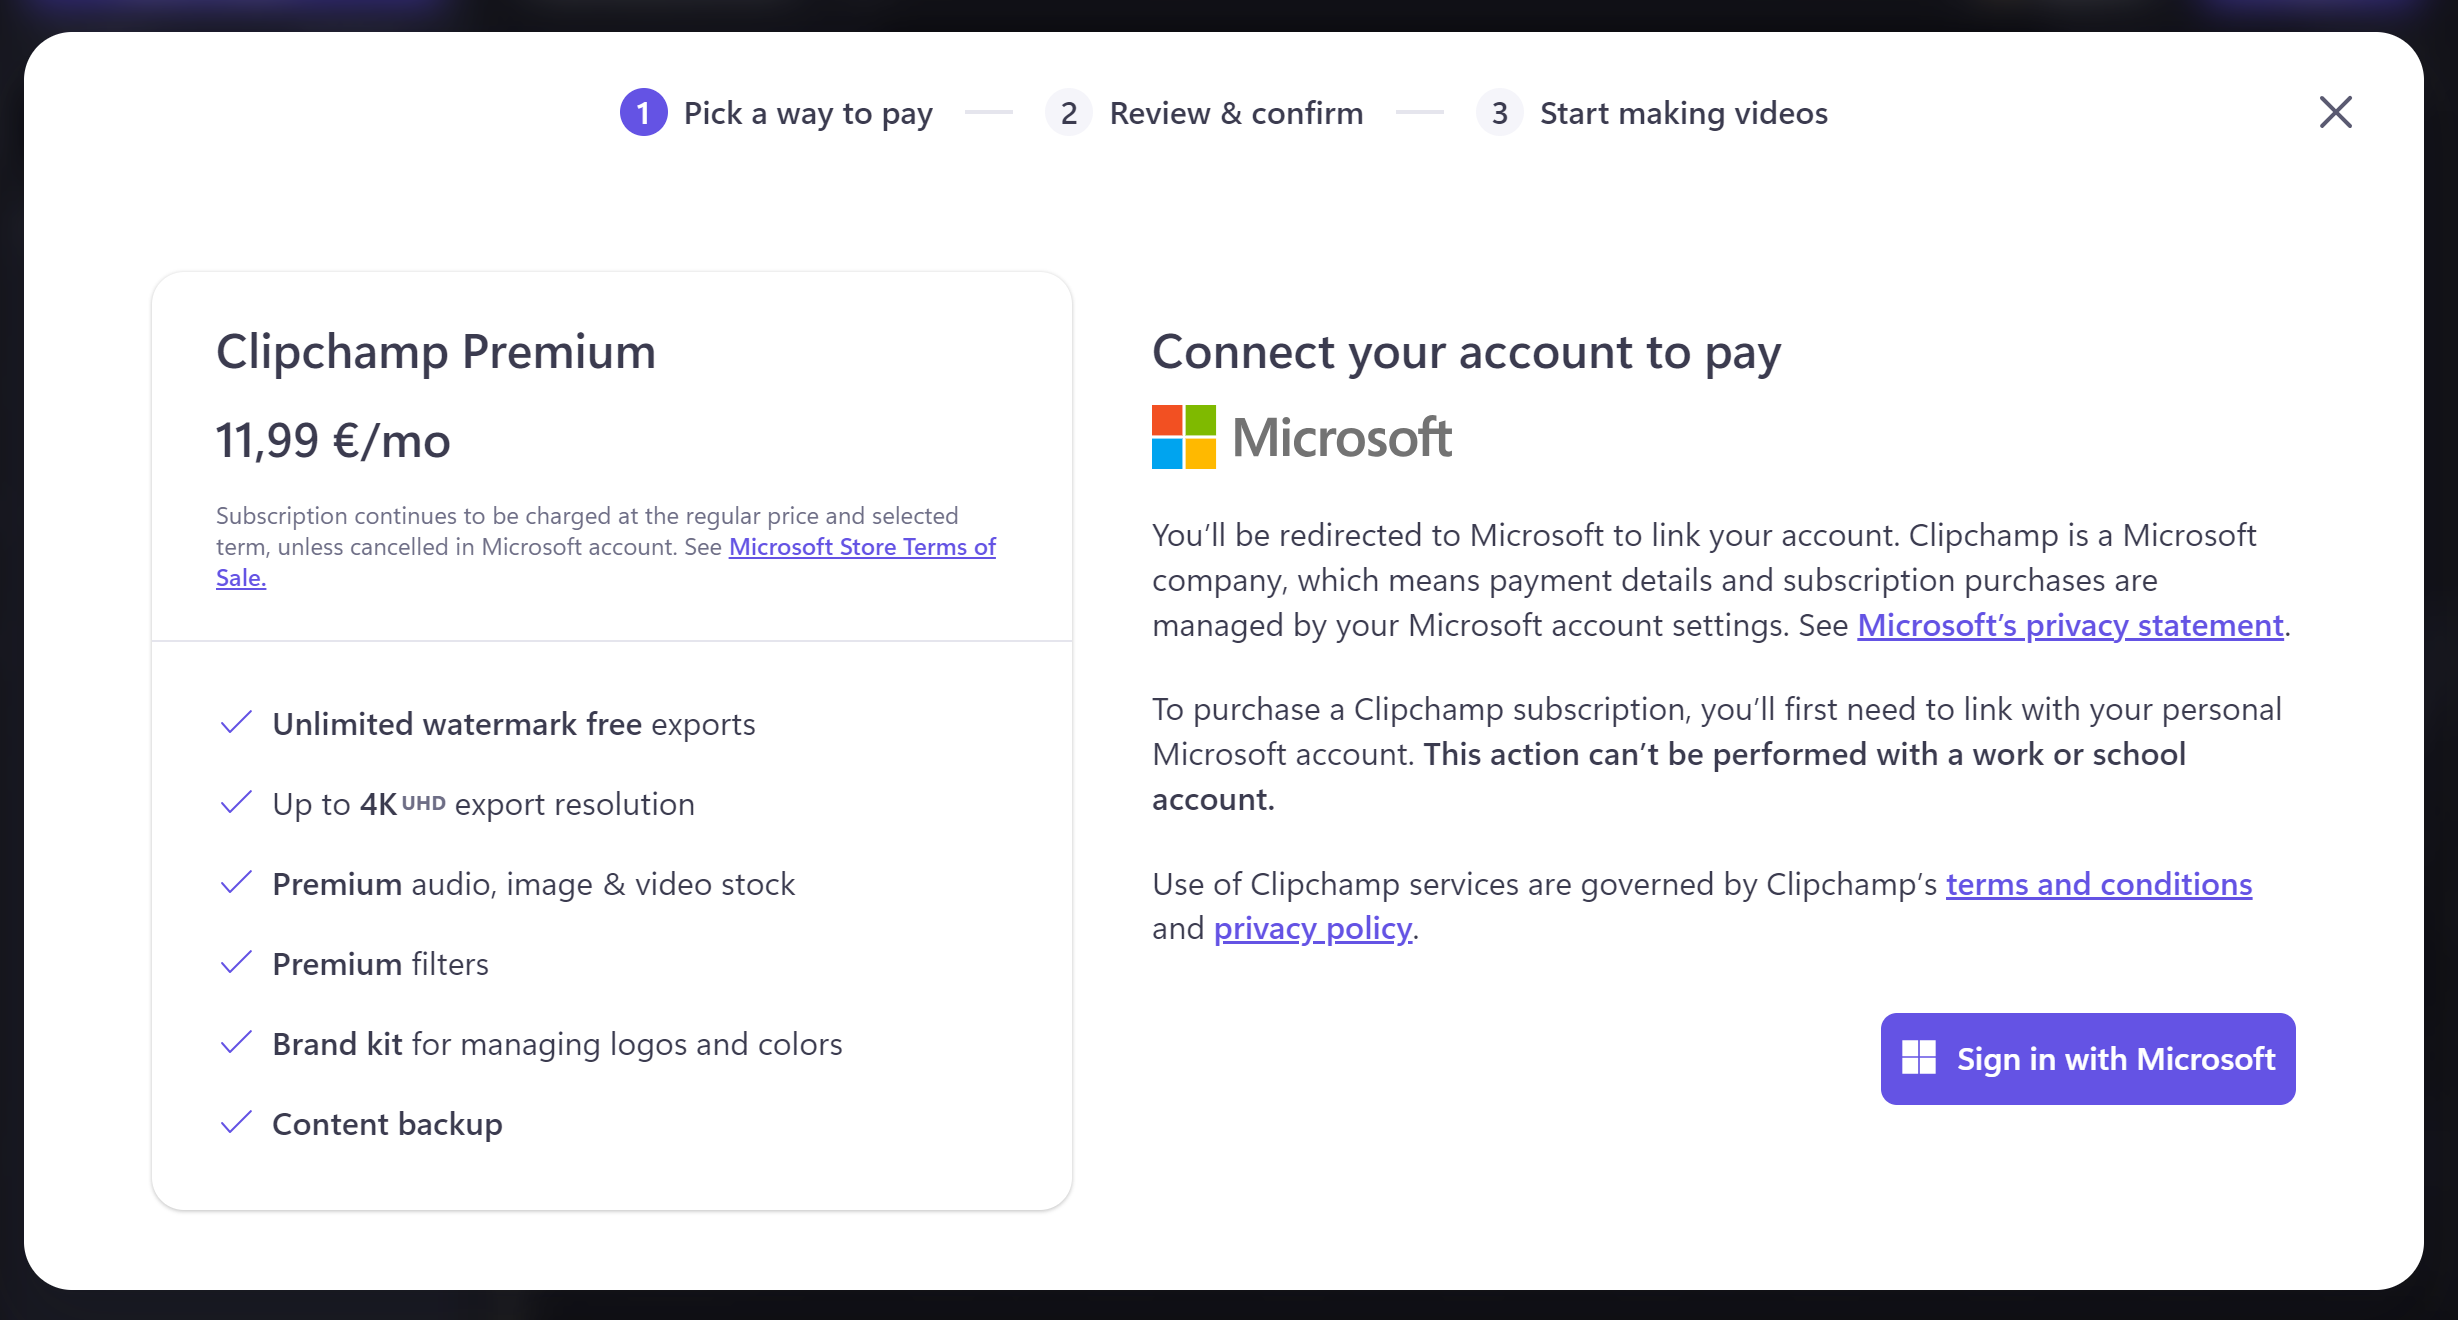
When you have logged in to your Microsoft account, a notification will appear in the lower left of the screen that your Microsoft account was linked successfully.
Add billing information, select a payment method
You will be brought back to Clipchamp after logging in to your Microsoft account. Fill in all required fields, then select Next.
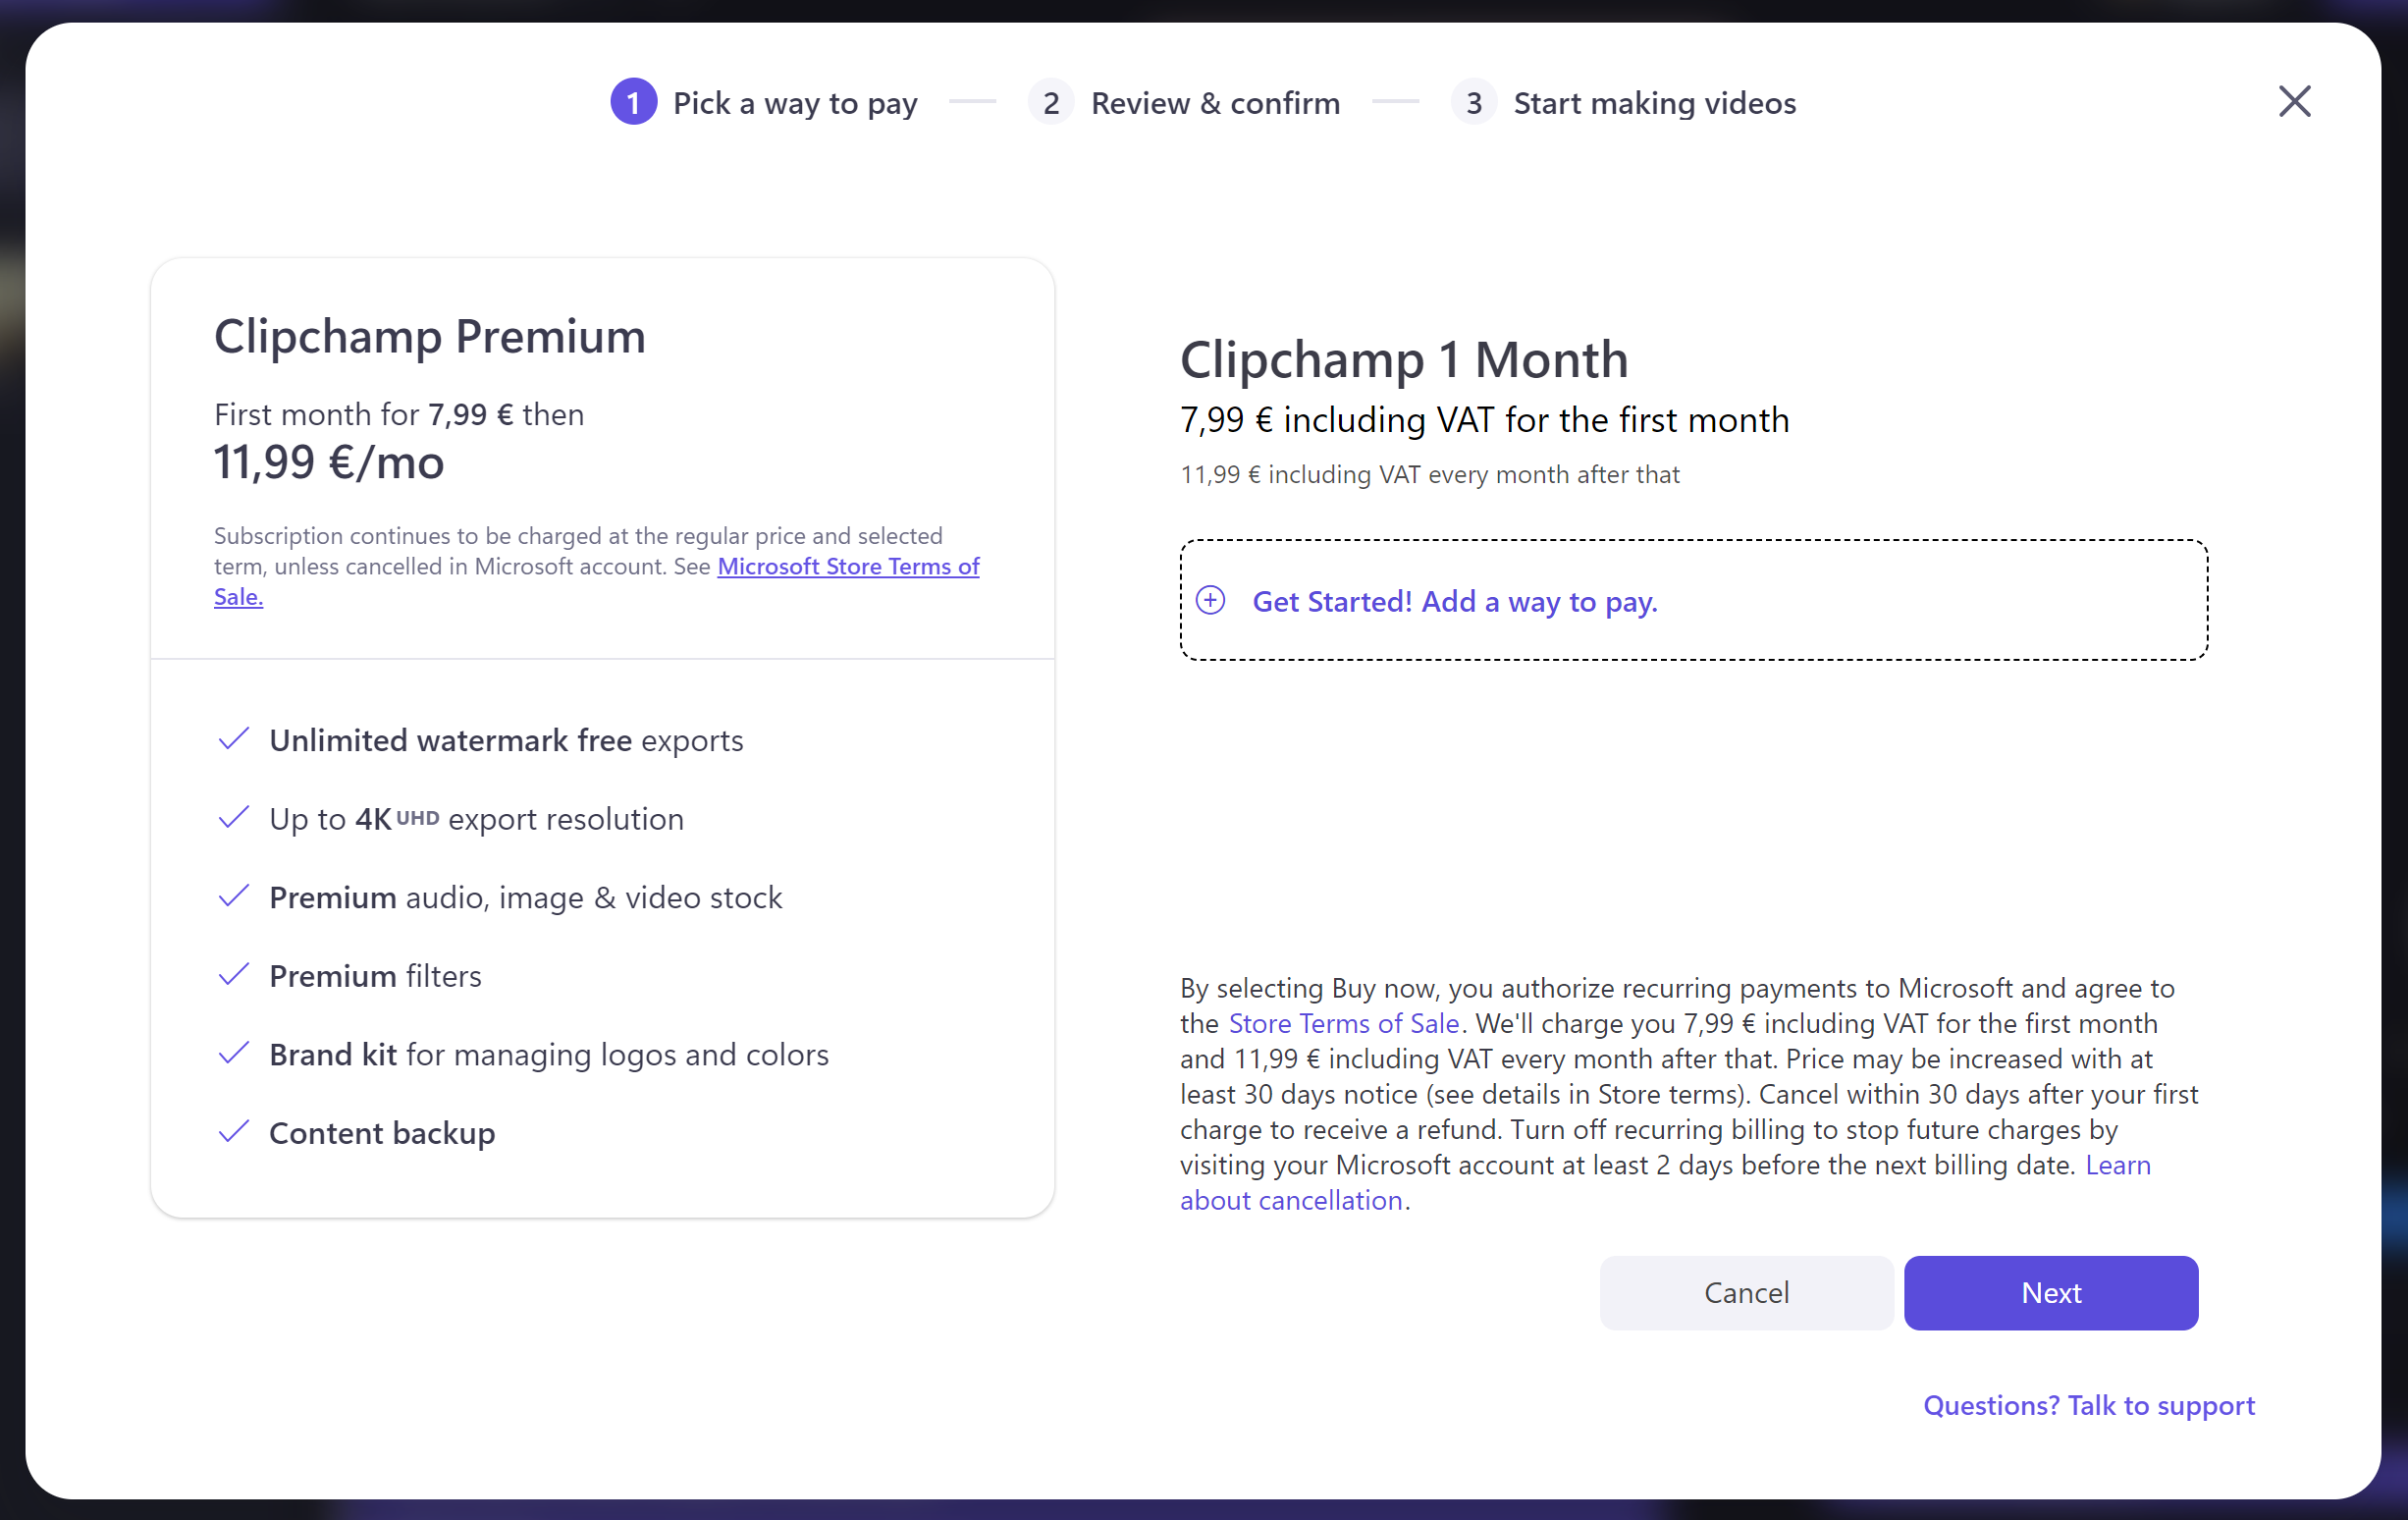
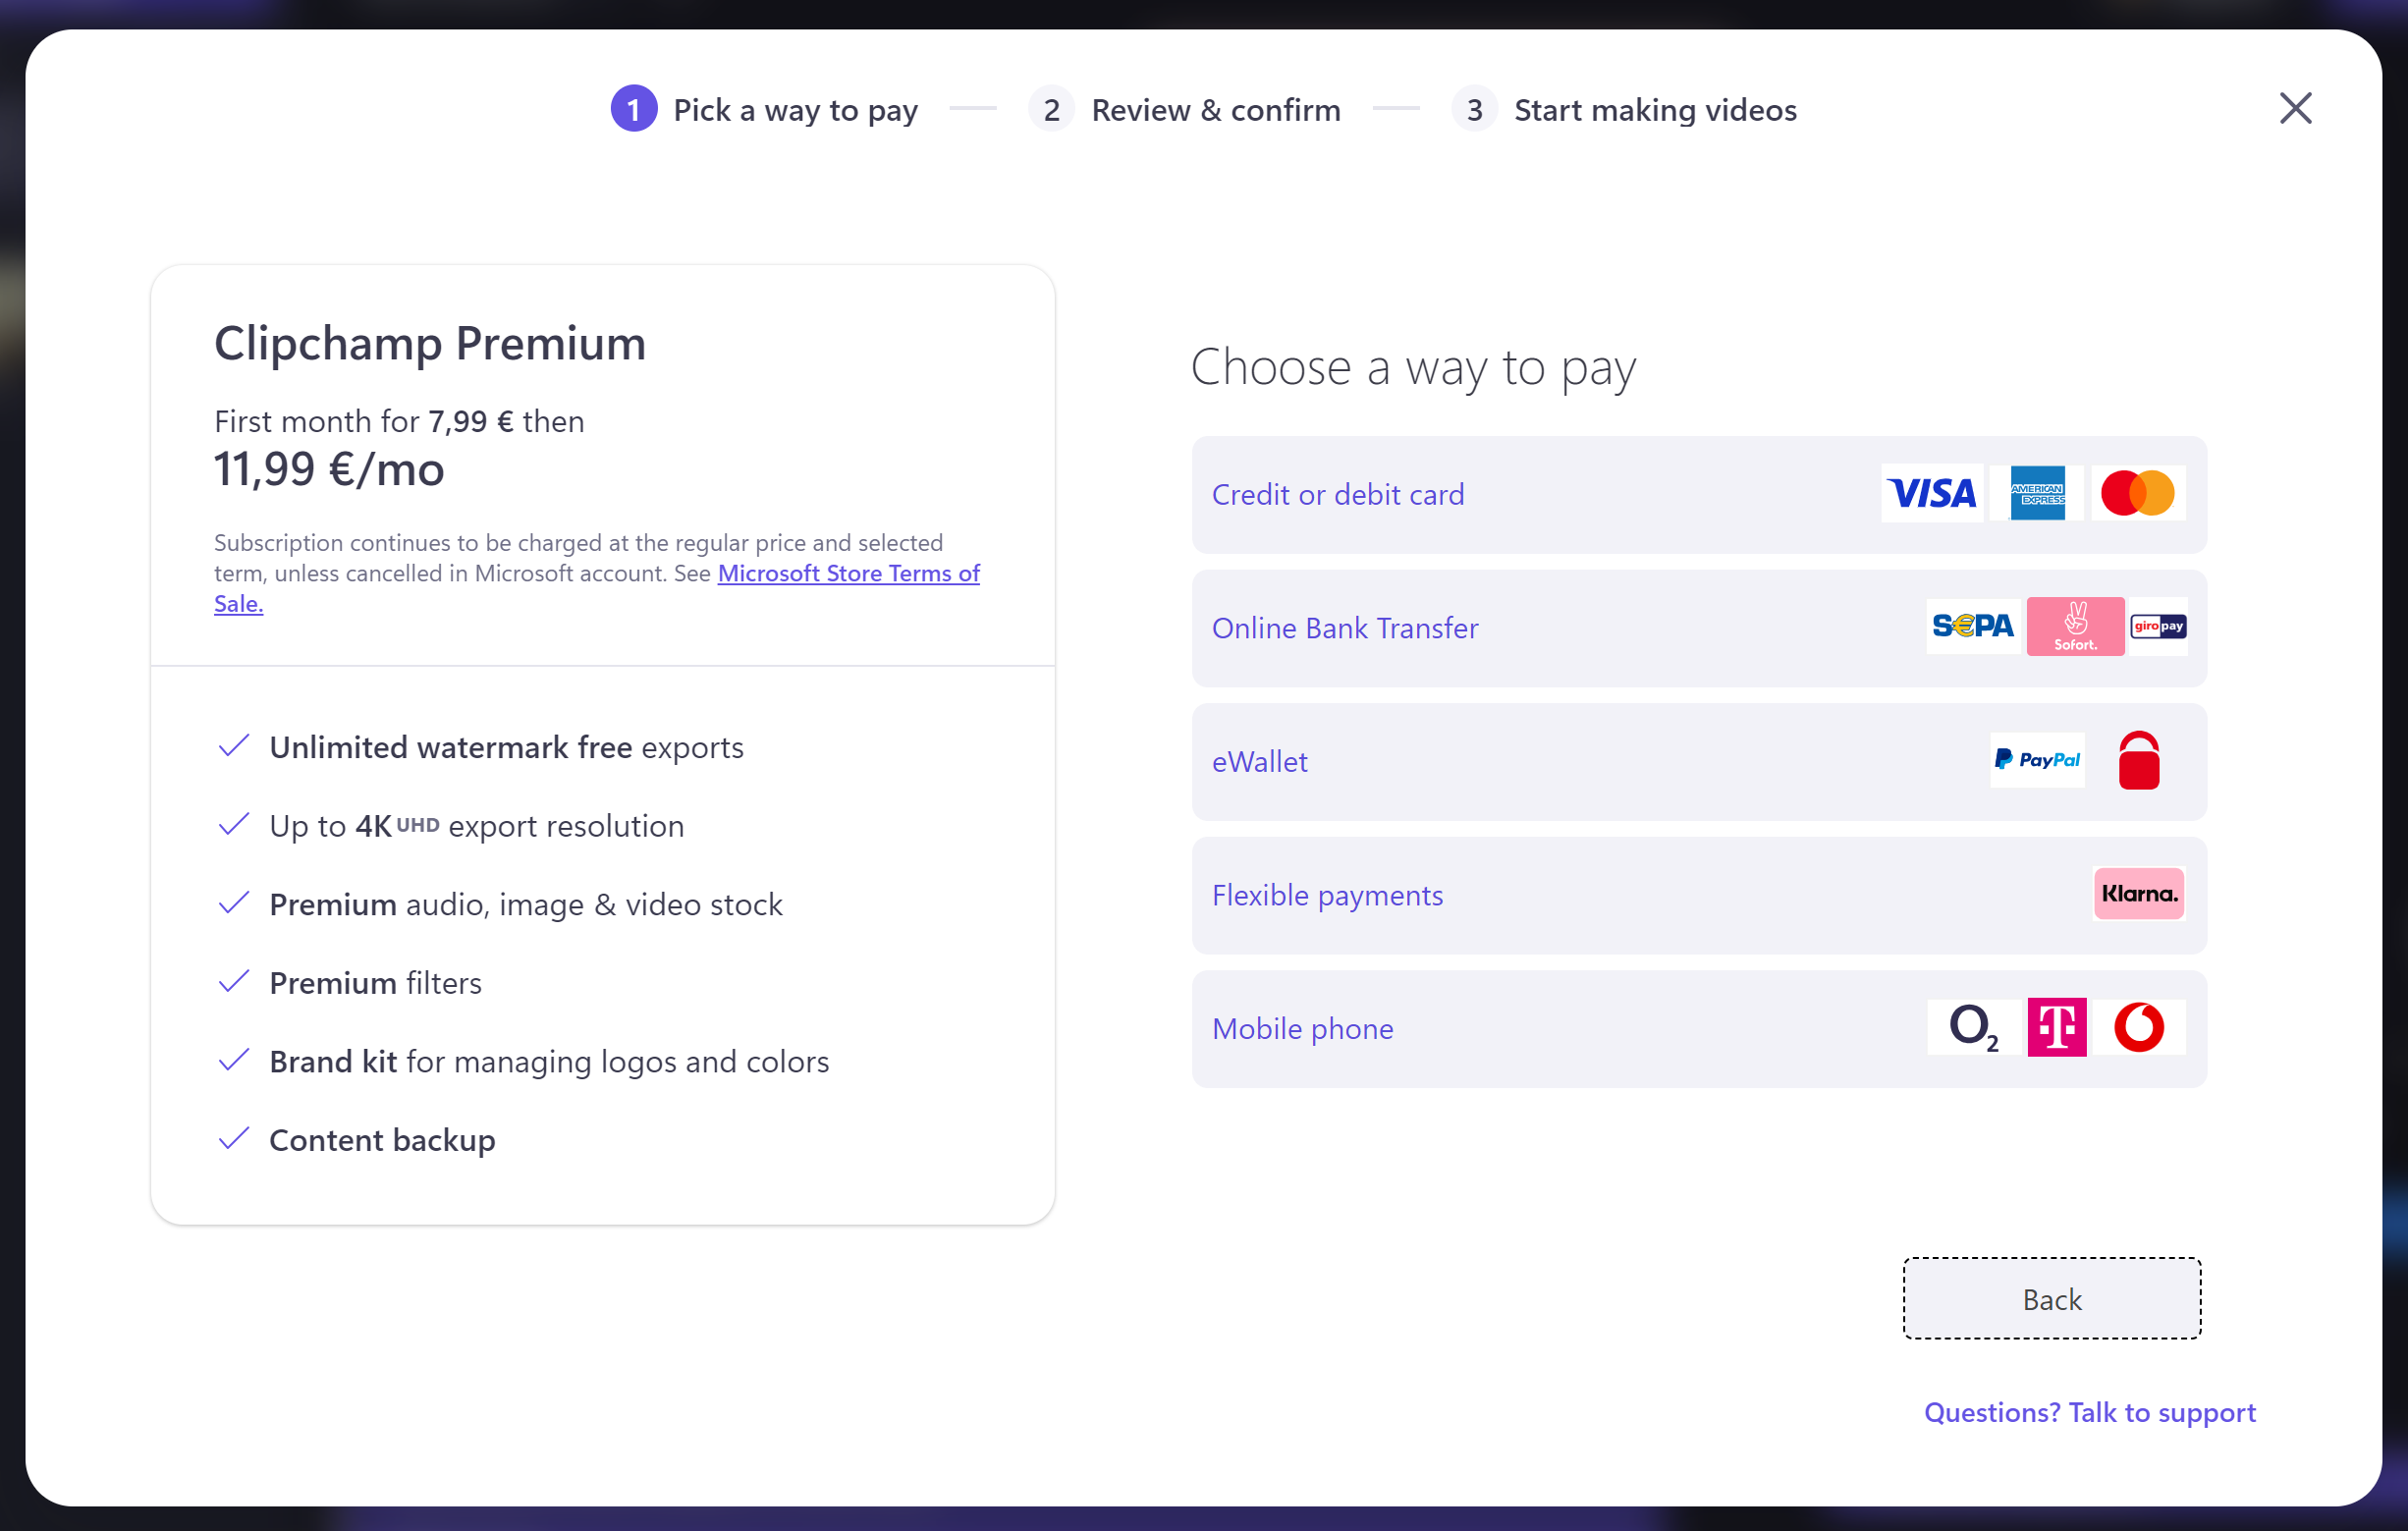
After this, select a payment method. The options available to you depend on the region of your Microsoft account. In our example screenshot, options for Germany are getting shown.
Complete the checkout
After adding account and payment information, select the Buy Now button.
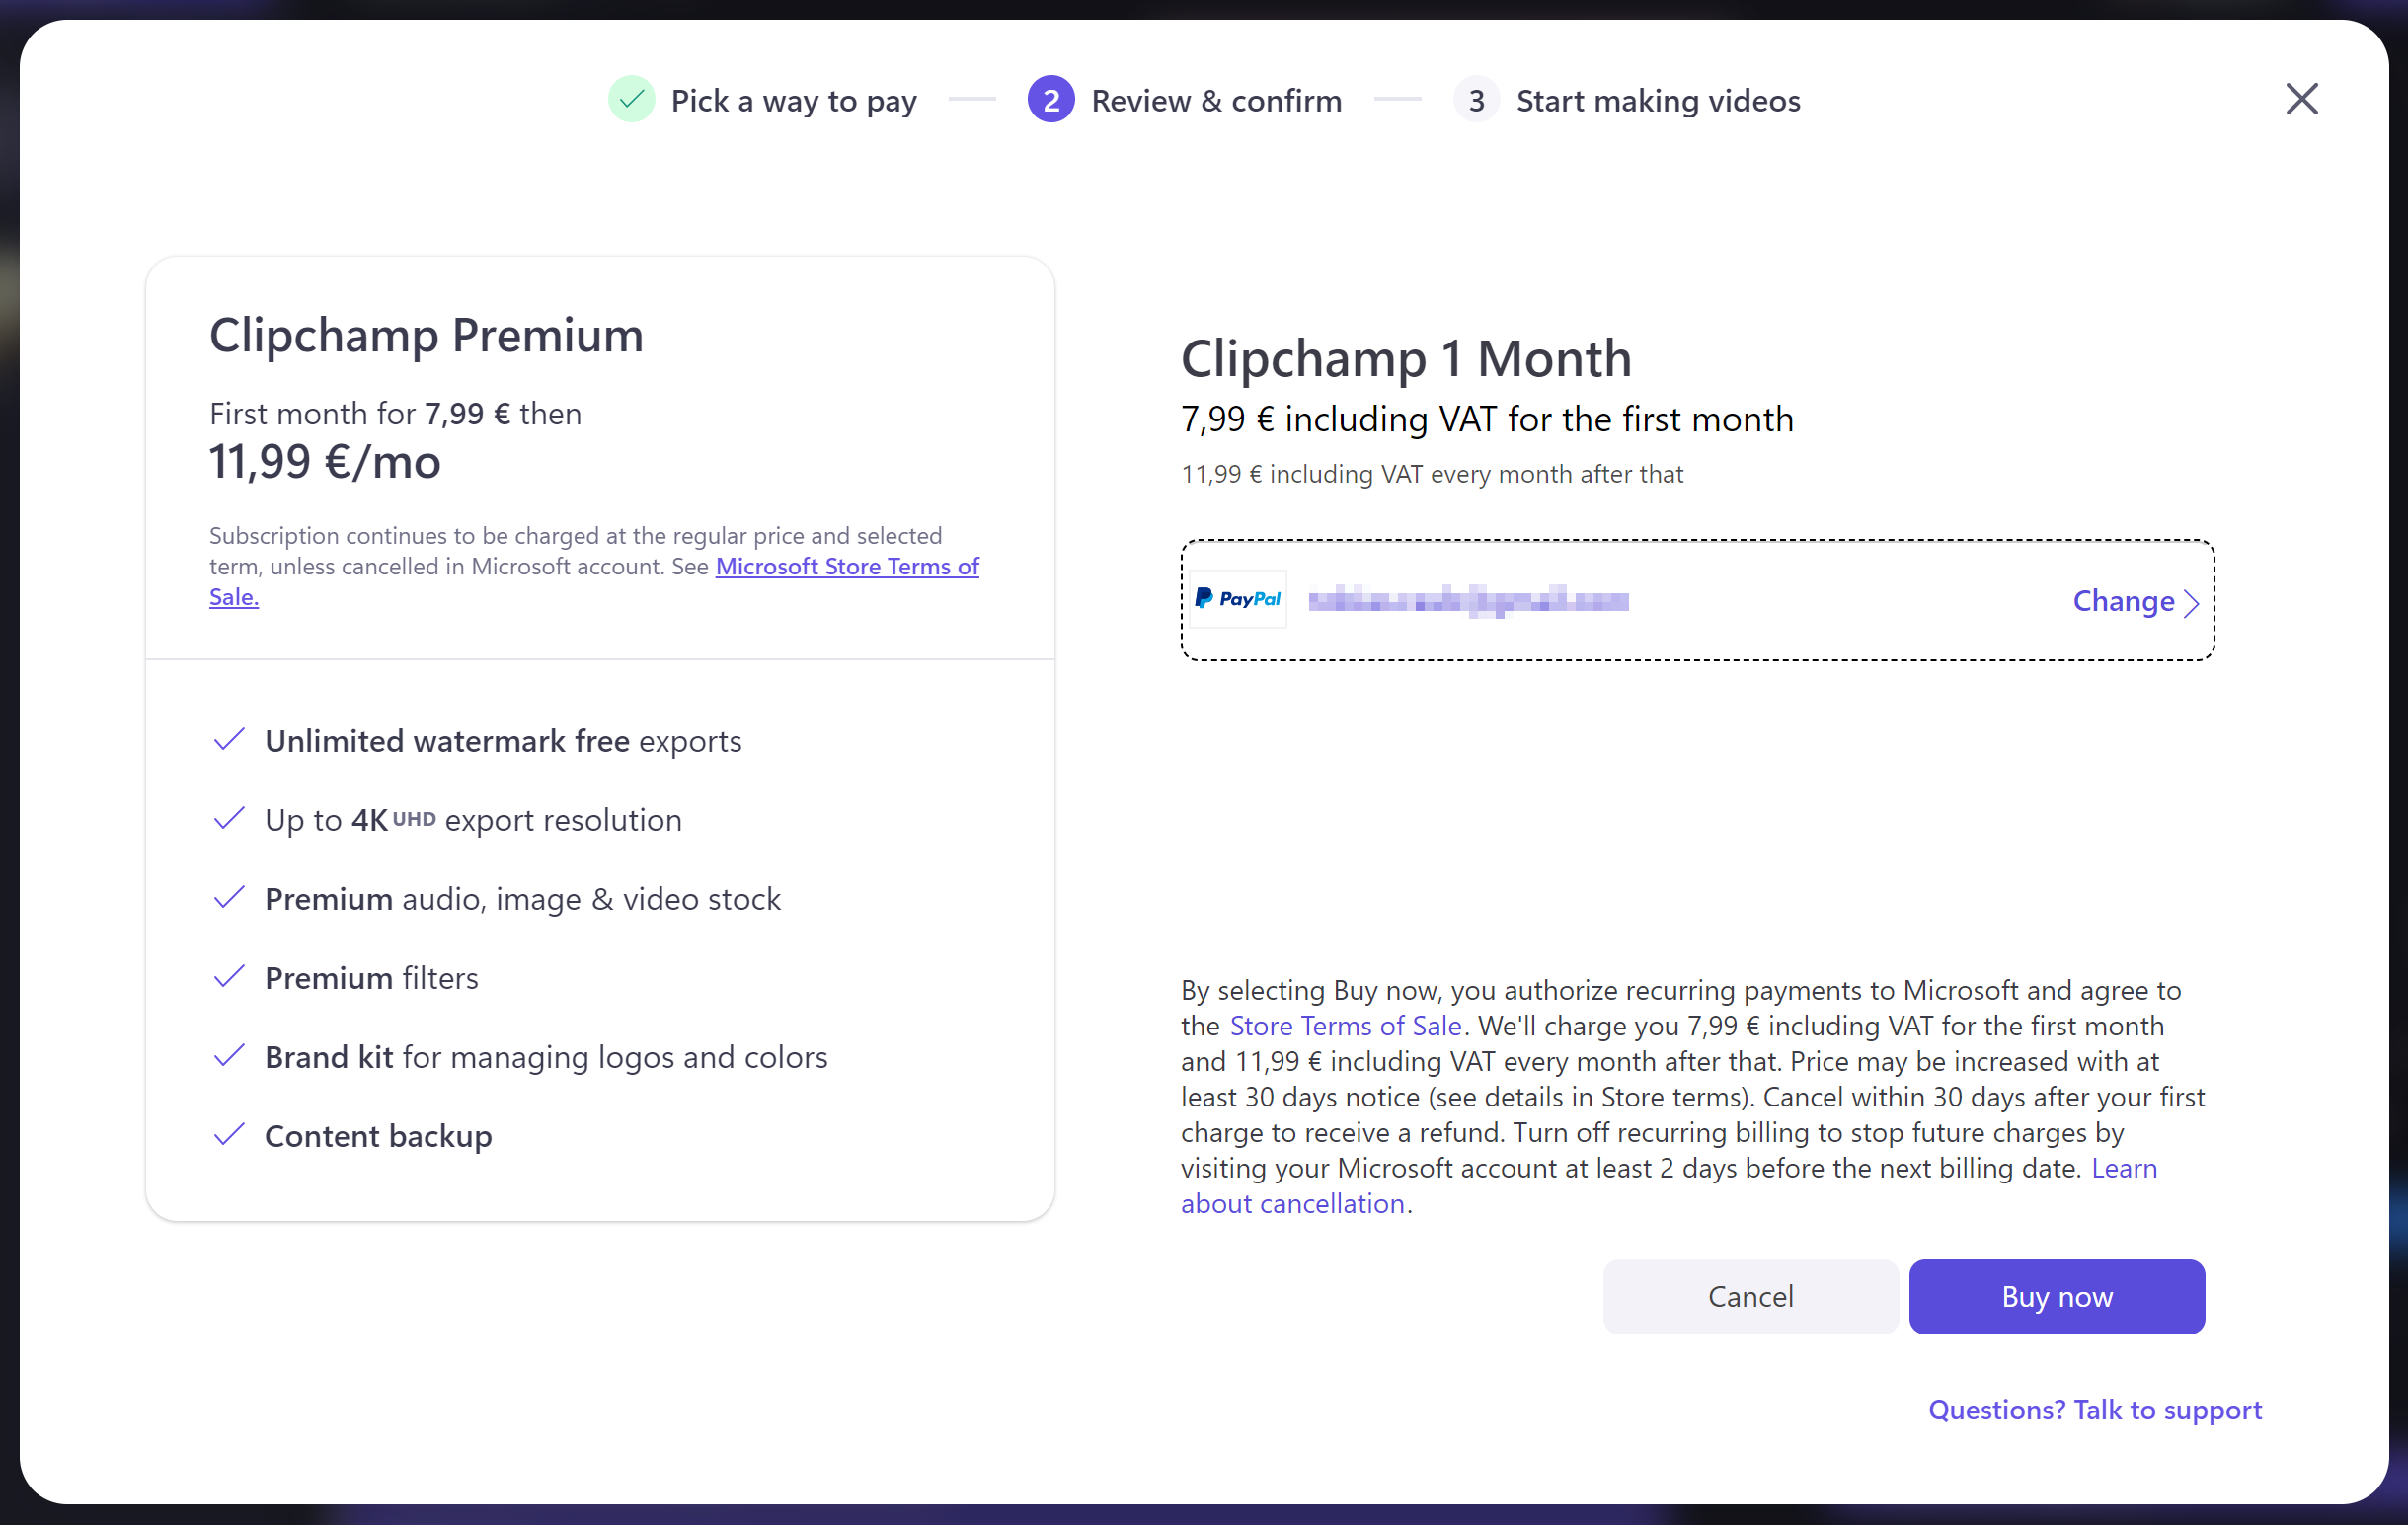
You'll see a success notification and your account is now on the Premium plan.
What happens if I downgrade?
When you cancel your subscription, by default it will stop at the end of the current billing period.
After the end of the billing period, you’ll still have access to all your existing projects, but if they contain premium stock assets, you'll no longer be able to export them. You will also lose access to the content backup feature.
Note: You can manage your Clipchamp subscription in your Microsoft account at https://account.microsoft.com/services. Make sure to log into the correct account that is connected to Clipchamp if you have more than one Microsoft personal or family account. Otherwise, the Clipchamp subscription won't get shown under Services & subscriptions.
How to solve issues during the purchase
If you encounter issues while going through the checkout, there are some steps you can try to solve them.
Open Clipchamp in a browser instead of the Windows desktop app
If you are using the Clipchamp Windows app and there is an error while purchasing the Premium plan, try opening Clipchamp in a browser window (Edge or Chrome) instead.
Go to app.clipchamp.com and log in with your Microsoft login information. Then, select one of the Upgrade buttons and go through the purchasing steps again to see if they succeed.
Log in with your Microsoft account
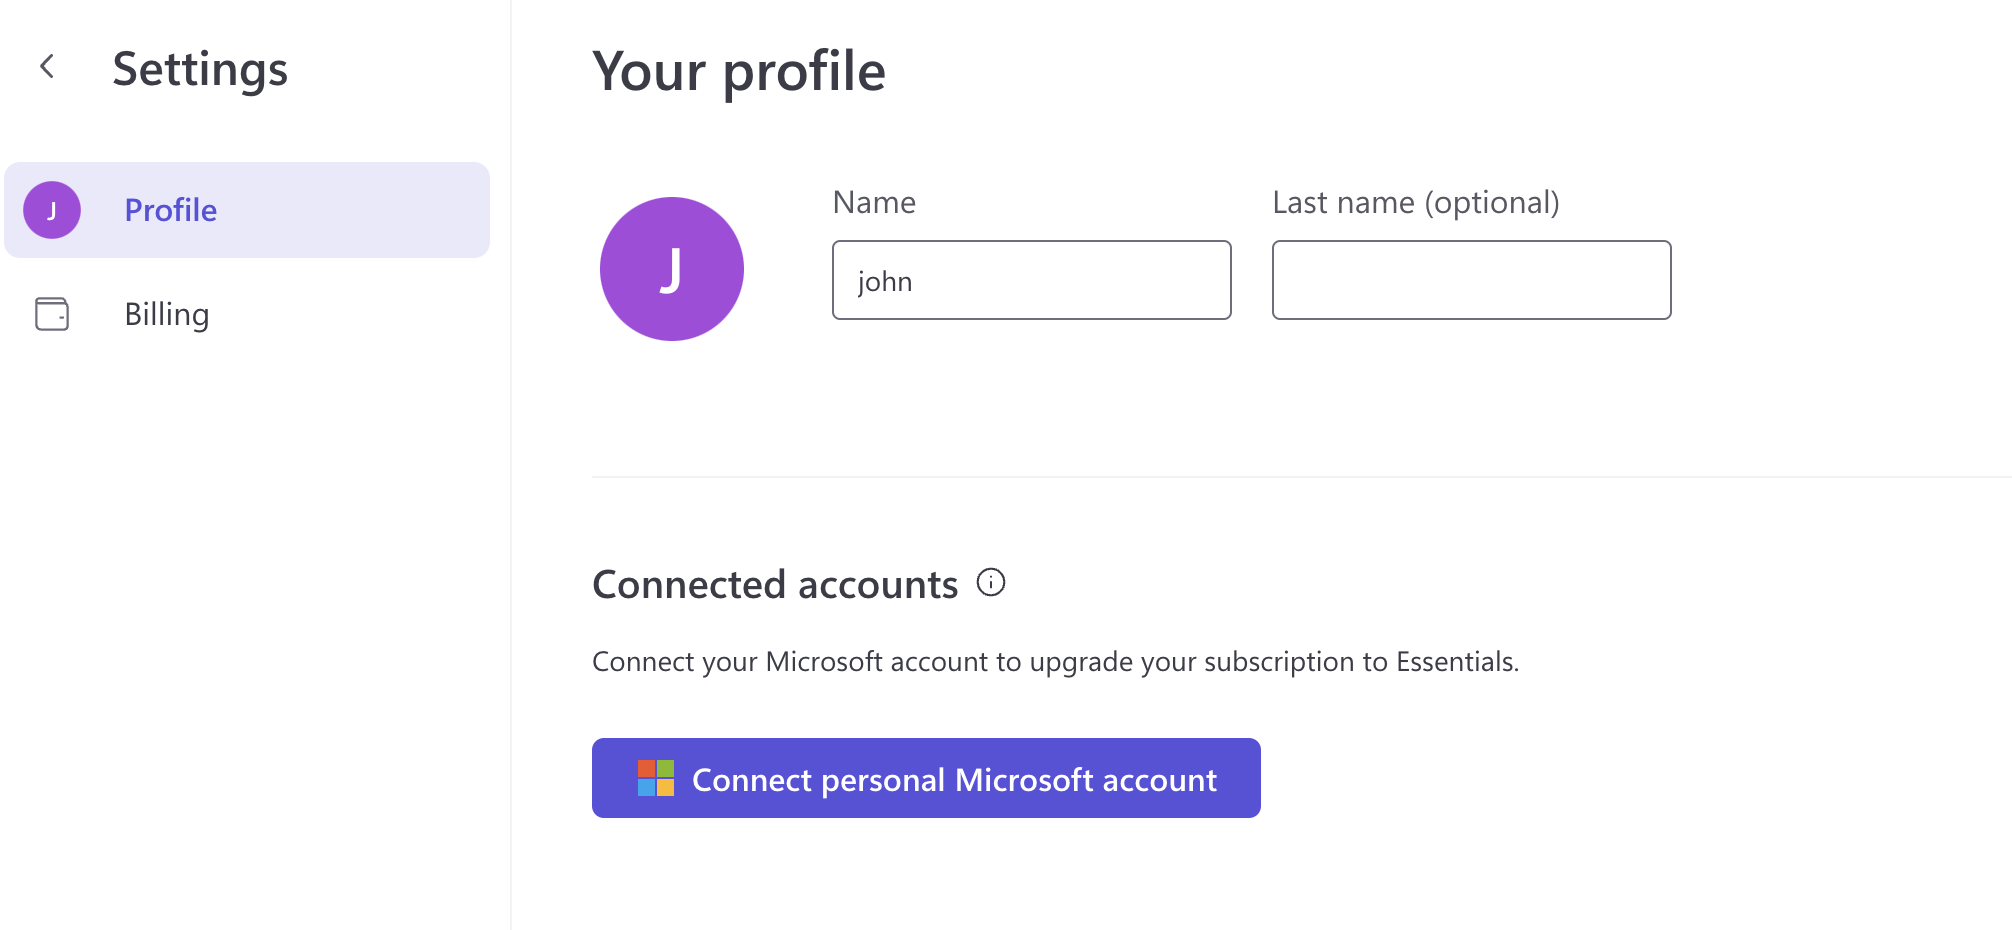
If you haven't connected a Microsoft personal or family account to your Clipchamp account yet, connect one on the Clipchamp settings page.
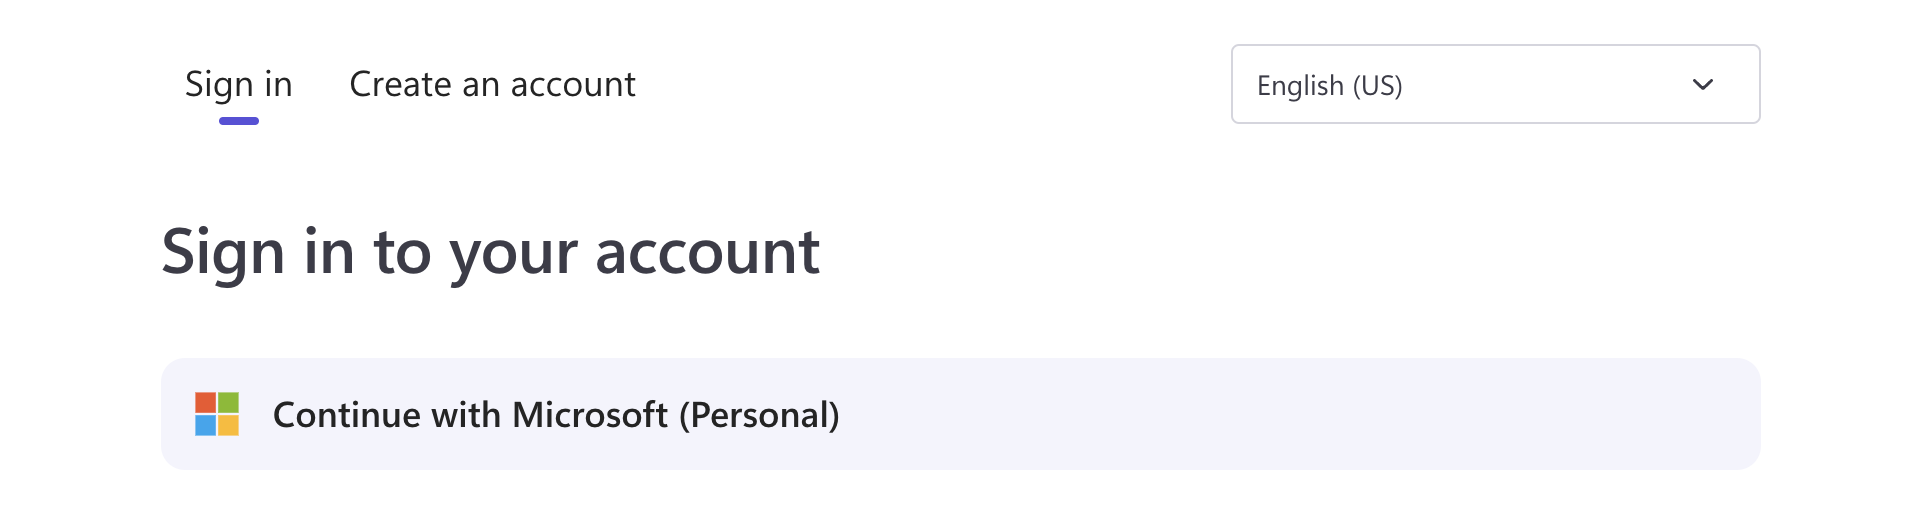
After connecting a personal Microsoft account, log out of all currently active Clipchamp sessions, then log back in using the Continue with Microsoft button at app.clipchamp.com/login.
Then, try the checkout again.
Purchase directly from the Microsoft Store
If neither of the suggestions above work, you can try purchasing the subscription directly from the Microsoft Store at this link.
This will also allow you to select a different purchasing region if required.
Important: Make sure you are signed in with your personal Microsoft account that is connected to your Clipchamp account when you make the purchase from the Microsoft Store.
Troubleshoot purchasing through the Microsoft Store
If you are still facing problems after following the suggestions above and you attempted to buy through the Microsoft Store but this did not succeed, see: Troubleshoot buying issues with Microsoft Store.
You can also contact the Clipchamp support team for additional help.
How to purchase the Premium plan if you're in a different region
When purchasing a subscription in Clipchamp, you will only be able to buy from the region in which you are currently located. For example, if you are based in the United States, you can only purchase a subscription from the US store in USD.
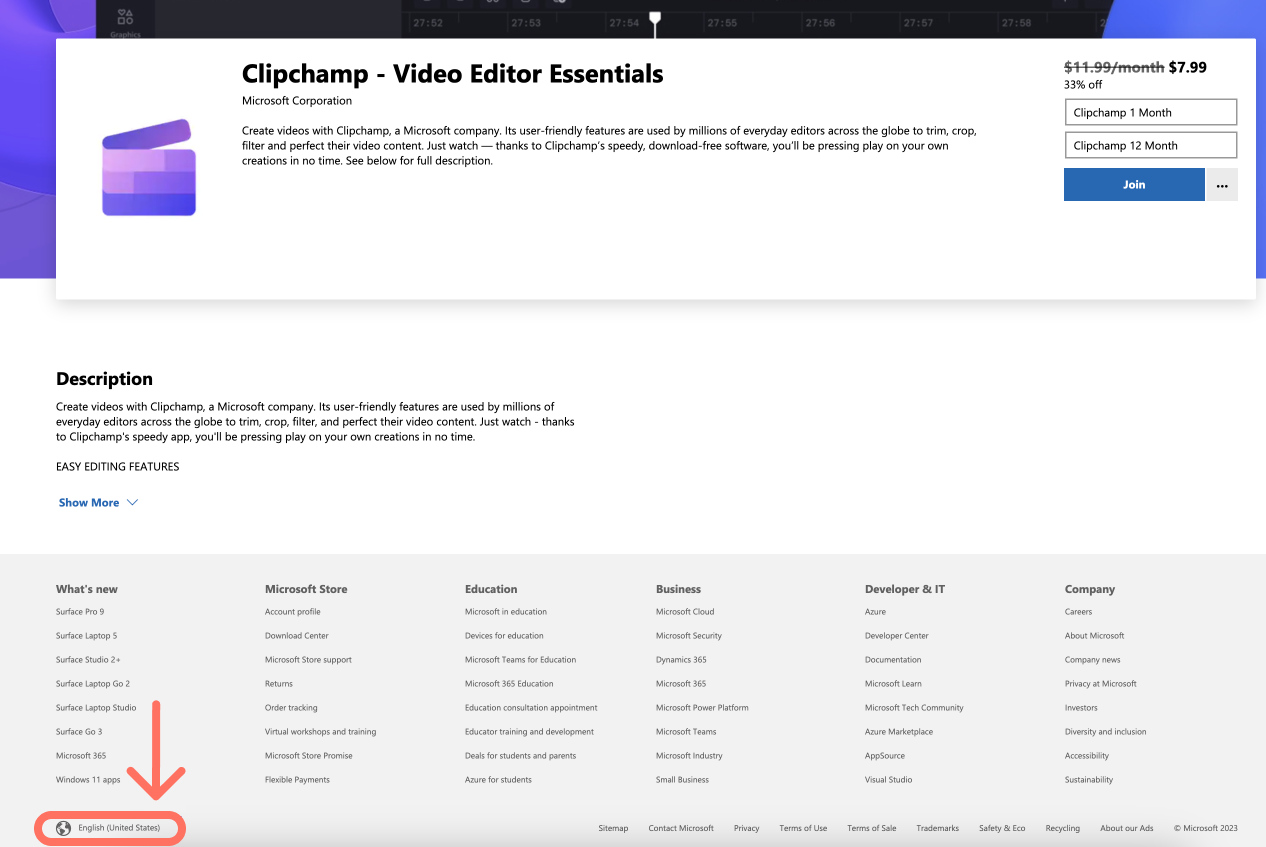
If you would like to purchase Clipchamp from a different store region, for example because you want to use a credit card from another country, you will have to purchase from the Microsoft store directly using this link.
From the Microsoft store, you can change the region from the link at the bottom of the page:
Using a Virtual Private Network (VPN)
Note that if you're using a VPN with Clipchamp, it will affect the default region used when making an in-app purchase. If you have any problems purchasing a subscription from within the app because of the region while you are using a VPN, try purchasing it with the VPN disabled.
How to obtain a receipt
After the initial purchase succeeds, you'll receive a confirmation message at the email address that is connected to your Microsoft account.
To access receipts (invoices, statements) for past and current billing periods for the Clipchamp Premium plan or the plan that is included in your Microsoft 365 subscription, go to your Microsoft account's services & subscriptions page.
You can either access it directly via the link above or you can access it via the billing page of your Clipchamp account where you will see this button:

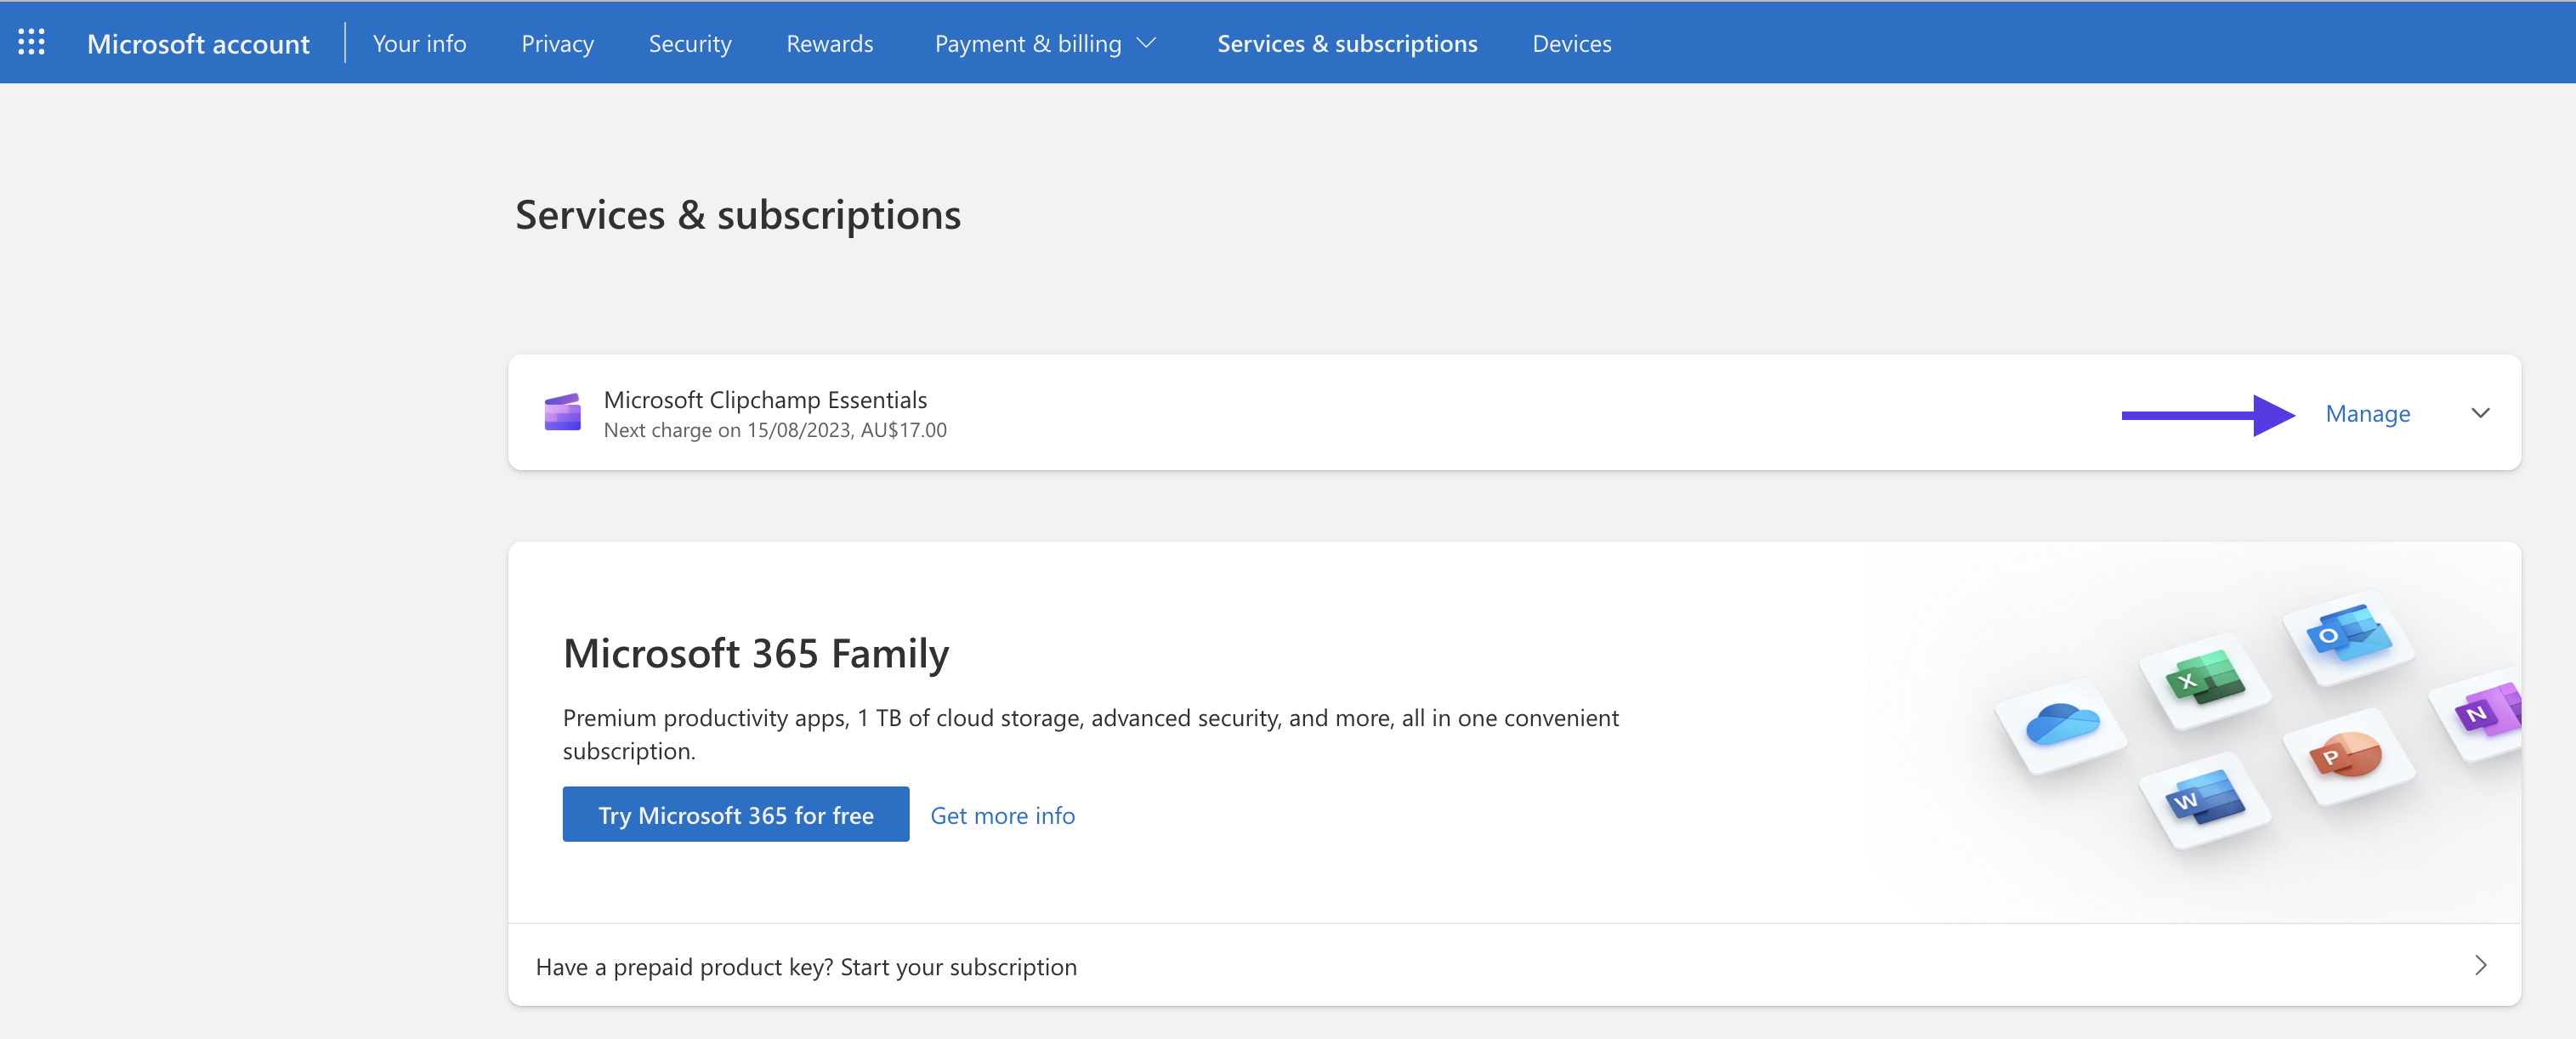
Selecting it will open your Microsoft account in a new browser tab. The Clipchamp subscription will get listed there together with other Microsoft subscriptions you might have in place.
Select Manage on the right side of the Clipchamp entry, then Billing history. Alternatively, select Payment & billing in the menu at the top, then Order history.
Important: Make sure you are signed in with the personal or family Microsoft account that is connected to your Clipchamp account on the paid subscription, otherwise the Clipchamp subscription will not get shown.
How to add, change or remove billing information
To update billing information such as your name, email or address for the Clipchamp Premium plan or the plan that is included in your Microsoft 365 subscription, go to your Microsoft account's services & subscriptions page.
You can either access it directly via the link above or you can access it via the billing page of your Clipchamp account where you will see this button:
Selecting it will open your Microsoft account in a new browser tab where you can adjust settings such as updating your payment method, updating your billing address, downloading invoices, and more.
To find out more, see this article about managing a Microsoft subscription.
Important: Make sure you are signed in with the personal or family Microsoft account that is connected to your Clipchamp account on the paid subscription, otherwise the Clipchamp subscription will not get shown.
If you're not on a paid Clipchamp subscription on the account you're logged in, the Manage Subscription button will not show on your Clipchamp account's billing page and you will see information about the free account tier instead.
How to update the subscription period
If you started a monthly Clipchamp Premium subscription and would like to change it to an annual plan, or vice versa, you can change the subscription period on the Microsoft account page.
Start by signing into your personal or family Microsoft account that you used to purchase your Microsoft Clipchamp subscription.
Next, on the Services & subscriptions page, select the Manage button in the Microsoft Clipchamp subscription tab.
From here, you can change to a different billing period by selecting Switch plan next to the current charging amount.
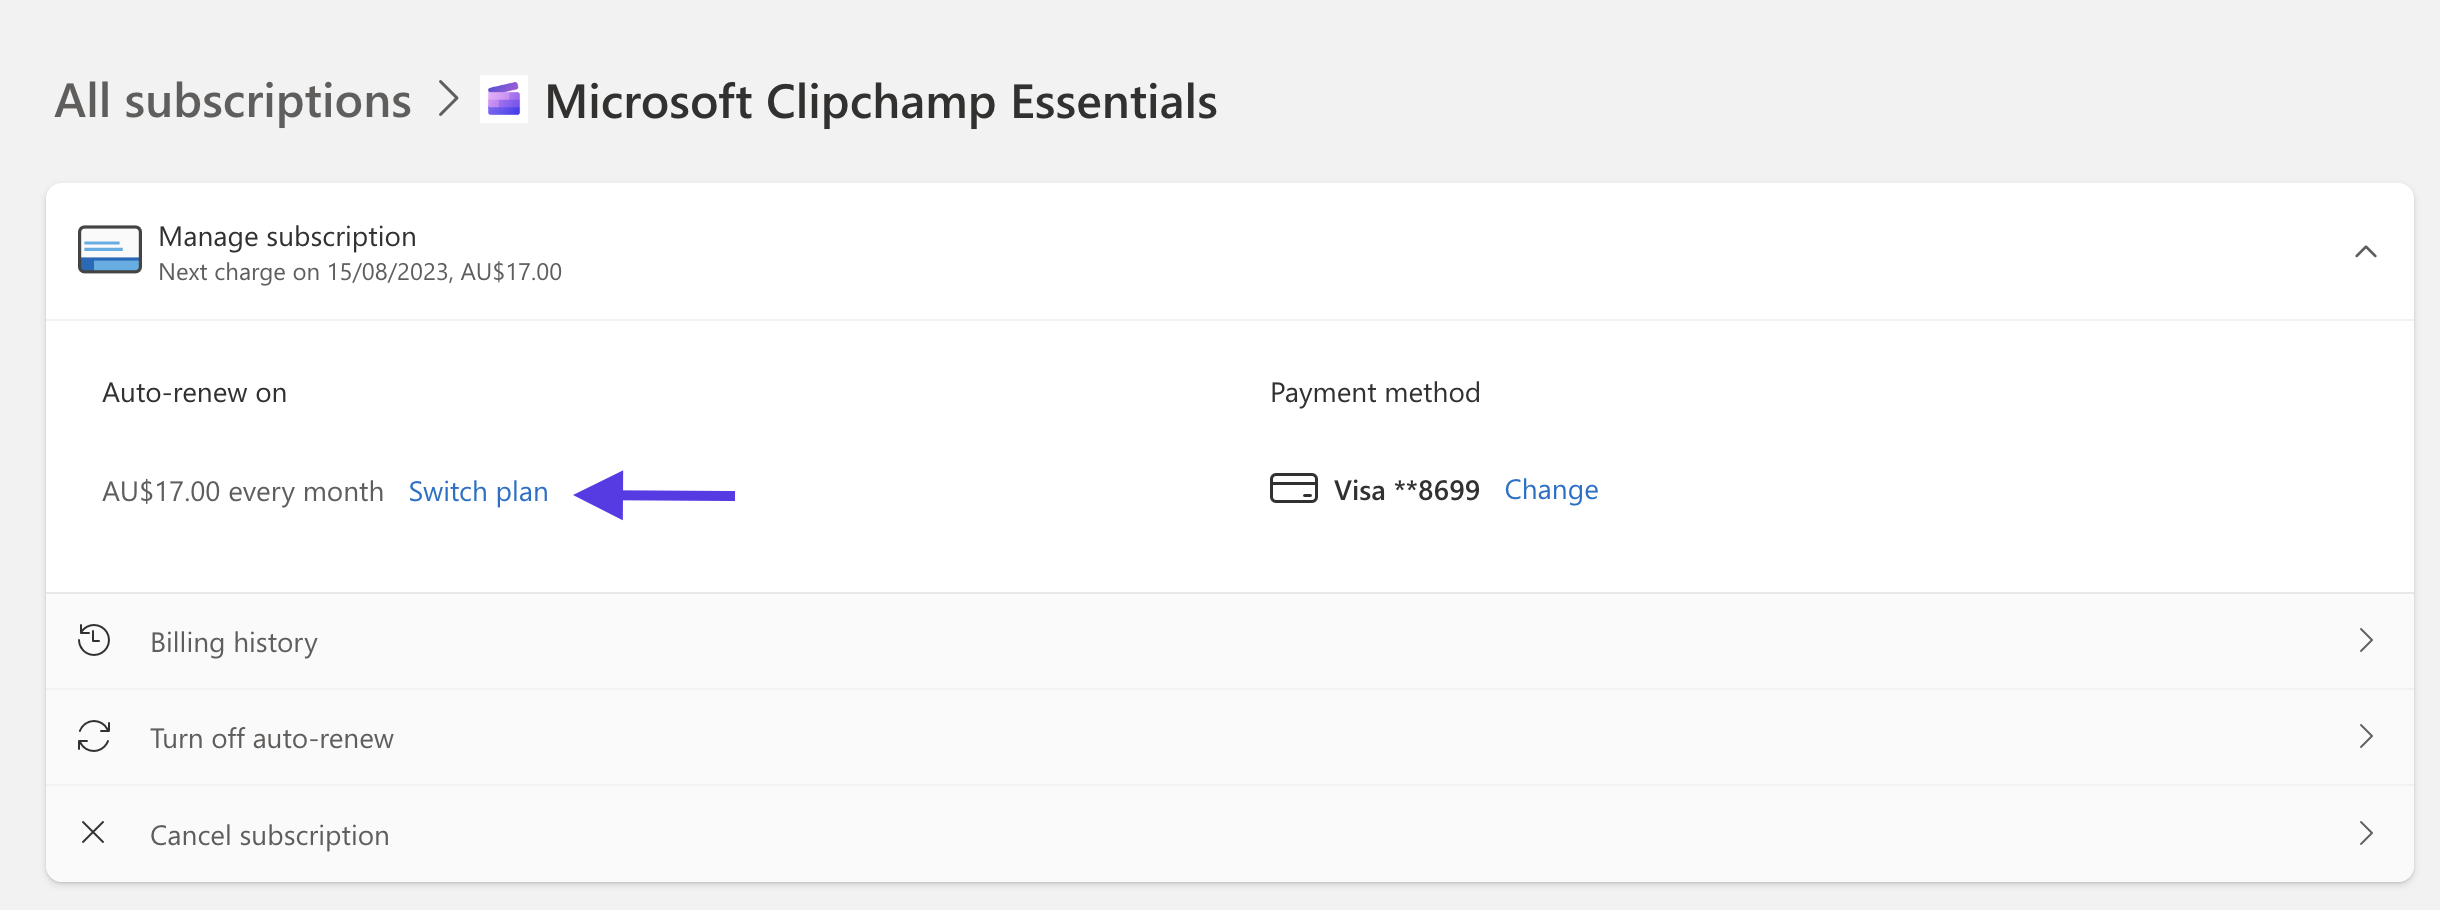
On the next screen, select your desired subscription period.
You can use the above steps to change your Clipchamp Premium subscription from annual to monthly, or monthly to annual.


