The Insert Caption feature in Word makes it easy to systematically add captions to pictures in a document.
In other Office apps, such as PowerPoint, you manually add a text box near the image and then group the text box and image. See the instructions below. If you have multiple pictures in a series, you have to manually number them.
Word
-
Click the picture you want to add a caption to.
-
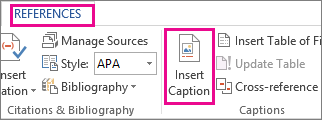
Click References > Insert Caption.
-
To use the default label (Figure), type your caption in the Caption box.
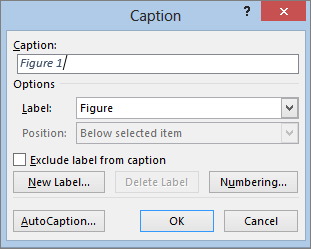
Tip: You can also create your own default caption label by clicking New Label, and then adding your caption in the Label box. Word automatically numbers the new labels for you.
All other Office apps
-
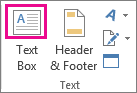
Use Insert > Text Box to draw a box near the picture. (See add a text box for additional details.)
-
Click inside the text box and type the text you want to use for a caption.
-
Select the text. On the Home tab, use the Font options to style the caption as you want.
-
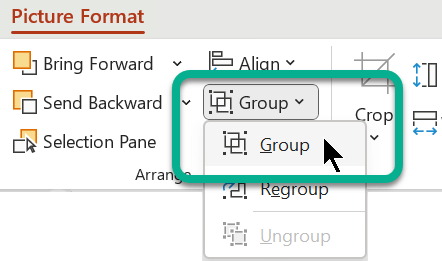
Use Ctrl+click to select the picture and text box, and then on the Picture Format tab, in the Arrange group, select Group > Group.