
Summary
This article describes how to set up the Microsoft Multipath I/O feature for StorSimple volumes in Windows Server 2008 R2.
More Information
Microsoft Multipath I/O (MPIO) is an optional feature. By default, it is not installed in Windows Server. MPIO should be installed as a feature through Server Manager. This article describes the steps that you should follow to install and use the MPIO feature in Windows Server 2008 R2. This article consists of the following sections:
Install MPIO in Windows Server 2008 R2
Configure MPIO for StorSimple volumes
Mount a StorSimple volume in Windows Server 2008 R2
Configure MPIO for HA and load balancing
Install MPIO in Windows Server 2008 R2
To install the MPIO feature in Windows Server 2008 R2, follow these steps.
Note You must restart the server after you follow these steps.
-
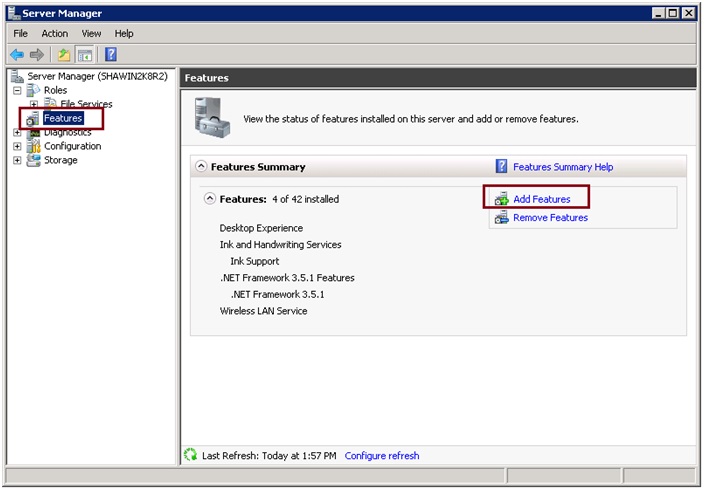
Open Server Manager. To do this, click Start, click Administrative Tools, and then click Server Manager.
-
In Server Manager, click Features, and then click Add Features.
-
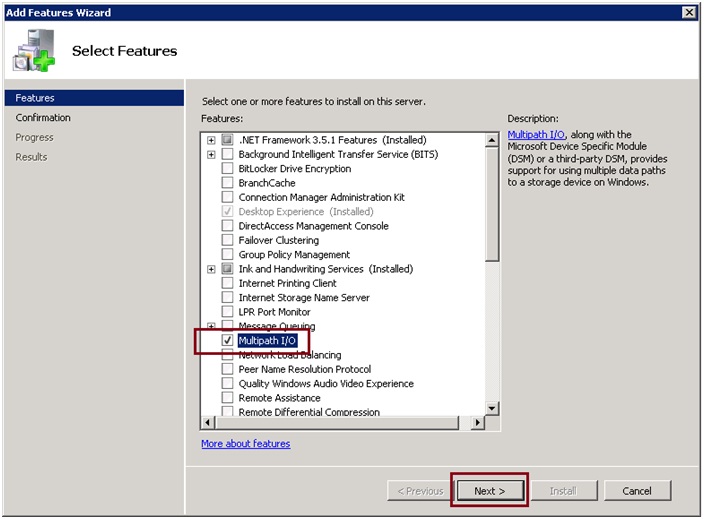
Select the Multipath I/O feature for installation, and then click Next.
-
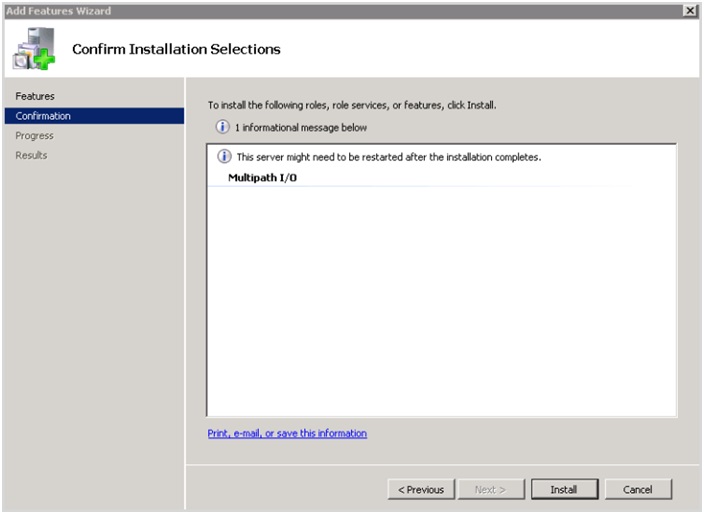
Finish the installation by confirming the selections, and then restart the server.
Configure MPIO for StorSimple volumes
MPIO must be configured to identify StorSimple volumes. To configure MPIO to recognize StorSimple volumes, follow these steps:
-
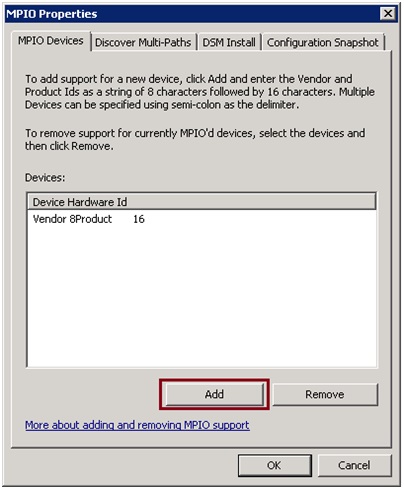
Open the MPIO configuration. To do this, click Start, click Administrative Tools, and then click MPIO.
-
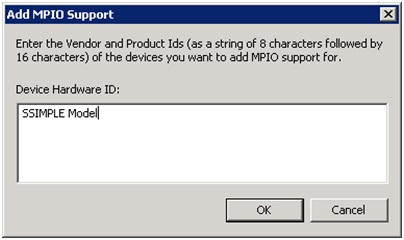
In the MPIO window, click Add on the MPIO Devices tab.
-
Type SSIMPLE Model in the Add MPIO Support window under Device Hardware ID.
-
Restart the server when you are prompted.
Mount a StorSimple volume in Windows Server 2008 R2
After MPIO is configured on the server, volumes that are created on the StorSimple appliance can be mounted and can take advantage of MPIO for redundancy. To mount a volume, follow these steps:
-
Open the iSCSI Initiator Properties dialog box on the server. To do this, click Start, click Administrative Tools, and then click iSCSI Initiator.
-
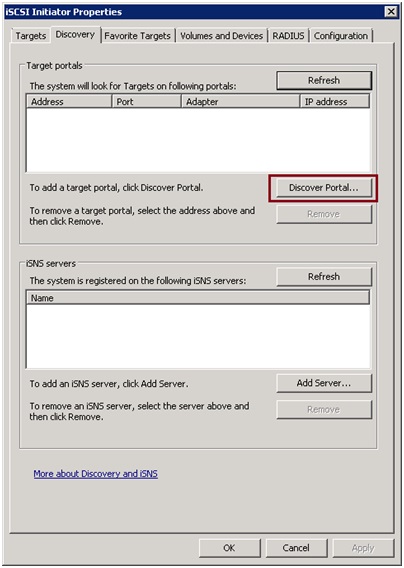
In the iSCSI Initiator Properties dialog box, click the Discovery tab, and then click Discover Portal.
-
Type the IP address of the "DATA" port on the StorSimple appliance.
Note If you use a private network for iSCSI connections, type the IP address of the DATA port that is connected to the private network. -
Click the Targets tab in the iSCSI Initiator Properties dialog box. This displays the StorSimple appliance iSCSI qualified name (IQN) in the Discovered Targets section.
-
Click Connect to establish the iSCSI session with the StorSimple appliance. In the Connect To Target dialog box, click to select the Enable multi-path check box.
-
Open Server Manager. To do this, click Start, click Administrative Tools, and then click Server Manager.
-
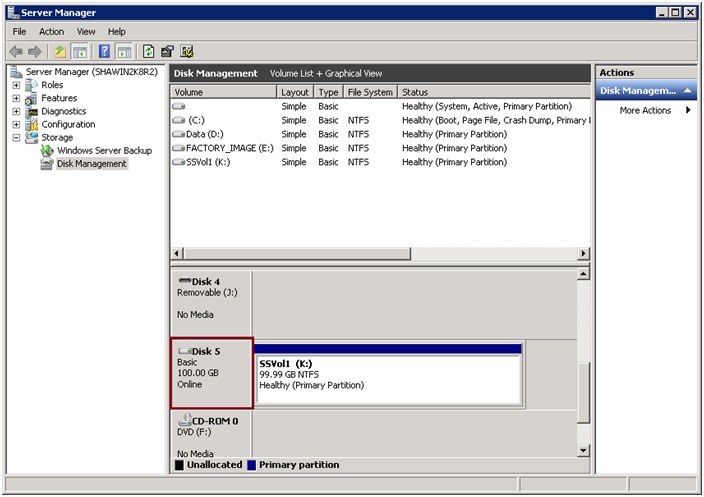
In Server Manager, click Storage, and then click Disk Management. Volumes that are created on the StorSimple appliance and that are visible to this server appear under Disk Management as new disks.
-
Initialize the disk and create a new volume. During the format process, select a block size of 64 kilobytes (KB).
-
Under Disk Management, right-click the disk, and then click Properties.

-
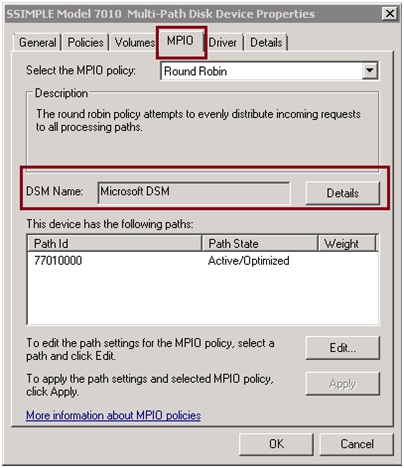
In the SSIMPLE Model #### Multi-Path Disk Device Properties dialog box, click the MPIO tab, click Details in the DSM Name section, and then verify that the parameters are set to the default parameters.
Note Do not change the default parameters.
Default parameters:-
Path Verify Period = 30
-
Retry Count = 3
-
PDO Remove Period = 20
-
Retry Interval = 1
-
Path Verify Enabled = Unchecked
-
Configure MPIO for HA and load balancing
Note For load balancing and high availability (HA), use a separate IP subnet for each host interface and StorSimple DATA interface pair that is configured. When multiple subnets are not an option, you can still configure multiple interfaces on the same subnet for high-availability only purposes.
For multipath-based HA and for load balancing, multiple sessions must be manually added to declare the different paths that are available. For example, if the host has two interfaces that are connected to the storage area network (SAN), and if the appliance has two interfaces that are connected to the SAN, four sessions are needed and have to be configured by using correct path permutations.
To add sessions when an appliance that has two network adapters is connected to a host that has two network adapters, follow these steps:
-
Perform a discovery of the target. In the iSCSI Initiator Properties dialog box, on the Discovery tab, click Discover Portal. This displays the Connect to Target dialog box.
-
Supply the IP address of one of the appliance interfaces.
-
Click OK to return to the iSCSI Initiator Properties dialog box.
-
In the iSCSI Initiator Properties dialog box, under the Targets tab, highlight the discovered target, and then click Connect. This displays the Connect to Target dialog box.
-
In the Connect to Target dialog box, take the following actions:
-
Leave the default selected target setting for Add this connection to the list of favorite targets. This makes the system automatically try to restart the connection every time that the computer restarts.
-
Click to select the Enable multi-path check box.
-
Click Advanced to open the Advanced Settings dialog box.
-
-
In the Advanced Settings dialog box, take the following actions:
-
From the Local Adapter dropdown list, select Microsoft iSCSI Initiator.
-
For the Initiator IP, select the IP address of the host.
-
For the Target Portal IP, supply the IP of appliance interface.
-
Click OK.
-
-
Click OK to return to the iSCSI Initiator Properties dialog box.
-
Click Properties. In the Properties dialog box that is displayed, click Add Session.
-
In the Connect to Target dialog box, take the following actions:
-
Select Enable multi-path.
-
Click Advanced.
-
-
In the Advanced Settings dialog box, take the following actions:
-
In the Local adapter dropdown list, select Microsoft iSCSI Initiator.
-
For Initiator IP, select the IP address that corresponds to the second interface on the host.
-
For Target Portal IP, select the IP address for the second data interface that is enabled on the appliance.
-
Click OK to return to iSCSI Initiator Properties dialog box. You have added a second session to the target.
-
-
Repeat Steps 8 through 10 to add more sessions (paths) to the target. With two interfaces on the host and two on the appliance, a total of four sessions can be added.
After you add the desired sessions (paths), select the target in the iSCSI Initiator Properties dialog box, and then click Properties to display the dialog box. On the Sessions tab, notice the four session identifiers that correspond to all the possible path permutations. To cancel a session, click to select the check box next to a session identifier, and then click Disconnect. -
To view devices that are presented within sessions, click the Devices tab.
-
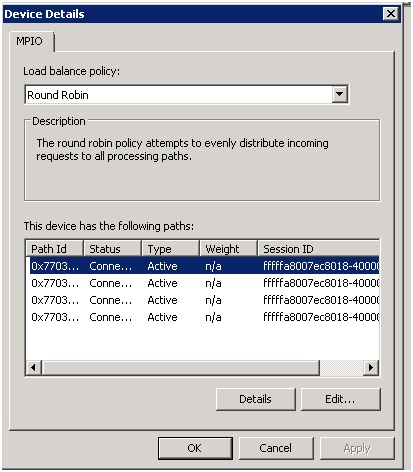
To configure the MPIO policy for a selected device, click MPIO. This displays the Device Details dialog box.
-
On the MPIO tab, you can select the appropriate Load Balance Policy settings. You can also see whether the path type is Active or Standby.


