With Microsoft PowerPoint, Word, Outlook, or Excel, you can easily change the outline of a photo by turning it into a shape like a circle or a rounded rectangle. The Crop to Shape feature provides options for cropping an image to a specific shape or starting with a shape and then inserting an image within it.
This article applies to steps you can use to crop images in different Microsoft 365 applications. You can use the same steps in PowerPoint, Word, Outlook, and Excel.
Crop an image to a shape
When you crop a picture to a certain shape, it'll change size to match that shape while keeping its proportions the same.

-
Add an image to your Microsoft 365 file, like a PowerPoint presentation or Word document, by selecting Insert from the ribbon > Picture. There'll be different options for you to choose where to get your image.
Tip: If you want to crop the same picture into multiple shapes, first create copies of the original picture. Then, crop each copy into the shape you want.
-
After inserting the image, you'll see the Picture Format tab in the ribbon. You can select multiple pictures and crop them all at the same time. However, all the pictures will be in the same shape.
Note: Multi-cropping in Word can be difficult, because you can't select multiple pictures that have the default In Line with Text layout option.
-
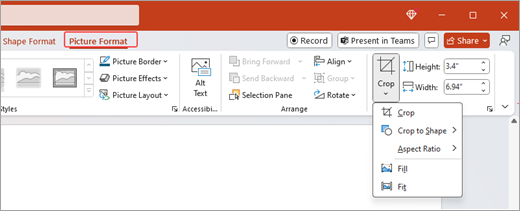
In the ribbon, go to Picture Format and select the arrow under Crop .

-
Customize your image:
-
To change the shape, select Crop Shape. The shape is immediately applied to your image.
-
If you want to fill the entire shape with the picture, select Crop > Fill. Some outer edges of the picture might be cropped away. There won't be any empty space at the margins of the shape.
-
To make the entire picture fit within the shape, select Crop > Fit. There might be some empty space at the margins of the shape.
Note: When you select Fill or Fit, black crop handles appear on the edges and corners of the picture.
-
-
Select the picture and drag it it to adjust the position of the picture within the frame. This can help you center the most important part of the picture within the shape.
-
Crop the margins of the image by dragging the black crop handles inward. If you drag one of the corner handles, it crops two adjacent sides at the same time. To crop evenly on two parallel sides at the same time, hold the Ctrl key and drag inwards on the side cropping handle.
-
Select Crop when you're done.
Start with a shape and add an image
A picture can be used to fill a shape, and the shape can then be edited or cropped.
Add a picture to a shape
-
Add a shape to your Microsoft 365 file by selecting Insert from the ribbon > Shapes. Then select a shape from the gallery. For more info, see Add shapes.
-
After inserting the image, you'll see the Shape Format tab in the ribbon.
-
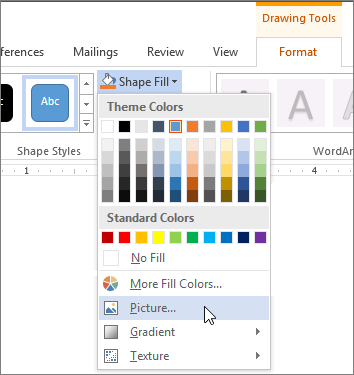
Go to Shape Format, and select Shape Fill > Picture.

-
Select your image. There'll be different options for you to choose where to get your image.
-
After you select the image, it's automatically added to the shape.
Resize the shape
To change the filled shape's dimensions while maintaining its basic format, select it and drag any of the sizing handles.
How to fit a picture in a shape
If your picture is skewed, cut off, or doesn't fill the shape the way you want, you can fine-tune it with the Fit and Fill tools on the Crop menu.
-
Select the shape that you want to edit in your Microsoft 365 file. Then go to Picture Format on the ribbon.
-
Select the arrow under Crop to customize your shape. To resize the picture so the entire picture area is filled, select Crop > Fill. To resize the picture so it shows in the frame and keeps its original shape, select Crop > Fit.
-
Adjust the crop area by using the cropping handles. See Crop a picture.
-
When you're finished, press Esc or select anywhere outside the picture to submit changes.
Use edit points to edit or crop a shape
While cropping tools are not available for shapes, you can use the Edit Points tool to customize a shape.
-
Select the shape that you want to edit in your Microsoft 365 file.
-
Select Shape Format, and then select Edit Shape

-
Drag the black dots (vertex points) until the shape looks the way you want.
-
To delete a vertex point, hold Ctrl and select it. To add a vertex point, hold Ctrl while selecting anywhere on the shape's perimeter that doesn't already have a vertex point.
See Also
This article applies to steps you can use to crop images in different Microsoft 365 applications. You can use the same steps in PowerPoint, Word, and Excel.
Crop an image to a shape
When you crop a picture to a certain shape, it'll change size to match that shape while keeping its proportions the same. If you want to crop the same picture to more than one shape, make copies of the picture and crop each to the desired shape individually.
-
Add an image to your Office file like a PowerPoint presentation or Word document by selecting Insert > Pictures.
-
After inserting the image, you'll see the Picture Format tab in the ribbon.
-
On the Picture Format tab, select the arrow next to Crop .
-
Go to Crop to Shape and then select the shape from the available options. The shape is immediately applied to the image.
-
Adjust the shape using the cropping handles. Select Crop and black crop handles appear on the edges and corners of the picture. To crop the image, drag one of the crop handles inward. If you drag one of the corner handles, it crops two adjacent sides at the same time.

How to fit or fill a picture in shape
After you have added a picture to a shape, you can choose how the picture fits in the shape by using the Fit and Fill tools for fine-tuning.
-
Select the shape you want to edit in your Microsoft 365 file. Then go to Picture Format tab on the ribbon > Crop.
-
Select the arrow under Crop to customize your shape. To resize the picture so the entire picture area is filled, select Crop > Fill. To resize the picture so it shows in the frame and keeps its original shape, select Crop > Fit.
-
When you're finished, select anywhere outside the picture to submit changes.
Learn how to crop an image into a shape in Microsoft Office applications, like Word and PowerPoint.
How to fit a picture inside a shape in Word
The web version of Word doesn't include the crop-to-shape capability found in the desktop application. However, you can still use quick Picture Styles to apply some basic shapes to a picture.
-
Add an image to your Word document by selecting Insert from the ribbon > Picture. There'll be different options for you to choose where to get your image.
-
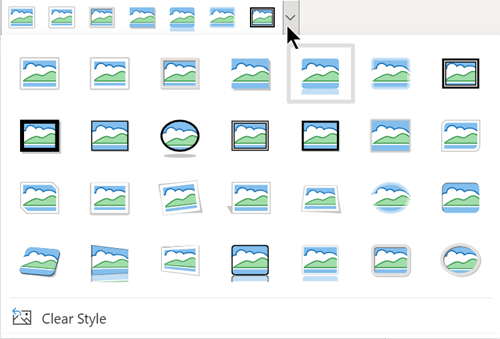
After inserting the image, you'll see the Picture tab in the ribbon. Then go to the Picture Styles.

-
Select a shape and apply it to your picture.
-
You can adjust the crop area by using the cropping handles.
Crop a picture to a shape in PowerPoint
-
Add an image to your PowerPoint presentation by selecting Insert from the ribbon > Pictures. There'll be different options for you to choose where to get your image.
-
After inserting the image, you'll see the Picture tab in the ribbon.
-
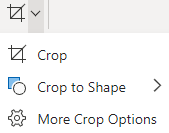
Select the arrow next to Crop.

-
Select Crop to Shape, to apply a shape to the border of the picture.
-
Crop the margins of the picture, select Crop > More Crop Options , then drag the black crop handles inward. If you drag one of the corner handles, it crops two adjacent sides at the same time.
-
Select the Crop button or press Esc to save changes.


