
Når du tilføjer en moderne side til et websted, tilføjer og tilpasser du webdele, der er byggeblokkene på din side. I denne artikel beskrives webdelen Hurtige links.
Bemærk
Nogle af funktionerne introduceres gradvist til organisationer, der har tilmeldt sig programmet Targeted Release. Det betyder, at du muligvis ikke kan se denne funktion endnu, eller at den muligvis ser anderledes ud end det, der beskrives i hjælpeartiklerne.
Med Hurtige links kan du "fastgøre" elementer til din side for at få nem adgang til dem.

Hvad vil du gerne gøre?
Tilføj webdelen Hurtige links
Hvis din side ikke allerede er i redigeringstilstand, skal du vælge Rediger øverst til højre på siden. Find
 til højre.
Vælg Se alle webdele, og vælg eller træk og slip derefter Hurtige links fra listen over webdele.
Overskriv titlen på Hurtige links for at tilføje din egen titel.
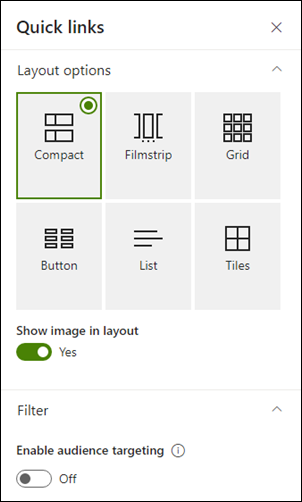
Vælg layoutindstillingerne over hurtige links for at vælge dit layout.
Vælg Rediger egenskaber
 for at få adgang til flere indstillinger for det valgte layout. Hvert layout har forskellige indstillinger. Du kan f.eks. vælge Vis billede i layout for layoutet Kompakt , og du kan vælge Vis beskrivelser af liste - og knaplayout .
Her er en sammenligning af, hvordan hvert layout ser ud:
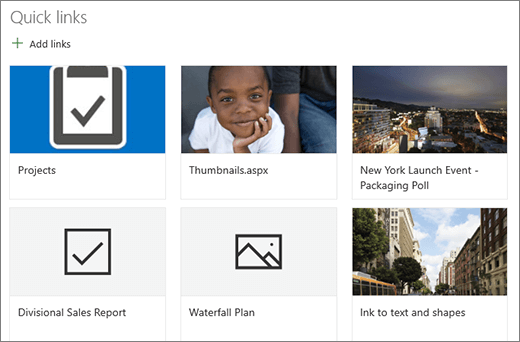
Kompakt
Det kompakte layout er designet til at vise ikoner på 48 x 48 pixel.
Filmklip

Layoutet Filmstrip er designet til at vise billeder med en bredde på 212 til 286 pixel med et højde-bredde-forhold på 9/16, hvor højden er 9, og bredden er 16.
Gitter
Kun SharePoint
Knap
Kun SharePoint

Liste
Kun SharePoint

Fliser
Kun SharePoint

Tilføj links
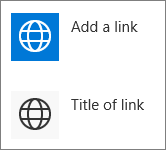
Vælg + Tilføj links.
Vælg en af de seneste filer, eller hent en fil eller et billede fra en af følgende placeringer:
Stockbilleder leveret af Microsoft
Et websted
Din OneDrive-konto
Din computer
Et link
Hvis din organisation har angivet et sæt godkendte afbildninger, kan du vælge mellem dette sæt under Din organisation.

Bemærk
- Websøgning bruger Bing-billeder, der anvender Creative Common-licensen. Du er ansvarlig for at gennemgå licenser til et billede, før du indsætter det på din side.
- Hvis du er SharePoint-administrator og vil lære, hvordan du opretter et aktivbibliotek for din organisation, skal du se Opret et bibliotek over organisationsaktiver.
- Hvis du er SharePoint-administrator, anbefaler vi, at du aktiverer et netværk til levering af indhold (CDN) for at forbedre ydeevnen for hentning af billeder. Få mere at vide om CDN'er.
Vælg dit billede, din side eller dit dokument, og vælg Indsæt.
I værktøjskassen til højre har du mulighed for hvert link. Indstillingerne afhænger af de indstillinger, du har valgt for layoutet. Hvis du f.eks. vælger Vis beskrivelser for et listelayout, kan du tilføje en beskrivelse af det enkelte link. Andre typer indstillinger for individuelle links, afhængigt af layoutindstillingerne, omfatter ændring af billedet, formateringsikoner, tilføjelse af beskrivelser og tilføjelse af alternativ tekst.

Rediger links
Hvis din side ikke allerede er i redigeringstilstand, skal du vælge Rediger øverst til højre på siden.
Hold markøren over det element, du vil redigere, og vælg derefter Rediger
nederst i det element, du vil redigere.
Dette åbner værktøjskassen for det pågældende element, hvor du har indstillinger for det pågældende link. Indstillingerne afhænger af de indstillinger, du har valgt for layoutet. Hvis du f.eks. vælger Vis beskrivelser for et listelayout, kan du tilføje en beskrivelse af det enkelte link. Andre typer indstillinger for individuelle links, afhængigt af layoutindstillingerne, omfatter ændring af billedet, formateringsikoner, tilføjelse af beskrivelser og tilføjelse af alternativ tekst.
Hvis du vil fjerne links, skal du vælge papirkurvsikonet
 for elementet.
Hvis du vil ændre rækkefølgen af links, skal du trække og slippe elementer til nye placeringer ved hjælp
 Du kan også ændre rækkefølgen af links ved hjælp af Ctrl + Venstre eller Ctrl + Højre piletast.
Bemærk
Du kan ikke ændre rækkefølgen af links i layoutet Filmstrip.
Målretning til målgruppe
Ved hjælp af målretning af målgrupper kan du fremhæve links til bestemte grupper af personer. Dette er nyttigt, når du vil præsentere oplysninger, der er særligt relevante for en bestemt gruppe af personer. Du kan f.eks. målrette links til bestemte projektoplysninger til teammedlemmer og interessenter i projektet. Hvis du vil bruge målretning til målgruppe, skal du først aktivere målretning af målgrupper i egenskabsruden for webdelen og derefter redigere hvert enkelt hurtigt link for at angive målgruppen, der skal målrettes.
Bemærk
Hvis du har valgt en målgruppegruppe, som du for nylig har oprettet eller ændret, kan det tage lidt tid at få vist målretning anvendt for den pågældende gruppe.
Aktivér målretning til målgruppe
- Hvis siden ikke allerede er i redigeringstilstand, skal du vælge Rediger øverst til højre på siden og vælge webdelen Hurtige links.
- Vælg knappen Rediger egenskaber .
- I sektionen Filter skal du skubbe til/fra-knappen for Aktivér målretning for målgruppe til Til.

Angiv målgrupperne for hvert link
- Hvis siden ikke allerede er i redigeringstilstand, skal du vælge Rediger øverst til højre på siden og vælge webdelen Hurtige links.
- Hold markøren over det link, du vil redigere, og vælg derefter Rediger nederst i det element, du vil redigere.
- Under Målgrupper, der skal målrettes skal du skrive eller søge efter den eller de grupper, du vil målrette.

Mens du er i redigeringstilstand på siden, kan du se, hvilke links der har målgrupper markeret, ved at kigge efter målgruppeikonet  ud for linket.
Når siden er publiceret, træder målretningen for målgruppen i kraft.