Manage your Personal Tasks with Planner in Teams
Applies To
In the Planner app, you can create personal plans which are accessible only by you. These plans offer a great solution for tracking personal tasks without the need to add a Microsoft 365 group to your plan.
Create a personal plan
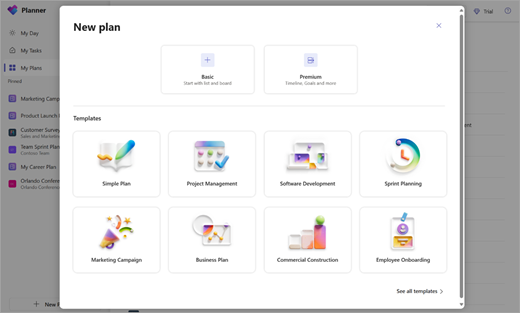
To get started, select New plan in the left navigation. You can then select a blank option or start from one of our out-of-the-box templates that match your use case! Some options are premium and will require a premium license to create.
Upon selection, you will be asked for a plan name. You can leave the optional Microsoft 365 group selection blank to create a personal plan.
Sharing
When the time comes to collaborate on a plan with others, it's simple to share a plan with the right set of people:
-
Select Share in the top right corner of a plan.
-
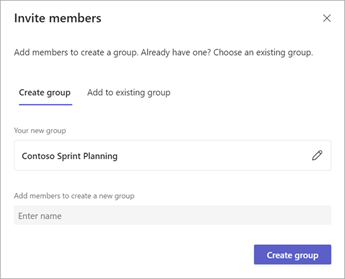
Add members to the plan by creating a new Microsoft 365 group, or by choosing an existing one:
-
Create group
-
Add members who should have access and select Create group.
-
-
Add to existing group
-
Select the existing Microsoft 365 group that should be added to this plan and select Add.
-
-
Views
Basic personal plans
Grid – View your tasks in an easy-to-understand list. Here you can easily set task fields, mark tasks complete, and add new tasks.
Board – View your tasks in a Kanban style board. Here you can group your tasks by bucket, progress, due date, priority, and labels.
Schedule – Organize your tasks on the calendar.
Charts – Get a visual of the status of tasks. From here, you can view charts for:
-
Status – Status of tasks
-
Bucket – Progress of tasks in each bucket
-
Priority – Progress of tasks by priority
-
Members – Availability of team members
Premium personal plans
Grid – View your tasks in an easy-to-understand list. Here you can easily set task fields, mark tasks complete, and add new tasks.
Board – View your tasks in a Kanban-style board. Here you can group your tasks by bucket, assigned to, progress, finish date, labels, priority, sprint, and goal.
Timeline – View a Gantt chart of your tasks and dependencies.
Charts – View the status of tasks. Here you can see charts for:
-
Status – Status of tasks
-
Bucket – Progress of tasks in each bucket
-
Effort per person – Time spent on tasks by each individual
People – View team members included in that plan.
Goals – Set and track objectives.
Assignments – View a list of team members included in that plan and see what tasks are assigned to them.


