
Roadmap reports are included in the Project for the web Power BI template. They help you visualize project, portfolio, and resource data from Project for the web in new and insightful ways. You'll get information in straightforward and easy-to-understand reporting dashboards—and people in different roles can see the dashboards too.
To get started with the report pack, learn how to connect to Project data through the Power BI Desktop.
The template started with nine detailed reports: Portfolio Overview (3 report pages), Resource Overview (2 report pages), Project and Task Overview (2 report pages), and My Work and My Timeline (2 report pages)—these last two have detailed information on individual team members' work.
Two more reports were added for Roadmap:
-
Roadmap Key Dates: This report provides insights on key dates across all roadmaps in the organization.
-
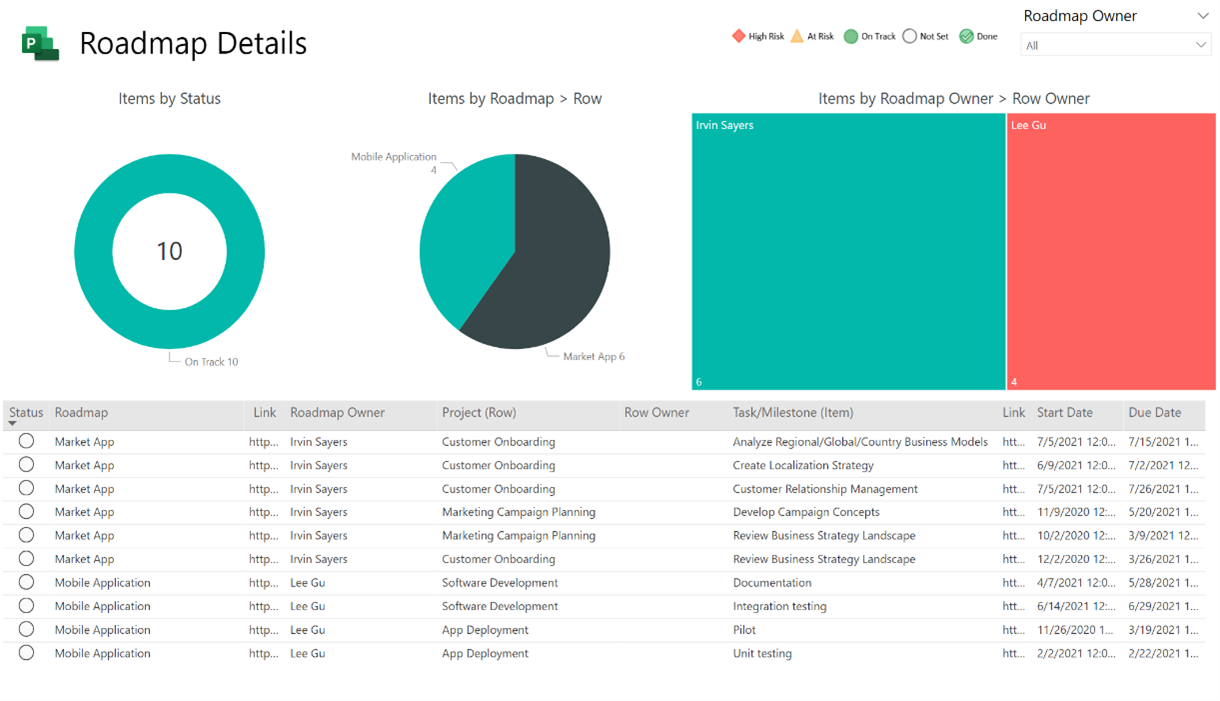
Roadmap Details: This report provides details on roadmap items by owner, status, and roadmap row. The details apply to roadmaps across the organization.
You can find the Roadmap report pages in the Project for the web Power BI template. Instructions for the template are available in Connect to Project data through Power BI Desktop.
Alternatively, you can use the report pages in the template you're already using if you enable the queries and reports.
Note: We're rolling this out over a period of time, so this might not work for your roadmap.
To enable Roadmap queries and reports in the Project for the web Power BI template:
-
In the Power BI Desktop application, open the Power BI template file. Load the data into your reports from your Dataverse instance.
-
Select Home, then select Transform Data in the Queries section. The Power Query Editor opens.

-
In the Queries pane, right-click each of the following queries that relate to Roadmap data, and select Enable load for each one:
-
Roadmap
-
Roadmap Row
-
Roadmap Item
-
Roadmap Key Dates

-
-
Select Close & Apply. The data from the Roadmap queries will load into the report.
-
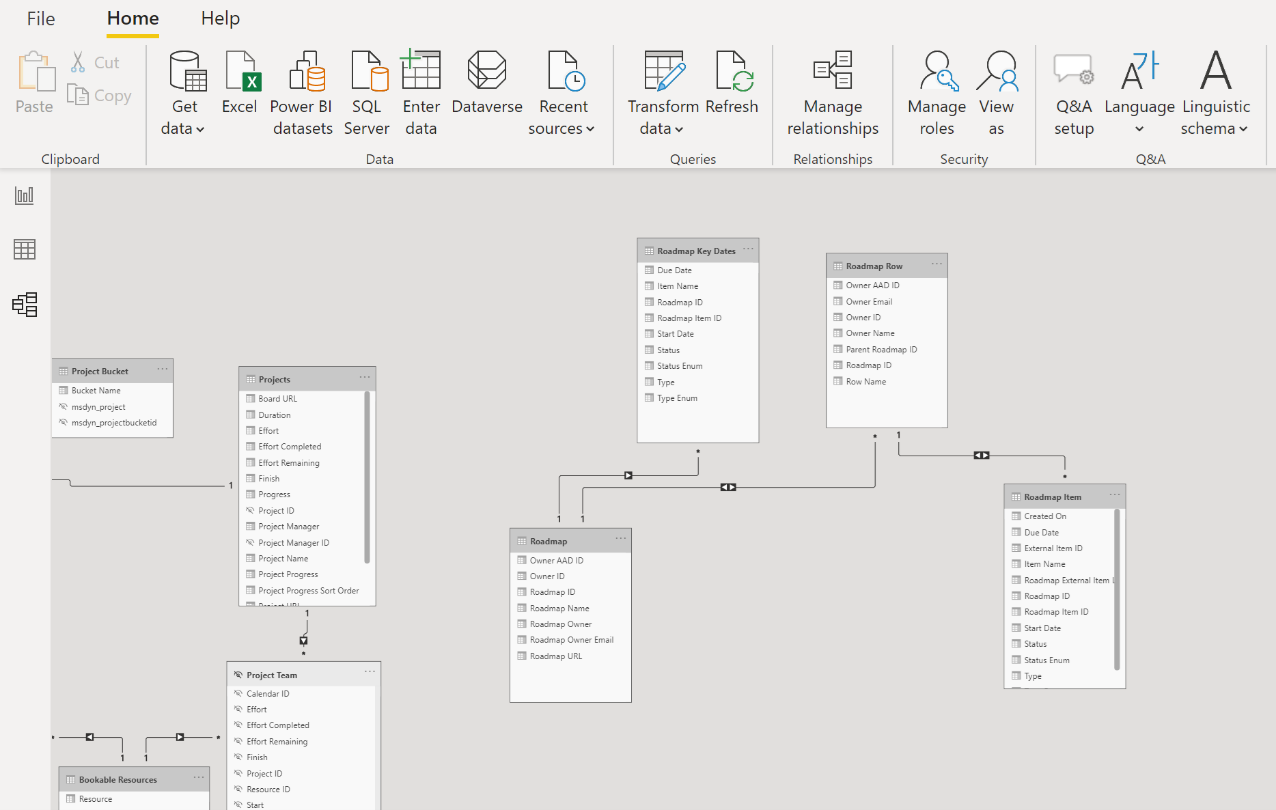
Select the Model icon on the left to go to the model view.

-
Select Home, select Manage relationships, and then select Edit.
-
Create the relationships by connecting the following tables and columns:
-
For the Roadmap to Roadmap Key Dates tables, select the column called Roadmap ID (for both).
-
For the Roadmap Row to Roadmap Item tables, select the column called Roadmap ID (for both). Expand the Cross filter direction box and select Both.
-
For the Roadmap Row to Roadmap tables, select the column called Parent Roadmap ID (for Roadmap Row) and Roadmap ID (for Roadmap). Expand the Cross filter direction box and select Both.

-
-
Select OK, then select Close.
-
To show the report pages, right-click the Roadmap Key Dates tab and clear Hide page by selecting it. Repeat this step for the Roadmap Details tab.
-
To make the links clickable in the Roadmap Key Dates and Roadmap Details tables, in the Fields pane, expand the Roadmap table and make sure you see the Roadmap URL field. Then expand the Roadmap Item table and make sure you see the Roadmap External Item Link field.

-
Select Roadmap URL, and in the Data category box, select Web URL. Then select Roadmap Item, and in the Data category box, select Roadmap External Item Link.

That’s it! You've enabled the queries and reports in the template you're using.


