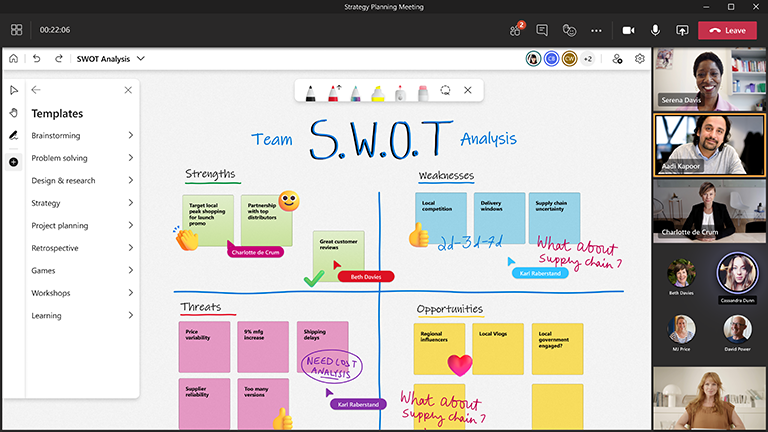
The best, most inclusive plans and decisions come when everyone contributes.
It can be difficult to come up with new strategy or to change direction, but Microsoft Whiteboard provides a lightweight structure on top of an infinite canvas built for collaboration. Now, everyone can contribute before, during, and even after a planning meeting.
Key features:
-
Templates to organize and build strategy, such as cost/benefit analysis, goal setting, and SWOT analysis
-
Colorful sticky note options to organize ideas
-
Smart inking and shapes to help visualize solutions
-
Reactions to allow everyone to contribute and vote
Prepare the board
-
Reflect on your key stakeholders and on the outcome that you want to achieve.
-
Schedule a meeting in Microsoft Teams.
-
Navigate to the Teams meeting and select Whiteboard from the list at the top of the meeting. You can also do this by creating a whiteboard and sharing the link in the Whiteboard Windows App or in the browser at whiteboard.office.com.
-
In the creation panel, select Templates > Strategy, and then choose a template.
-
Customize the template to fit your goals for the session. You may want to use specific colors or reactions as a legend, for example.
-
Share the board if others are helping you prepare.
During the session
-
Once the meeting has started, share the whiteboard from the Share tray, or send a link to the board from the Whiteboard app or from whiteboard.office.com.
-
Introduce the goal of the session and give everyone a few minutes to explore the board with you.
-
Set ground rules with the team on what different colors and reactions mean for this particular session.
-
Start your planning session, encouraging participation through Teams and directly on the whiteboard.
-
Use the "Raise Hand" feature in Teams to organize the order in which participants will speak.
-
Keep an eye on the time to make sure you.ll be able to cover everything.
After the session
-
Send a message to attendees with the link to the whiteboard so everyone has access, or remind them that the board can be accessed in their own Whiteboard board picker.
-
Export a PNG image of the board from the Settings menu to share a summary of the findings with anyone outside of the team.
-
Put your plan into action!
See also
Check out our other Whiteboard guides to learn more!


