
In Project for the web, labels can help you quickly see what tasks have in common, such as requirements, locations, dependencies, or important time constraints. It's simple to add or edit labels in Grid or Board view.
Add and edit labels in Grid view
-
Make sure the Labels column is available. If you don't see it, select Add column and select Labels.
-
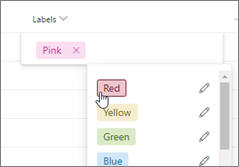
Click inside the Labels cell and choose an option. If you already have labels you're using, you can type the name of it.
-
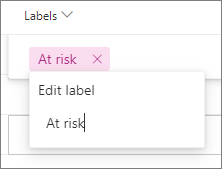
To rename a label, select it and type what you want. Or select Edit label name and change the label name to what you want.
Tips:
-
For example, you can name the pink label "Safety" on a task and then use the same pink "Safety" label on every other safety-related task in your project.
-
Renaming the label changes all instances where that label's color is used in the project.
-
-
To remove a label, select the X next to the label.
Add and edit labels in task details
-
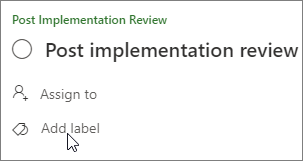
From the Grid view, select Open details. The task will open the task details on the right. If you're in Board view, select the task and it'll open the task details as well.
-
Select Add label and choose an option. If you already have labels you're using, you can type the name of it.
-
To rename a label, select it and type what you want. Or select Edit label name and change the label name to what you want.
-
To remove a label, select the X next to the label.
Add labels in Board view
-
Select More Options.
-
Select Label and choose a label.

-
To edit a label, select the task to open it.
Group by labels in Board view
When you need to see related tasks together, Group by labels is a great way to see your tasks and make changes to the labels assigned to them.

-
Select Board.
-
Select Group by.
-
Choose Labels.
Filter tasks by label
Tasks can be filtered by labels to help you focus on specific types of work or tasks.
-
Select Filters.
-
Expand the Labels option.
-
Choose the labels you want to filter by.
To clear filters, select the labels you're filtering by or select Clear all.
More ways to get organized
If you need more ways to organize your work, you might find buckets helpful. You can sort tasks into buckets to help you organize tasks into things like phases, types of work, or departments.
With labels, buckets, progress symbols, dates, assignments, comments, and attachments shown for each task on the Board, you can get a good sense of what's going on in your project, at a glance. Both Microsoft Planner and Project for the web use these tools.


