Customize
Applies To
To support students in learning how to use Search Coach and build in scaffolding that drives them towards reliable information, educators can customize how Search Coach works for their students in the Class settings.
Disable filters
Educators can choose to make some of the default filters inactive in order to support students in learning to use them a little at a time - or to challenge students to create complex queries manually.
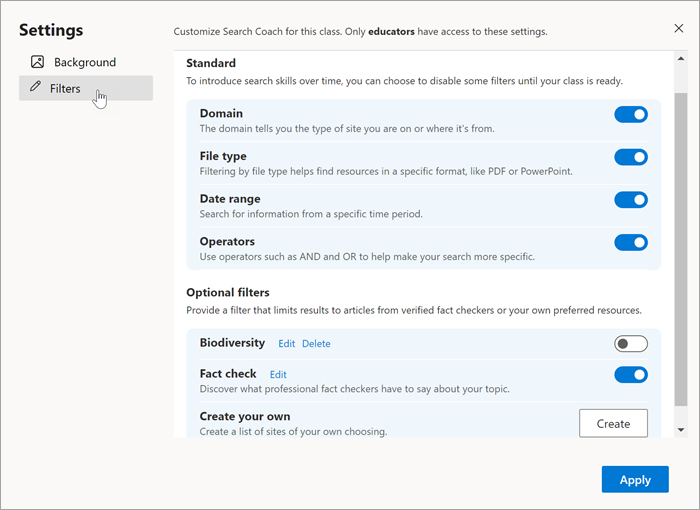
1. Select Class settings in the top right corner of the home page, then select Filters.
2. From here you can toggle any of the Standard filters off (or back on).
3. Select Apply to save your changes.
Note: Students will still be able to build intentional queries by typing search modifications into the search bar. For example, if you've disabled the filetype filter, a student can still narrow their search to only return PDF documents by typing filetype:pdf with their search terms.
Create a custom filter
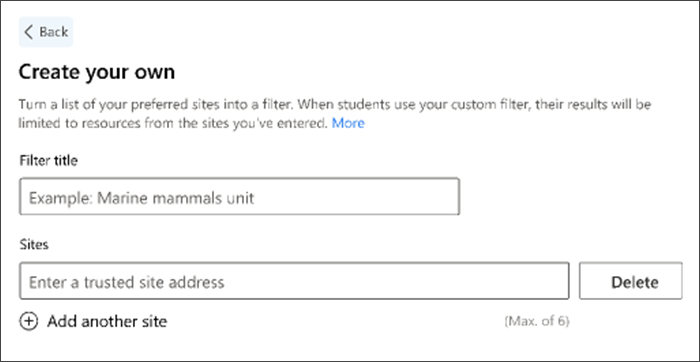
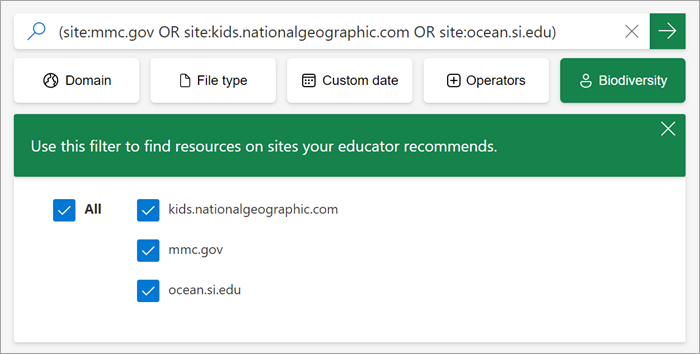
Turn a list of your preferred sites into a filter. When students use your custom filter, their results will be limited to resources from the sites you've entered.
1. From Class settings select Filters.
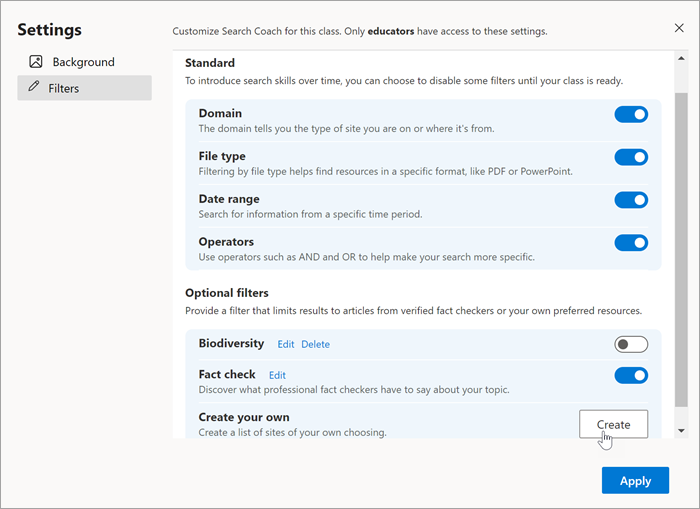
2. Scroll to Create your own and select Create.
3. Enter a title for your custom filter.
4. Enter a preferred site. Use the following steps to ensure your site will work with Search Coach:
-
Choose a site that overarches the content you'd like students to find. Search Coach doesn't support individual articles, but rather broader sites that host multiple resources.
-
Search coach supports up to two subcategories in a URL.
-
For example, mars.nasa.gov/mars2020/spacecraft/rover would need to be shortened to mars.nasa.gov/mars2020/spacecraft
-
This shortened URL will expand results to include your original intended article, as well as additional information from other subcategories.
-
Important: If you enter a URL that is too long, Search Coach will automatically shorten it to the second subcategory. This is likely to broaden the information students encounter. We recommend testing your custom filter before assigning it to your class to get familiar with how it works and what students will be seeing.
5. Select Add another site to build your list.
6. Select Save to create your custom filter. Your filter will now be visible in the Filters tab of Class settings.
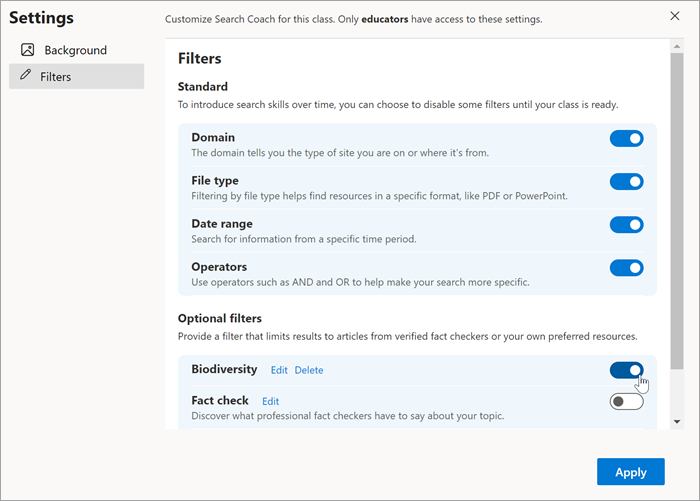
7. Toggle on a filter you've created then select Apply to make it visible to your students. Only one custom filter can be on at a time.
Note: Students will only be limited to the sites on your custom filter if they have selected it, similar to the way the standard filters in Search Coach function.
Edit your custom filter
To edit a filter you've created:
-
Navigate to Class settings > Filters.
-
Find the filter you'd like to change and select Edit.
-
Here you can manage your title and sites.
-
Select Save to add the changes to your filter.
Encourage students to check their facts
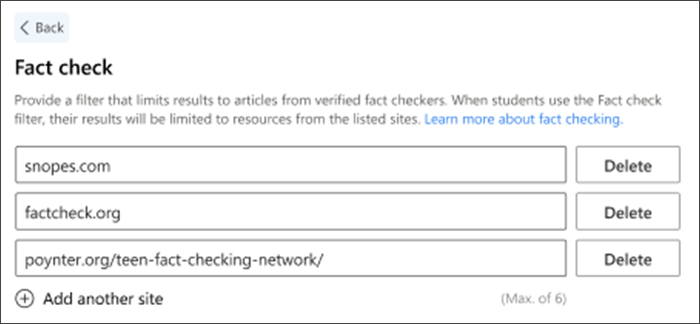
Provide a filter that limits results to articles from verified fact checkers. When students use the Fact check filter, their results will be limited to resources from the listed sites.
To enable a filter made up of Search Coach's standard set of fact checking sites:
1. Navigate to Class settings > Filters.
2. Toggle Fact check on.
To view and edit the fact checking sites included in the filter:
1. Navigate to Class settings > Filters.
2. Navigate to the Fact check filter and select Edit.
From here you can select Delete to remove fact checking sites from the list or select Add another site to create a more robust filter with up to 6 sites.
Note: Fact checking sites don't cover everything, it will work best for questionable news and verifying trending content. We recommend searching over several fact checking sites, as each one covers different topics.
Our default fact checking sites
As the default, the Fact check filter will include:
-
snopes.com: which covers urban legends and current events
-
factcheck.org: which covers current and recent events
-
Teen Fact Checking Network: where students research claims and are overseen by professional fact-checkers
About fact checking
Fact checking didn't emerge with the internet. It has been employed in the creation of encyclopedias, by book publishers, magazines and newspapers, and in other information sources. Fact checking professionals are trained to be objective and accurate. While fact-checkers investigate all kinds of topics, online fact checking sites tend to focus on urban legends and rumors along with trending information and current events, such as claims in political discourse. A fact checking site will not respond to questions like "Is Jupiter the largest planet?"
Fact checking resources
Do your own evaluation to confirm that the following sites are unbiased and a good fit for your classroom. Do they find fault with people on both sides of issues? Do they identify sources?
-
The International Fact-Checking Network of the Poynter Institute in Florida has examined hundreds of fact-checking sites worldwide. Here is a list of sites that passed their rigorous evaluation.
-
Additional sites to consider:
Change the background of your homepage
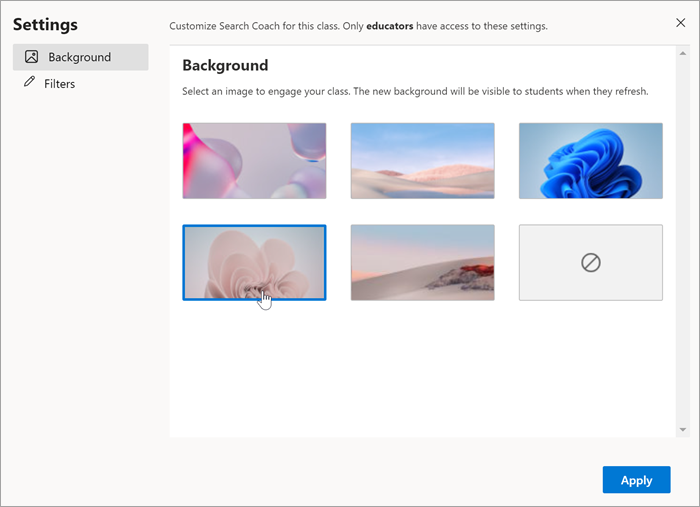
Make teaching search skills fit your teaching style by changing the background of your homepage.
-
Navigate to Class settings then select Background.
-
Select an image that suits your class.
-
Select Apply. The change will be visible to students when they refresh their screens.

