Summary
You may find images or files that do not belong in your Microsoft HealthVault account. If you want to delete this unwanted content, follow these steps:
-
Sign in to your HealthVault account by using your Windows Live ID, Open ID, or Facebook credentials.
-
Select the record that contains the files that you want to remove.
If you want to remove more than one record, click the current record name on the right side of the page, then click See all to view all available records. -
Click the Health information tab.
-
In the Files section, click Documents File.
-
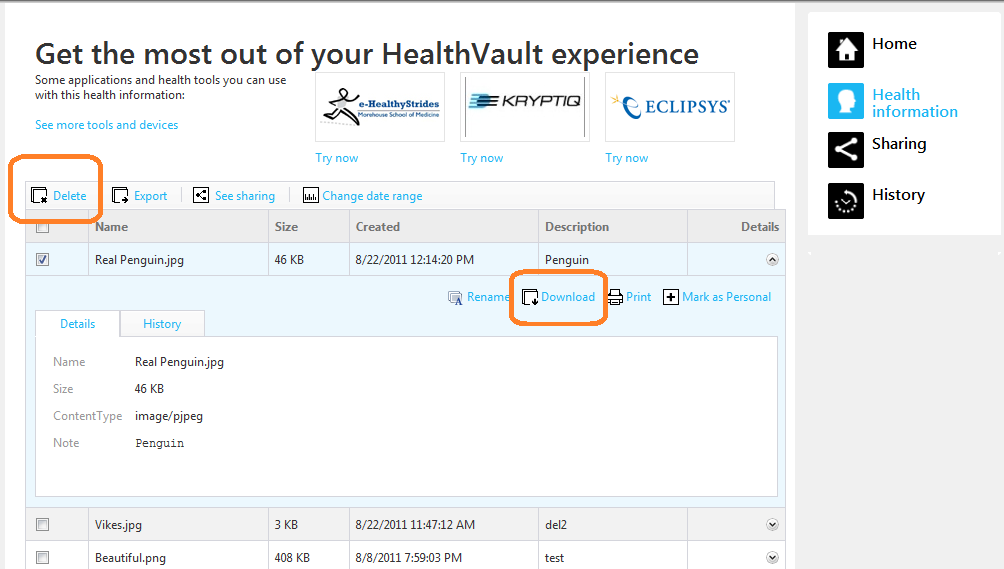
Click to select the files that you want to delete. If you are not sure of the file name, follow these steps:
-
Under the column name, click the file name.
-
In the upper-right corner, click Download.
-
Click the option to open the file.
-
After you view the file, close it.
-
-
In the upper-left corner, click Delete, and then click Yes.

The
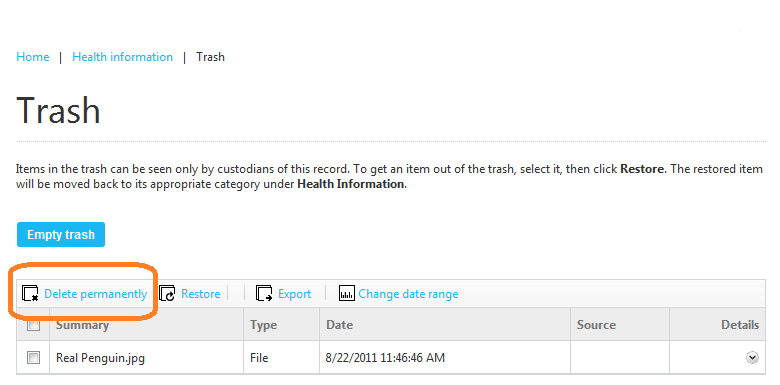
The files are now in the trash folder. To delete them permanently, follow these steps:
-
Click the Health information tab.
-
Click More Actions.
-
Click View Trash.
-
Click to select the check box next to each file that you want to permanently delete.
-
In the upper-left corner, click Delete permanently, and then click Yes.


