
Manage your personal info, language and region settings in My Account
If you sign in with a work or school account, you can update your profile photo, set up your time zone, regional format, languages, and translation preferences.
To open your Personal Info page, go to myaccount.microsoft.com/personal-info.
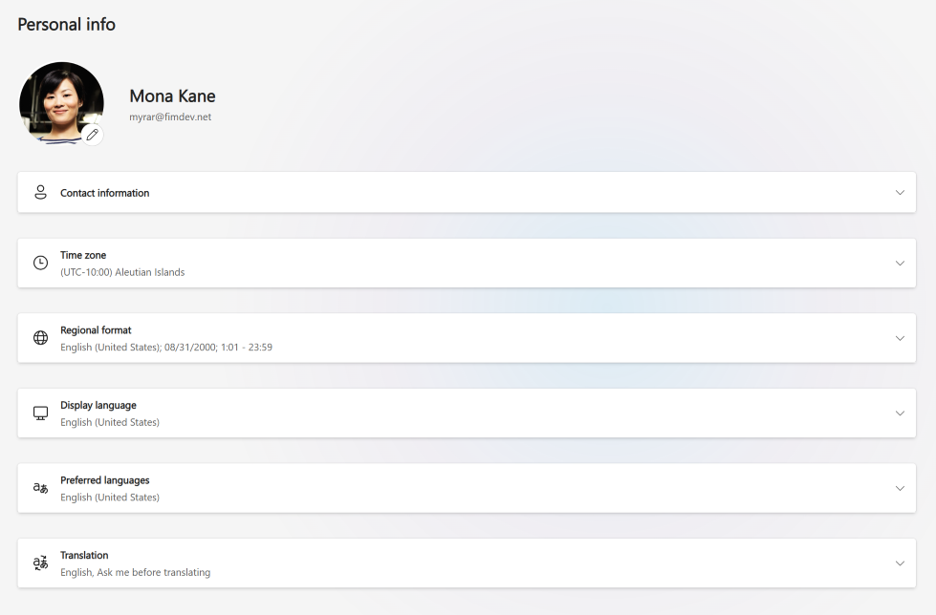
Change the profile photo for your work or school account
Your photo appears across the Microsoft apps and services your organization uses.
- Select the edit (pencil) button in your photo.
- Upload and adjust your image.
- Select Save.
If you don’t see an edit button, your organization doesn’t allow for photo changes. Learn more about how to change your picture.
Update your work or school account contact information
Your work details - such as work location, phone, company, and job title - are shown here. These come from your organization’s directory and are read-only. To change them, contact your IT or HR department.
Set the time zone for your work or school account
Your time zone is visible to others and is used by your Outlook calendar to schedule meetings.
- Select Change time zone.
- Search for and select your time zone.
- Select Save.
Set the regional format for your work or school account
Your regional format controls how dates and times appear on Microsoft 365 websites.
- Select Change regional format, Change date format, or Change time format.
- Choose a value and select Save.
Set the display language for your work or school account
Menus and buttons on some Microsoft 365 websites appear in your display language.
- Select Change display language.
- Search for and choose a language.
- Select Save. If this setting is managed by your organization, contact your IT admin to change it.
Choose preferred languages for your work or school account
These are the languages you use to read and create content.
- Select Add a language to add one.
- Use the reorder controls to put your preferred language first.
- Select Remove language to remove one.
Set translation preferences for your work or school account
Choose how Microsoft 365 handles content in other languages.
- Select Change translation language to set your preferred language.
- Choose what to do with messages in other languages: Always translate, Ask me before translating, or Never translate.
- Select Save to remove one.