

Not an admin? See <Add link to user topic>
There are a few things you need to decide, and info you need to have on hand, before moving your business to Microsoft 365.
Info to have on hand before you run the Office 365 setup wizard
When you're ready to run the Microsoft 365 setup wizard and move your domain to Microsoft 365, here's the info you'll need to have on hand:
-
List of people you want to add to Microsoft 365. Even if you've already added them to Microsoft 365, if you're updating your domain information, you need to enter their names here.
-
How you're going to notify your employees of their Microsoft 365 user ID and password so they can sign in. Are you going to call them with the info? Or send it to their personal email address? They won't have access to their Microsoft 365 email, so you can't use that.
-
If you have a domain name for your business (such as contoso.com) and you plan on using Microsoft 365 email, you'll need to know where your domain is registered and have sign-on information. See this list of info to collect for domains setup.
Here are the steps you'll do when you run the setup wizard:
-
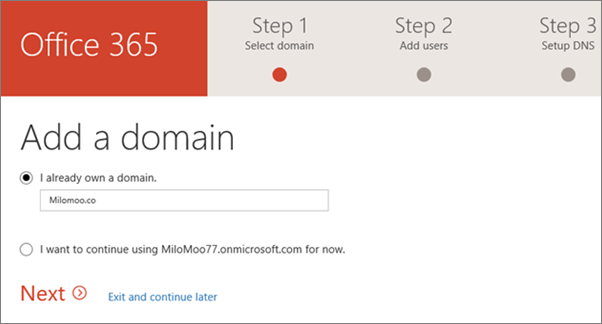
Add your domain, such as contoso.com.
When you signed up for Microsoft 365, you got a user ID that includes an “onmicrosoft.com” domain. In this step, you can add your own domain so your user ID and email are personalized for your business, like rob@contoso.com. Domain setup can be confusing, but we’ll guide you through it step by step. What's a domain?
-
Verify your domain. In this step, the wizard gives you a code - called a TXT value - that you enter at your domain registrar. If your registrar is GoDaddy, the wizard prompts you to login in at GoDaddy so Microsoft 365 can enter the code for you!

-
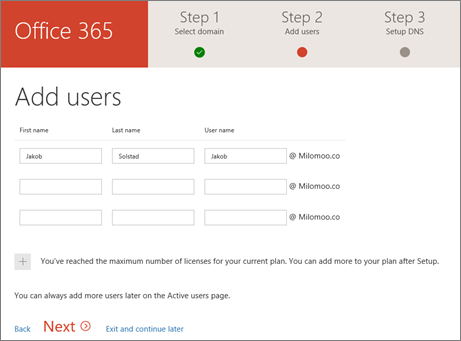
Add your users. You can add users later, too; see Add users individually or in bulk.
Note: If you need to assign admin permissions to the users you add in the wizard, you can do that later on the Users page.
-
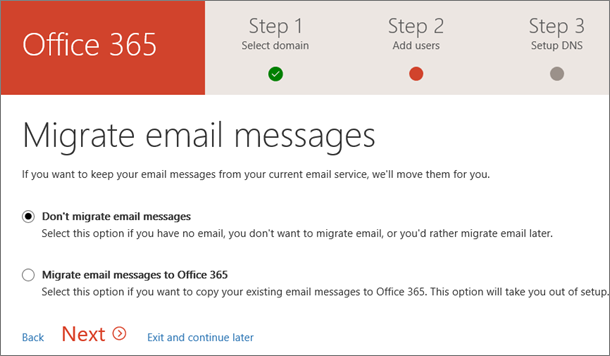
Migrate email and contacts from another email service that uses IMAP (such as Gmail). For more migration options, or if you just want to migrate your email later, see Migrate email and contacts to Office 365.
-
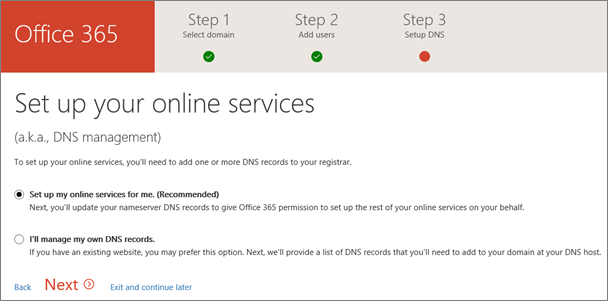
Setup online services, such as email and Skype for Business.
-
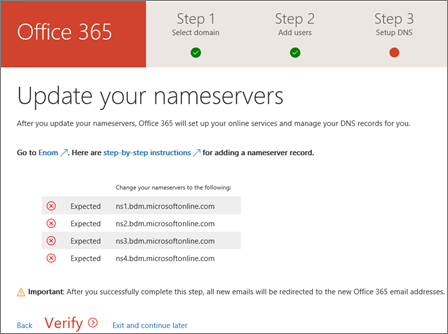
Change your nameservers. (You don't have to do this step if your domain registrar is GoDaddy.) IMPORTANT: After you do this step, your user's email will be delivered to their Microsoft 365 mailbox. It may take up to 72 hours for your domain provider to start rerouting email.
-
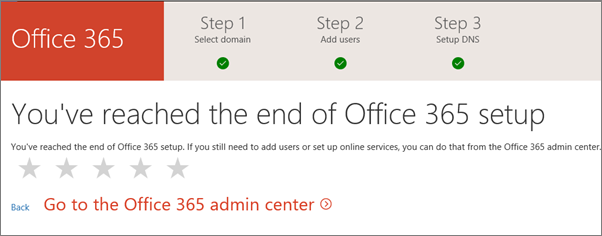
Congratulations! You're finished!
-
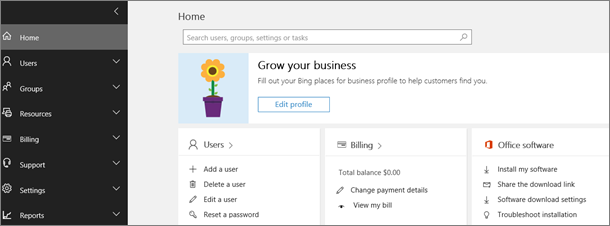
Now you can go to the Office 365 admin center, where you can change the domain of your Microsoft 365 admin account. Plus you can manage your billing information, add or remove users, reset passwords, and do other business functions.
Note: You can also update your account to the new domain on the Users page.
If you get stuck at any point, call us. We're here to help!


