Liberate your Access reports and distribute them far and wide. For example, email them to one or more users, export them to SharePoint document libraries, and archive them on network folders. When you distribute an Access report, you create a static report of data at a certain moment in time, such as daily, weekly, or monthly. By doing so, you have a single point of truth that information workers can use to make good business decisions, answer questions, find alternatives, determine best plans, evaluate risks, and improve quality.

Tip When you create the report, add a publication date. This helps users confirm the correct time the report was created. For more information, see Insert the date and time into a report or form.
What do you want to do?
Send a report by using the Email command
One of the fastest ways to distribute a report is by using the Email command. With just a few mouse clicks, Access exports the report, and then creates a new e-mail message with the file attached to it.
-
In the Navigation Pane, select the report that you want to send.
-
Select External Data > Email.
-
In the Send Object As dialog box, select the output format that you want to use, such as PDF, and then click OK.
Note Although there are a variety of formats you can select, consider using Portable Document Format (PDF) which has become a defacto standard, preserves the layout and format of the original Access report, and has built-in ways to customize the pages for viewing and printing. For more information, see Install Adobe Reader and Print PDF.
Access opens a new e-mail message in Outlook with the file attached.
-
Type the recipients' e-mail addresses in the To and Cc boxes, a description in the Subject box, and a message in the message area.
Tip By default, the file that you send by using this method is not saved on your computer. If you want to save a copy of the file on your computer, right-click the attachment in the Attached box, and then select Save As.
-
Select Send.
Note To automate the process, you can use the EMailDatabaseObject Macro Action. For example, you could create a macro with a sequence of these actions to email different reports to different users.
Export a report to a folder or SharePoint document library
-
In the Navigation Pane, select the report that you want to export.
-
Select External Data > PDF or XPS to open the Publish as PDF or XPS dialog box.
-
Do one of the following:
-
Locate the folder by using the navigation pane.
-
Locate the SharePoint site, by clicking SharePoint in the navigation pane or by entering the site URL in the address box at the top. For example:
https://contoso.sharepoint.com/ReportCenterSite/Shared%20Documents
For more information, see Discover content with the SharePoint start page.
-
-
In the Save as type box, make sure the PDF file type is selected.
-
To change the default name of the report, type a new file name in the File name box.
-
To open the report immediately after you export it, select the Open file after publishing check box.
-
Under Optimize for, do one of the following:
-
To optimize the report for a larger, higher-resolution file (recommended for printing), select Standard.
-
To optimize the report for a smaller, lower-resolution file (recommended for publishing online), select Minimum size.
-
-
Select Publish. Access creates the file. If you chose to have Access open the file after publishing, the Adobe Reader displays the file.
-
To save the steps of the operation so that you can run and schedule the same operation, click the Save export steps check box:
-
Enter a name and description for the steps.
-
To create an Outlook task that schedules the export operation at a future date, select the Create Outlook Task check box.
For more information, see Save the details of an import or export operation as a specification.
Note Another way to automate the process is to use the ExportWithFormatting Macro Action. For example, you can create a meaningful filename based on the report title and the export date. This helps users locate the correct report in a SharePoint library or folder of many reports. To do this, specify the following expression in the Output File argument:
=[Reports]![RptQC5]![Auto_Header0].[Caption] & "-" & Format(Date(),"yyyy-mm-dd") & ".PDF"
Where RptQC5 is the report object name, Auto_Header0 is the report header section, and the Caption property is the Report's title.
-
Learn about creating a report center in SharePoint
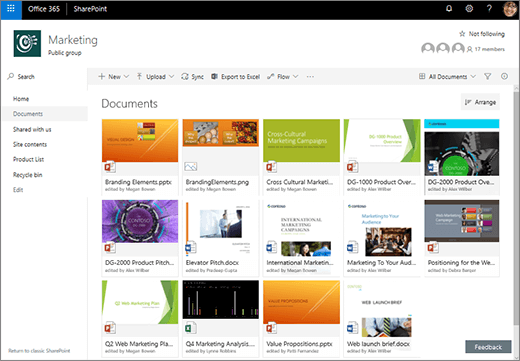
Consider creating a dedicated report center in a SharePoint document library so users can more easily find and view the reports they need. By adding columns, linking to the library from Access, and customizing the document library with views, you can provide a first-class experience for your users. What follows are the basic steps you can take.
Create a document library A document library is a secure file location that simplifies collaboration. You can add columns to a library, such as categories, persons or groups, and calculated columns, that you can then use to create views and filters.

For more information, see What is a document library?
Update library columns from Access By linking the library to Access, you can update the columns in the document library from Access to help users find the reports they want and to provide additional information.
For more information, see Import, link, or move data to SharePoint.
Create sorted and filtered views Instead of sending the report from Access through email, send a link to the relevant view of the document library. For example:
-
Sort the view in ascending order by the Modified column so that the most current report is displayed first. For more information, see Use sorting to modify a SharePoint view.
-
If you have a Choice column in the library called JobFunction with three values: Lineworker, Foreman, and Supervisor, create separate views based on a filter expression for each job role:
JobFunction is equal to Lineworker
JobFunction is equal to Foreman
JobFunction is equal to Supervisor
When you send a link to the Supervisor view and the user clicks on it, the view would display the specific reports for supervisors. To obtain a link of the library view, display the view and then copy the URL from the address bar.
-
If you have a person column in the library called OurEmployees, create a view based on a filter expression that uses the Me function to only show reports for the current user:
OurEmployees is equal to [Me]
When you send a link to the view and the user clicks on it, the view would display the specific reports for that user.
For more information, see Use filtering to modify a SharePoint view and Edit a list view in SharePoint.
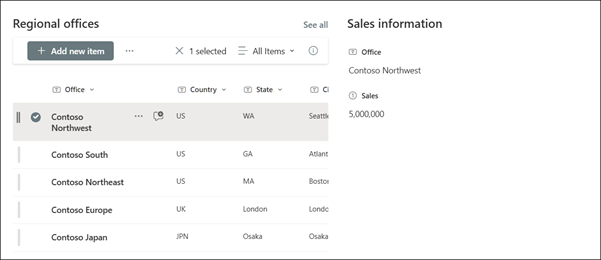
Connect web parts on a modern page You can also create a modern page to show a file based on what a user selects in a document library by connecting a File viewer web part to a Document library web part. Users could browse the reports to find the one they want.

For more information, see Using web parts on SharePoint pages and Connect web parts in SharePoint Online.
Leverage Microsoft Flow You can automate the use and management of the library by using a Microsoft Flow. For example, you can push notifications, send daily reminders, create a planner task, and archive expired files to a folder.
For a selected item in SharePoint, create a Planner task with a link to the SharePoint item.

For more information, see Create a flow for a list or library in SharePoint Online or OneDrive for Business.


