If you use a Microsoft 365 or Microsoft Exchange account with Outlook, you can schedule events or meetings and use the Scheduling Assistant and Room Finder to help scheduling them easier.
Creating a new event or meeting
-
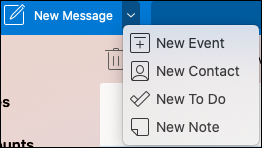
Click the drop-down menu next to New Message and select New Event.
-
From the New Event window you can name the event, add required people, set the time, set it as a recurring event/meeting, add a location, set a reminder, and add a message.
-
When you’re done, click Save, to save an appointment, or Send, to send the invite to everyone you added. It will appear on your calendar at the time and date you chose.
Use the Scheduling Assistant
When inviting multiple people it can get a bit complicated to manage everyone’s calendars to find a time that works for everyone. The Scheduling Assistant helps to make that easier.
-
Click the drop-down menu next to New Message and select New Event.
-
In the New Event window, select See more items (…) in the toolbar and then select Scheduling Assistant.
-
You'll see a row for every recipient you entered earlier as well as the availability of the location you selected (if available), and you can also add required or optional attendees right from the Scheduling Assistant as well.
-
Times that your attendees are busy are shown in red. Times that your attendees have a tentative appointment are shown in red and white diagonal stripes, times your attendees are working elsewhere are shown with a red outline, and times outside of your attendees' working hours are shown in light gray and white diagonal stripes.
-
-
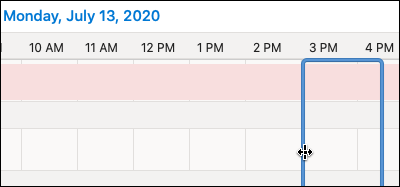
Click on a time to place a blue box which will help you see any conflicts. You can also click and drag the edges of the blue box to increase or decrease the length of the event or meeting.
-
When you’re done, click Done at the top of the screen to go back to the New Event window with the changes you made. Verify everything is correct and click Save to send it.
Use the Room Finder
-
In a new event or meeting, select See more items (…) in the toolbar and then select Scheduling Assistant.
-
Click on Add a location, and then click Browse with Room Finder if it’s available.
Note: If you don’t see the Room Finder option, it’s possible you aren’t logged into an account with access to location information. Reach out to your IT administrator for assistance.
-
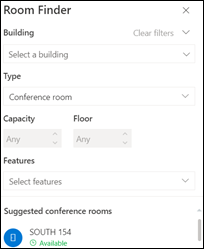
The Room Finder lets you pick the building, type of room, capacity, floor, and features (such as if the room has audio, video, projector, etc.).
-
Once you’ve selected from the available options, the Suggested section at the bottom locates rooms. If a room is available at the time of your meeting it will say Available in green text and if it’s already booked or closed, it will say Unavailable in red text.
RSVP to events or meetings
-
When you click on an email with an event or meeting invite, click on it and you’ll see an RSVP window.
-
Clicking Accept, Tentative, or Decline will immediately send your RSVP, so if you want to add an optional message or propose a new time, do that first. You can also click the Email organizer check box if you don’t want to send a confirmation email.
-
If you need to change your RSVP, go to your calendar, find the event or meeting, and double click on it to open it.
-
Click the Edit RSVP button to see the RSVP window and change your choice.


