Sign in with Microsoft
Sign in or create an account.
Hello,
Select a different account.
You have multiple accounts
Choose the account you want to sign in with.

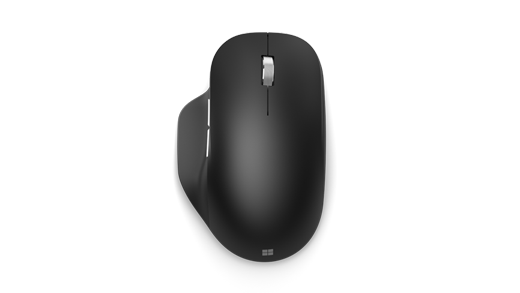
Microsoft Bluetooth Ergonomic Mouse is designed for comfort and control. The mouse has two customizable thumb buttons1 and lets you pair with up to three PCs and quickly switch between them2.

Microsoft Bluetooth Ergonomic Mouse

Notes: 

  1. Full customization requires Microsoft Mouse and Keyboard Center. Get the app 
    Mouse and Keyboard Center is not available on Windows 11 S, Surface Hub, or HoloLens.

  2. Smart switch requires Microsoft Mouse and Keyboard Center.

Connect your mouse to your PC

To use Microsoft Bluetooth Ergonomic Mouse, your PC needs to have Bluetooth 4.0 or later. It’s designed to work best with Windows 11 and supports Swift Pair. You can pair up to three different PCs.

  1. On the bottom of the mouse, slide the power switch on to turn on the mouse.
    It should automatically go into pairing mode. If it doesn’t, press and hold the pairing button for about 5 seconds. The first pairing light on the bottom of the mouse should flash.

  2. On your Windows 11 PC, select Connect if a notification appears for your mouse, then wait for it to get set up.
    Don’t see the notification? Go to Start > Settings > Bluetooth & devices > Add device  > Bluetooth > Microsoft Bluetooth Ergonomic Mouse > Done.

You can pair up to two more devices with your mouse. To pair your mouse with another device, press the pairing button to change it to another device, then follow the same instructions above to pair the new device.

When you’re using your mouse, you can then press the pairing button on your mouse to manually switch from one PC to another.

Make it your own with Mouse and Keyboard Center

Get the Mouse and Keyboard Center app to customize what the mouse buttons do, change the scroll settings, set up Smart switch, and more. You can also customize the wheel button.

Switch between devices using Smart switch

After your devices are paired, you can use Microsoft Bluetooth Ergonomic Mouse to automatically switch between screens on different devices. Just move your mouse cursor to the edge of your screen, then use your mouse on another screen on another PC.

You’ll need to pair all of your devices first and install Microsoft Mouse and Keyboard Center on each PC.

Here’s how to set up Smart switch in Microsoft Mouse and Keyboard Center:

  1. Open Mouse and Keyboard Center on one of the devices that Microsoft Bluetooth Ergonomic Mouse is paired with, and then select Smart Switch.

  2. Turn on Enable Smart switch.
    You’ll see a list of the devices that are paired with your mouse, in the order they were paired.

  3. Set up your layout and change your settings for Smart switch.

Change the batteries

Microsoft Bluetooth Ergonomic Mouse uses two AAA batteries. To change the batteries, flip the mouse over, press the small tab to open the battery door, then replace the two AAA batteries.

To help save battery, turn the power switch on the bottom off when you’re not using your mouse.

Tip: To check the battery level anytime, open Settings on your Windows 11 PC, then select Bluetooth & devices > Devices. The battery level appears next to your mouse.

Related topic

Microsoft Bluetooth Ergonomic Mouse is designed for comfort and control. The mouse has two customizable thumb buttons1 and lets you pair with up to three PCs and quickly switch between them2.

Microsoft Bluetooth Ergonomic Mouse

Notes: 

  1. Full customization requires Microsoft Mouse and Keyboard Center. Get the app 
    Mouse and Keyboard Center is not available on Windows 10 S, Surface Hub, or HoloLens.

  2. Smart switch requires Microsoft Mouse and Keyboard Center.

Connect your mouse to your PC

To use Microsoft Bluetooth Ergonomic Mouse, your PC needs to have Bluetooth 4.0 or later. It’s designed to work best with Windows 10 and supports Swift Pair. You can pair up to three different PCs.

  1. On the bottom of the mouse, slide the power switch on to turn on the mouse.
    It should automatically go into pairing mode. If it doesn’t, press and hold the pairing button for about 5 seconds. The first pairing light on the bottom of the mouse should flash.

  2. On your Windows 10 PC, select Connect if a notification appears for your mouse, then wait for it to get set up.
    Don’t see the notification? Go to Start  > Settings  > Devices  > Bluetooth & other devices  > Add Bluetooth or other device  > Bluetooth > Microsoft Bluetooth Ergonomic Mouse > Done.

You can pair up to two more devices with your mouse. To pair your mouse with another device, press the pairing button to change it to another device, then follow the same instructions above to pair the new device.

When you’re using your mouse, you can then press the pairing button on your mouse to manually switch from one PC to another.

Make it your own with Mouse and Keyboard Center

Get the Mouse and Keyboard Center app to customize what the mouse buttons do, change the scroll settings, set up Smart switch, and more. You can also customize the wheel button.

Switch between devices using Smart switch

After your devices are paired, you can use Microsoft Bluetooth Ergonomic Mouse to automatically switch between screens on different devices. Just move your mouse cursor to the edge of your screen, then use your mouse on another screen on another PC.

You’ll need to pair all of your devices first and install Microsoft Mouse and Keyboard Center on each PC.

Here’s how to set up Smart switch in Microsoft Mouse and Keyboard Center:

  1. Open Mouse and Keyboard Center on one of the devices that Microsoft Bluetooth Ergonomic Mouse is paired with, and then select Smart Switch.

  2. Turn on Enable Smart switch.
    You’ll see a list of the devices that are paired with your mouse, in the order they were paired.

  3. Set up your layout and change your settings for Smart switch.

Change the batteries

Microsoft Bluetooth Ergonomic Mouse uses two AAA batteries. To change the batteries, flip the mouse over, press the small tab to open the battery door, then replace the two AAA batteries.

To help save battery, turn the power switch on the bottom off when you’re not using your mouse.

Tip: To check the battery level anytime, open Settings  on your Windows 10 PC, then select Devices  > Bluetooth & other devices . The battery level appears next to your mouse.

Related topic

Need more help?

Want more options?

Explore subscription benefits, browse training courses, learn how to secure your device, and more.

Communities help you ask and answer questions, give feedback, and hear from experts with rich knowledge.

Find solutions to common problems or get help from a support agent.

Was this information helpful?

What affected your experience?
By pressing submit, your feedback will be used to improve Microsoft products and services. Your IT admin will be able to collect this data. Privacy Statement.

Thank you for your feedback!

×