Symptoms
Custom Connector connections fail due to authentication failures.
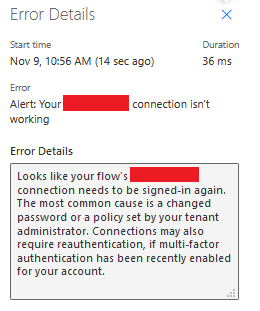
Sample Error Message:
Cause
One or more incorrect URLs set during Custom Connection creation.
Resolution
Prior to attempting to configure a Custom Connector, all of the actions should be verified outside of Power Automate using a tool such as Postman.
Each of the following steps should be performed and succeed in a tool such as Postman prior to configuring the Custom Connector:
-
Call the OAUTH token retrieval endpoint.
-
Call the API action using the returned token.
-
Call the OAUTH token refresh endpoint once the token expires.
-
Call the API action using the new refreshed token.
Note that only Authorization Code Grant flows and On-Behalf-Of flows support refresh tokens (see this linkfor more information). Implicit Grants and Client Credentials Grants do not suport refresh tokens, so may not be used to authenticate Custom Connectors.
Test Generating OAUTH tokens using Postman
Postman provides a way to easily perform the testing of an endpoint authenticated by OAUTH2. In order to perform this testing, you will need the following information or configurations to have been performed on the endpoint:
-
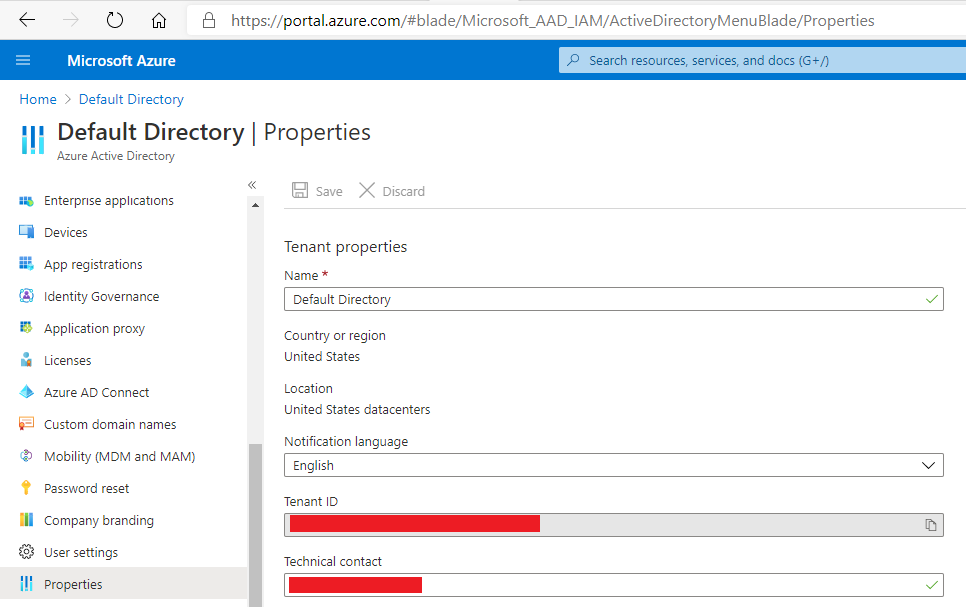
Get the Microsoft Azure Tenant ID. This is done from the Azure Active Directory blade, and is found under the Properties tab:
-
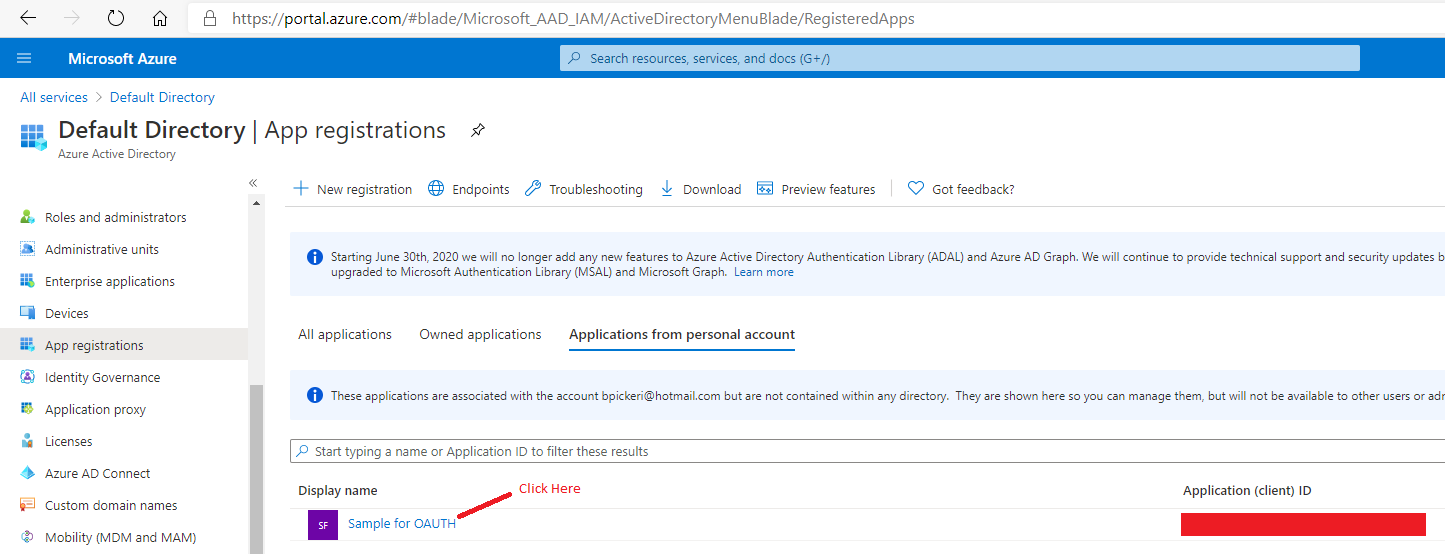
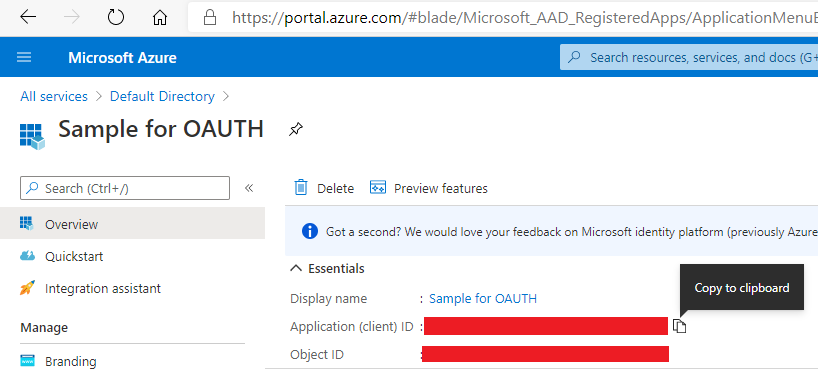
Get the Application (Client) ID. This is also done from the Azure Active Directory blade, and is found under the App Registrations tab:
-
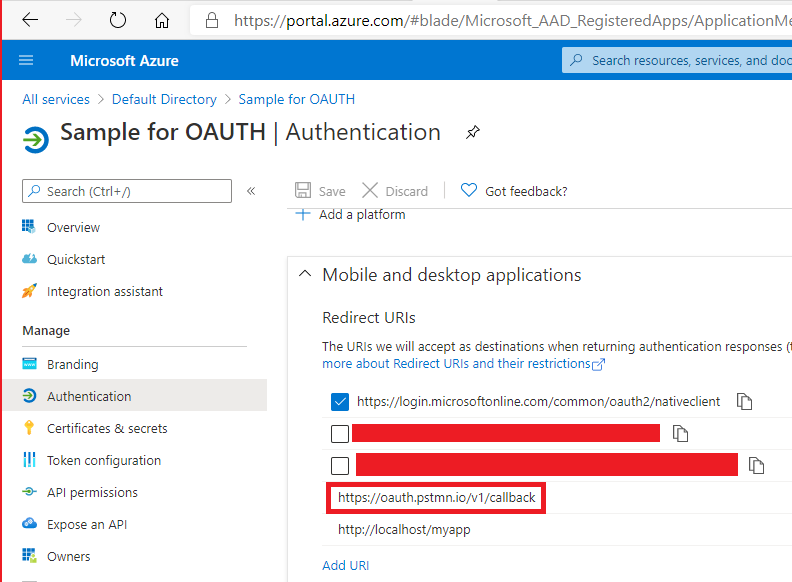
Ensure that https://oauth.pstmn.io/v1/callback is a valid callback URI for the application
-
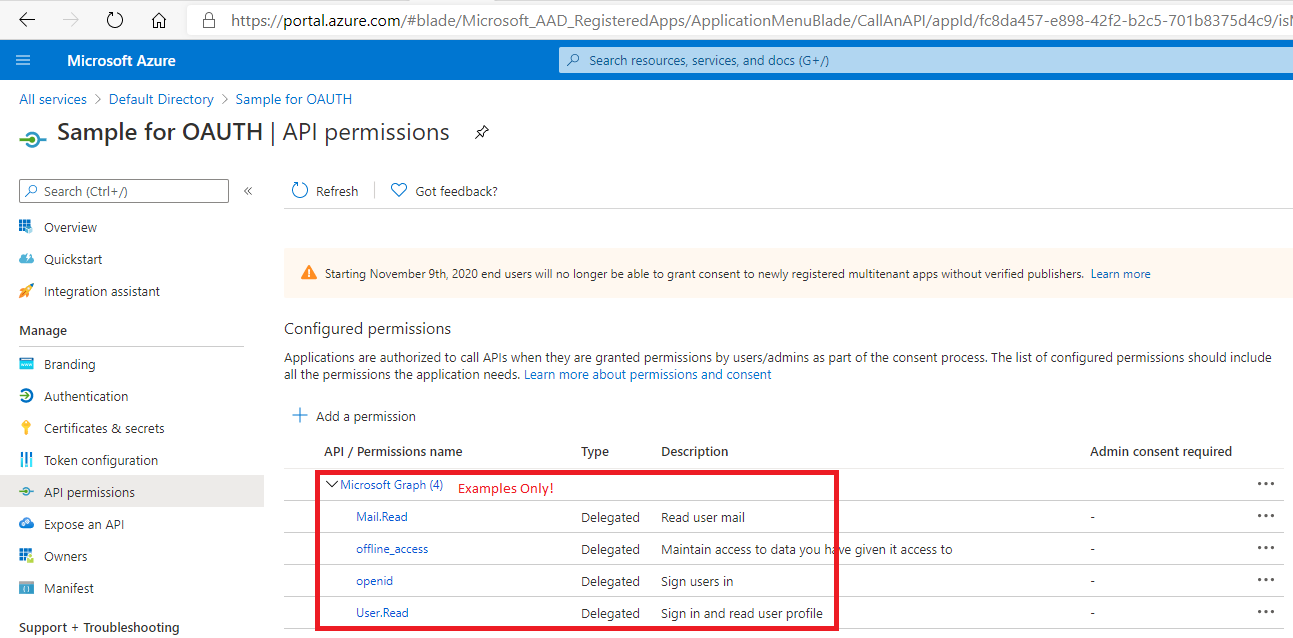
Record the Scope(s) for which your application will need to authenticate
Create Collection, and Get New Access Token in Postman
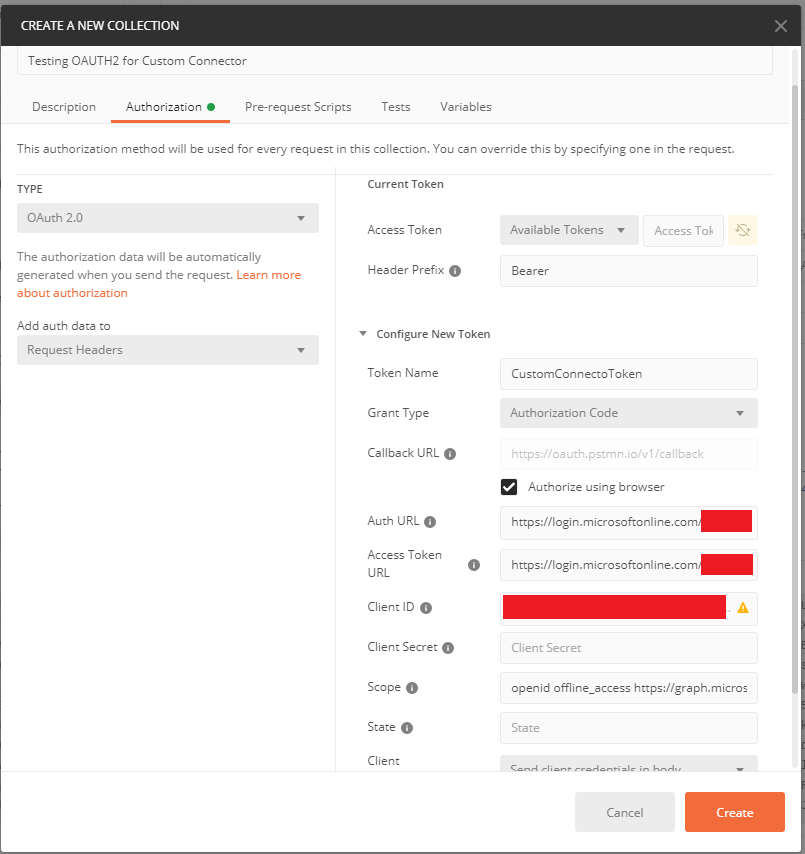
Now, open Postman, and create a New Collection. On the Authorization tab, choose Type = OAuth 2.0, then enter the following values as shown below:
-
Header Prefix: Bearer
-
Token Name: <user choice>
-
Grant Type: Authorization Code
-
Callback URL: check "Authorize using browser" near this; the URL itself may not be edited
-
Auth URL: https://login.microsoftonline.com/<your Tenant Id>/oauth2/v2.0/authorize
-
Acces Token URL: https://login.microsoftonline.com/<your Tenant Id>/oauth2/v2.0/authorize
-
Client ID: <your Application Id>
-
Client Secret: <optional, leave blank>
-
Scope: <enter scope(s), separated by spaces>
-
State: <optional, leave blank>
-
Client Authentication: Send client credentials in body
When you click Get New Access Token at the bottom of this dialog, you will first be taken to a browser to authenticate to Azure Active Directory, then automatically redirected back to Postman. If you see an Access Token and Refresh Token in the resulting dialog, you have successfully configured the URLs and may now proceed to create your Custom Connector.
Define OAUTH for Custom Connector
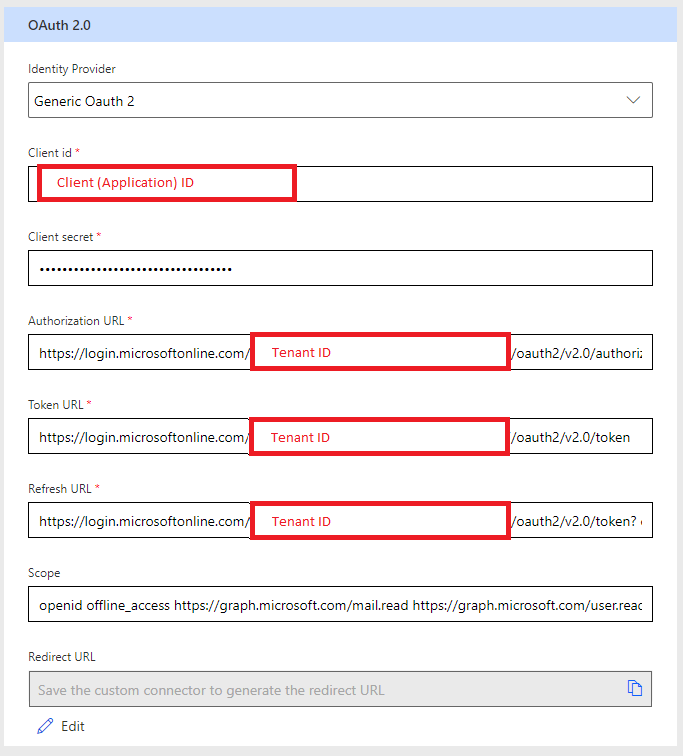
Now that we have all the information verified, it may be populated in the Custom Connector Authorization section as follows:

