

As a Teams user who has been enabled for task publishing by your organization, you can create a list of tasks to send to any number of teams in your org. Each team gets its own copy of the list for assigning and completing tasks and tracking team progress. If you're a team manager, find out how to assign and track tasks in Teams.
You create and publish task lists from one place: The Published lists tab in the Tasks app.
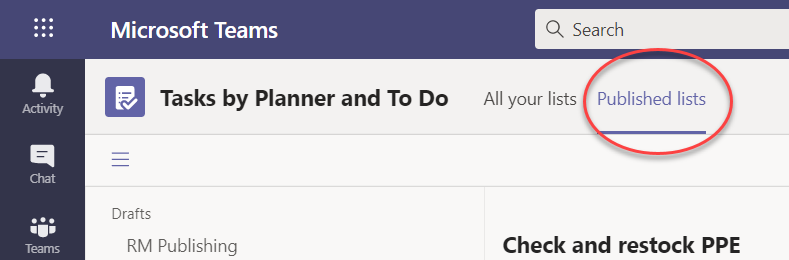
Note: The All your lists tab shows your individual tasks for yourself and the tasks you're working on directly with teammates (in your Teams/Channels). The Published lists tab allows you to publish broadly to teams you're not a member of. As a result, plans in All your lists can't be published.
Task list publishing is how operations managers and other organization planners distribute tasks to the teams who perform the work. Each team receives one copy of the list, so local managers can assign tasks to their workers. Managers who are part of teams in the hierarchy between the local manager and the task list publisher can track assignment and completion of tasks, but cannot change anything.
For example, say Anna is operations manager at the headquarters of Contoso Markets, a 250-store chain, organized in Teams by region. Each region has at least one store, and each store's workers receive job instructions via tasks in the Teams app. Anna's planning a Summer Sale, and has prepared a task list she'll publish to the whole chain.
-
Anna goes to the Tasks app in Teams and creates a list of tasks for setting up the sale, and names it Summer Sale. She attaches some visual product arrangements to guide the Then she publishes her task list to all 250 stores.
-
Srina manages the Western region, whose stores have an extra category of products: sporting goods. She decides to duplicate the Summer Sale task list, add tasks for sporting goods, and publish it to her region's stores as Summer Sale Western.
-
Frank manages Store 004, the largest store in the Western region. He opens Teams on his PC the day before sales preparation begins. He sees the two new published lists and has a look. He assigns tasks to his frontline workers and a few to himself.
-
Will, a stock clerk in Store 004, opens Teams on his phone to see what's in store for him. He reviews the visual product arrangements that Anna attached to his task and he begins implementing that in his store.
When you publish a list, managers can edit any of the task fields except for the task title and notes. Managers can't delete published tasks.
-
At the bottom left of the Published lists tab, select New list.
-
Name your list.
-
Choose how to select the recipient teams. You can select the teams from a hierarchy or upload a custom list of teams. Learn more about these options here. The following steps show selection from a hierarchy.
-
If you belong to more than one team in Tasks, select the team to publish from. The teams that receive the task list publication will be able to see which team the task list was published from.
-
Select Create. The new list appears under Drafts, on the left.
-
Under Task title, give the first task a title and select Enter.
-
Select the task title to open the task and add or edit any of the following.
-
The title
-
Bucket (use to categorize tasks – for example Warehouse or Sales Desk buckets could be used to identify the work group who will perform the task)
-
Priority (urgent, important, medium, or low)
-
Start or due date
-
Notes
-
A checklist of up to 20 items (you control the items and the order, task recipients control marking them complete)
-
An attachment
-
-
To add another task, enter a task name in the New task field.
Note: If you've just come back to the task list after doing something else, before entering a name in New task you may first need to select Add a task.
Tip: Once you’ve created tasks, you can bulk edit the priority, due date, or bucket for all the selected tasks. For instructions, see Change many tasks at once.
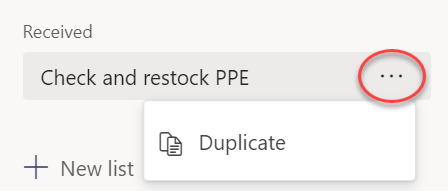
You can copy a draft list or a published list. Then, you can edit the copy to prepare it for publishing separately.
-
On the Published lists tab, select the task list you want to duplicate, select More options

Note: When you receive a published task list, if you also can publish task lists, the new list appears on the Published lists tab, in the left pane, under Received.
-
Once the list is duplicated, you can interact with the list just like other draft lists.
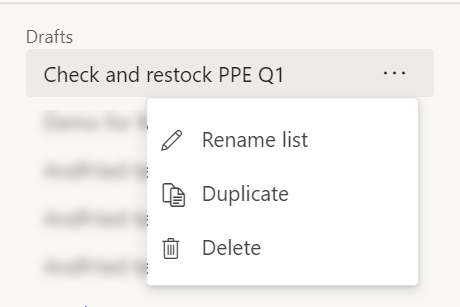
You may want to rename a draft list before you publish it. You can rename any task list in draft state.
-
On the Published lists tab, under Drafts, hover on the list you want to rename.
-
Select More options
-
Enter the new name in the Title box. Teams checks the name to make sure there are no conflicts. If a checkmark appears at the edge of the Title box, the name will work. Select Save to apply the name change.
Note: A list that was published but is now unpublished is no longer publishable. But, you can duplicate it, and the copy is publishable.
-
On the Drafts tab, select the task list you want to edit.
-
To change a task, select its title to open the task and then do one of the following:
-
To change any of the tasks' fields, select the field and edit as needed. You can also add notes and attachments.
-
To delete the task, to the right of the task name select More options
-
Important: You can't delete a published list unless you unpublish it first. After unpublishing, it will appear under Unpublished.
You can delete any task list under Drafts and Unpublished.
-
On the Published lists tab, under Drafts or Unpublished, hover over the task list you want to delete.
-
Select More options
When your task list is ready to go, publish it to the teams whose members will do the work.
Note: After you publish, you can make any changes to a task list.
-
In the Tasks app, select Published lists.
-
In the Drafts list, select a task list, and then select Publish in the top right corner.
-
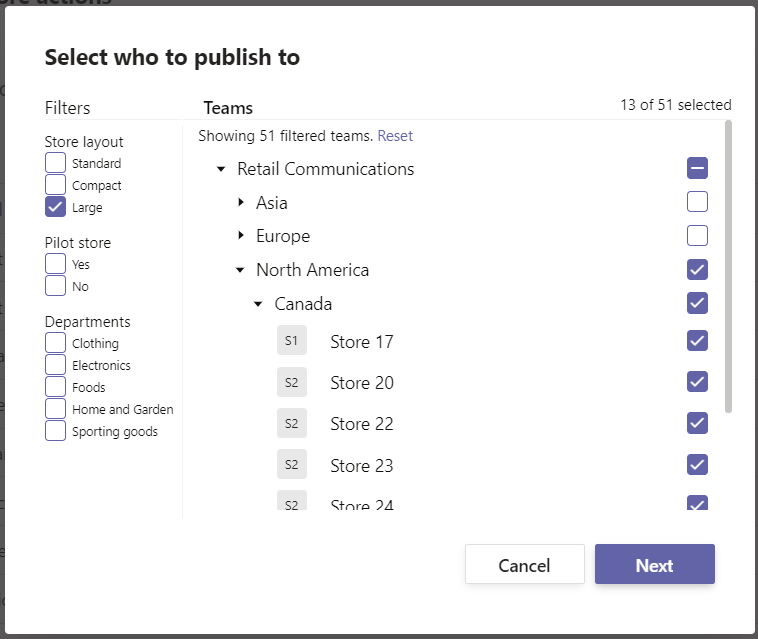
Select the teams who will receive the task list. Use the main Teams list and/or any available filters to locate the teams to include.
-
To select all the groups in a category, select the check box for the category heading. In the following case, selecting "Region 1" selects all the stores in that region.
-
To publish to only those stores in Region 1 that have a clothing department, select the "Clothing" filter in addition to the region heading.
-
-
Select Next to review your publication plan. To make changes, select Back.
-
Select Ready, everything looks good here, and then select Publish.
Notes:
-
As soon as the publishing process begins, the task list will move from Drafts to Published to indicate that tasks are being sent and becoming visible to recipients.
-
At various points in the publishing process, Teams checks your publishing instructions and informs you of any issues it encounters.
-
Task publishing can take a little while if there are a large number of tasks in your task list or if you select a large number of recipient teams. It’s okay to leave the publishing screen and come back later— the tasks will continue publishing in the background.
-
-
Once publishing is done, at the top of the Published lists tab, a message indicates your tasks were successfully delivered.
Important: If alert icons appear, select View details to help resolve the issue(s).
You can edit tasks in a published list by putting the list into edit mode. Once the list is in edit mode, you can update tasks in the list, delete tasks from the list, or add new tasks to the list. Changes are not published to recipient teams until you select the Publish changes and confirm the summary.
When you publish changes to a task in a published list, the values in the task fields in the updated task will overwrite the values of those task fields in each recipient team, with the exception that the status of the task is not reset. We recommend editing a task in a published list when you want to clarify what needs to be done. If there is a correction that requires the task to be completed again even if it was completed per the previous task details, we recommend deleting the original task and creating a new one.
-
On the Published section, select the list you want to edit.
-
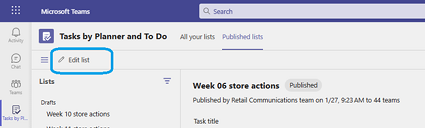
Select Edit list as shown in the image.
-
Once the list is in edit mode, you can click on a task to edit. You can also add a new task or click the ... menu next to an existing task to delete it.
-
If you decide not to make changes, you can select Cancel editing in the same place you found the Edit list button and no changes will be published to any of the recipient teams.
-
If you are ready to publish changes, you can select Publish changes in the top right corner to publish the changes to all of the original recipient teams.
Note: Alternatively, you can choose to cancel the edits you've made and the list will revert back to its previously published state.
If you need to unpublish, it's best to do so as soon as possible to reduce the assignment and completion of tasks that are wiped out. An unpublished list moves to the Unpublished section and can be duplicated but can't itself be republished.
Caution: Unpublishing a task list will remove all tasks in the list from all the teams that received them. They will lose all comments and attachments they may have added.
-
Next to the list you want to unpublish, select More options
-
After the list is in your Unpublished section, you can copy it, edit the copy, and publish the edited copy.
After you've published a task list, you'll likely want to track teams' progress in assigning and completing the tasks you sent them. You can view details for the published tasks in a few different ways.
Note: Users in your organization can view reporting for any team they're a part of and for any teams that report up to their team/s in the hierarchy defined by your organization.
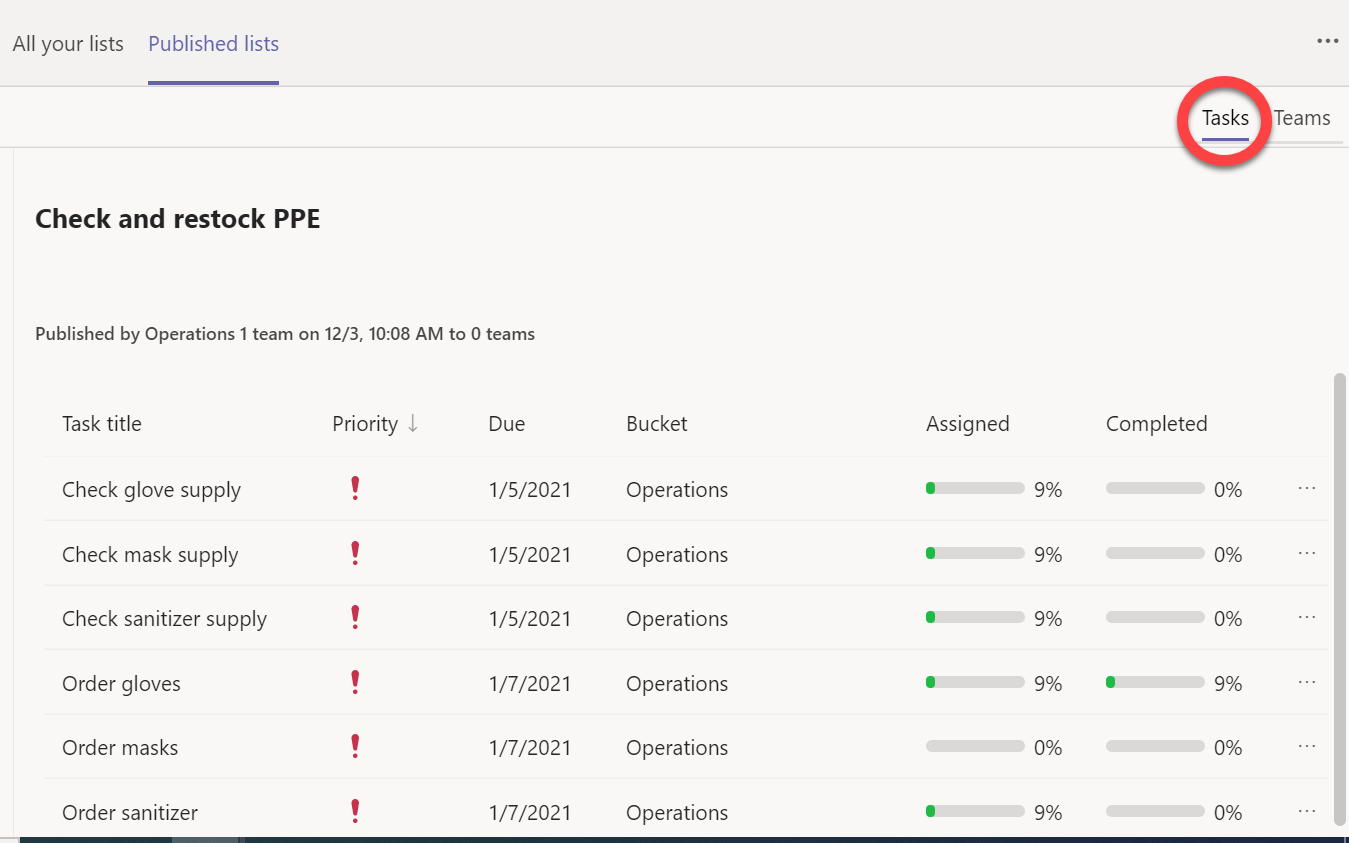
The Tasks view shows you the progress broken down by task. You can select a task to see additional detail for the assignment and completion of that task across the teams that received it.
-
Select
The Teams view lets you see the team-by-team progress for all tasks in the list. You can select groupings like regions or districts to expand them, and you can select an individual team that received the task list to see the details for that team..
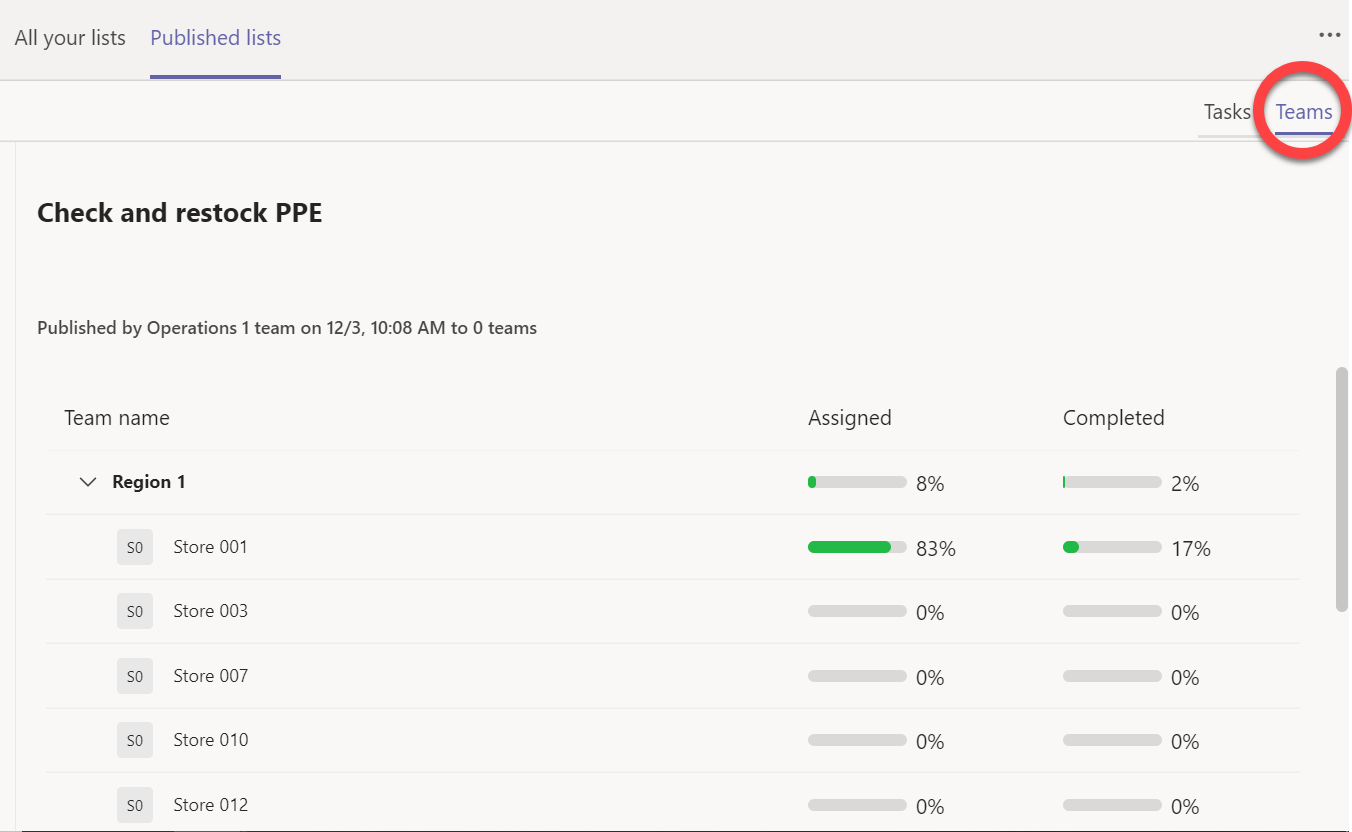
And to see how a team is doing on each task, select the team name.
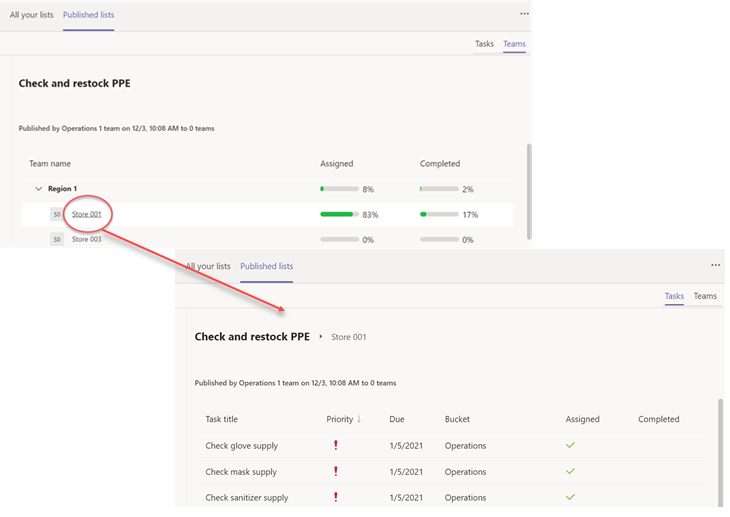
To return to a high level view after looking at the details, click the task list name to the left of the team name.


