The timeline at the top of the Project Center provides a simple way to show all of the projects and major tasks going on in your organization. You can use this timeline to craft a visual executive summary of your portfolio of projects.
Note: In addition to Project Center, adding tasks to the Schedule page timeline is another option available in Project Web App.
-
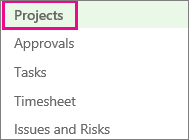
On the Quick Launch, click Projects.
-
Click anywhere on the timeline you wish to add a project to, and then click the row header for the desired project.
-
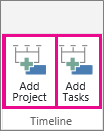
On the Projects tab, in the Timeline group, click Add Project or Add Tasks.
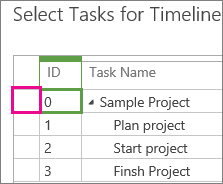
If you are just adding a project, continue to step 4, but if you are adding tasks, select the task row(s) that you want to add to the timeline, and then click OK.
Tip: Don’t see the task you wanted to add? Try expanding the summary tasks in the Task Name column to drill down to the subtask level(s).
-
To add another timeline, click the current timeline, and then click Add in the Timeline Bar group on the Timeline tab.
Note: Multiple timelines are available in Project Online and Project Server 2016.
-
To move projects between timelines, click the project, and then click Move Up or Move Down in the Current Selection group on the Timeline tab.


