徵狀
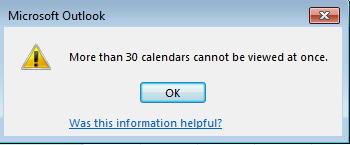
當您嘗試在一次行事曆模組在 Microsoft Outlook 中顯示 30 個以上的行事曆時,您會收到下列錯誤訊息:
無法一次檢視超過 30 個行事曆。

原因
之所以發生這個問題,是因為可以在 Outlook 中的一次檢視的行事曆的數目的預設限制為 30。您可以藉由編輯登錄中,變更這個限制,如 < 解決方案=""> 一節所述。
解決方案
重要 仔細遵循本章節中的步驟。如果您不當修改登錄,可能會發生嚴重的問題。您會修改它,還原登錄備份,萬一發生問題之前。 若要增加可在行事曆單元同時顯示的行事曆的數目,請依照下列步驟執行:
-
結束 Outlook。
-
啟動登錄編輯程式。若要這樣做,請使用其中一個下列的程序,視您的 Windows 版本:
-
Windows 10、 Windows 8.1 和 Windows 8: 按視窗鍵 + R,以開啟 [執行] 對話方塊。輸入regedit.exe,,然後按一下[確定]。
-
Windows 7: 按一下 [開始],在 [搜尋] 方塊中,鍵入regedit.exe ,然後按 Enter 鍵。
-
-
找出並按一下下列子機碼的其中一個:
HKEY_CURRENT_USER\Software\Policies\Microsoft\Office\x.0\Outlook\Options\CalendarHKEY_CURRENT_USER\Software\Microsoft\Office\x.0\Outlook\Options\Calendar注意X.0預留位置代表您的 Office 版本 (16.0 = Office 2016、 Office 365 及 Office 2019,15.0 = Office 2013,14.0 = Office 2010)。
-
在 [編輯] 功能表中,指向 [新增],然後按一下 [ DWORD 值。
-
輸入CalendarMaximumNumber,然後再按 Enter 鍵。
-
以滑鼠右鍵按一下CalendarMaximumNumber,,,然後按一下 [修改]。
-
在 [數值資料] 方塊中,鍵入您想要以 10; 的遞增量值比方說,40,50、 60、 70,80、 90 或 100。 注意如果您使用任何其他值,則會忽略它,,並將強制執行預設的 30 個行事曆的限制。
-
按一下 [確定]。
-
在 [檔案] 功能表上按一下 [結束] 以結束 「 登錄編輯程式。


