
Play, share, and download a meeting recording in Microsoft Teams
Play a meeting recording
After a meeting ends, you can find the meeting's recording in the meeting chat or calendar.
In Chat:
-
Select the chat for the specific meeting.
-
Find the recording and select the recording thumbnail.

-
When the viewer opens, select

From your calendar
-
Open Calendar, find and double-click the meeting.
-
Select the Recap tab and then choose
You can also select the recording thumbnail on the Details tab and choose
From a channel
-
Open the channel and select the Files tab.
-
Find and select the recording. The recording is an .mp4 file and has the

-
If the recording doesn't start immediately, select
Closed or Live Captions
Live captions are available during a meeting, but they aren't recorded with the video.
To turn on captions during a meeting:
-
In your meeting, select More (...) and choose

-
Select

Your captions are displayed under the meeting screen. These captions are only shown for you during the meeting, and don't appear on anyone else's screen or in the recording.
You may want to also create a transcript, which can be viewed after a meeting.
To see closed captions later during playback:
-
In the meeting chat, select the recording thumbnail.
-
In the playback dialog, hover over the video player and select
-
Select your language and view.
If the Toggle captions button isn't there:
-
Select

-
In Stream, select

-
Expand

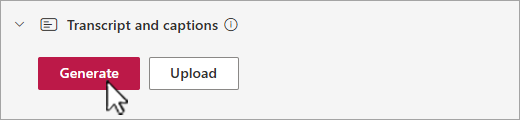
Depending on the length of the video, generating closed captions can take several minutes.
Once generated, you can watch the video in Stream and have captions displayed at the bottom of the screen.
When the caption have been created, the Generate button turns to Translate. Select Translate to change the spoken or screen language to automatically translate the captions.
Customize your captions
-
In the video player, hover and select

-
Select Caption settings and choose size, color, or background transparency.
Note: Captions only show when watching a recording. They're not actually in the video, so if the recording file is downloaded, it won't have captions. However, you can view the recording with captions in the Teams video viewer or Stream.
Meeting recording storage and permissions
Teams meeting recordings are stored in OneDrive or SharePoint, depending on the type of meeting.
Meeting recordings expire and are automatically deleted after a set period of time. The default amount of time it's available is set by your admin. If you're the meeting organizer, you can change or remove the meeting's recording expiration date. For more info, see Record a meeting in Teams.
Channel meetings
For channel meetings, the recording will be stored on the Files or Shared tab for the channel.
The Files tab stores all files in a SharePoint site and document library for the channel. Everyone who is a part of the channel will have permission to edit and view the recording.
All other meetings
For non-channel meetings, the recording will be stored in the Recordings folder in the OneDrive directory of the person who started the recording. If you were invited to the meeting, you can access the recording through the Files tab in the chat, channel, or meeting details.
Note: Only the organizer of the meeting and the person who started the recording is able to edit the recording. But everyone invited to the meeting is able to view the recording.
Share a link to a meeting recording with others
If you recorded or organized the meeting, you can share the recording with people who weren't invited to the meeting by sharing it like you would share any other file.
To share a recording from a meeting chat, channel, or meeting details:
-
Select the Files tab and find the recording. The recording is an .mp4 file and has the
-
Select More options (...) and choose

-
Select Copy if it appears.
-
Paste the link into a message or post to share.
Notes:
-
Guests and external attendees can only view a recording if they're sent a direct link to the recording.
-
To learn more about sharing meeting recording in OneDrive and SharePoint, see Share OneDrive files and folder.
Who can you share with?
As a meeting attendee, person who recorded, or meeting organizer, you can share the recording with people weren't invited to the meeting.
If you're sending the link to someone that doesn't already have access, such as someone in the same org, you can ask the meeting organizer or recorder to invite people who don't have access.
-
In the Link dialog, select
-
At the bottom of the Link settings dialog, select You can ask the owner to invite the people you choose.
-
Add their names and an optional note, and select

Download a meeting recording
If you're the owner, started the recording, or were invited to the meeting, you can download the video.
-
Select the Files or Shared tab in the meeting chat, channel, or meeting in calendar.
-
Find and select the file.
-
Select

Only the person who started the recording and the meeting organizer can download the recording. For more info on downloading files and folders, see Download files and folders from OneDrive or SharePoint.
Want to know more?


Need more help?
Want more options?
Explore subscription benefits, browse training courses, learn how to secure your device, and more.


Communities help you ask and answer questions, give feedback, and hear from experts with rich knowledge.


