
The Directory feature in Word merges data in to a single document, such as a membership directory, catalog, or parts list. Since you can merge a number of types of data sources, you can create reports from databases like Access using all the formatting features of Word.
Start the document
-
Open a blank document.
-
Go to Mailings > Start Mail Merge > Directory.
-
Go to Mailings > Select Recipients.
-
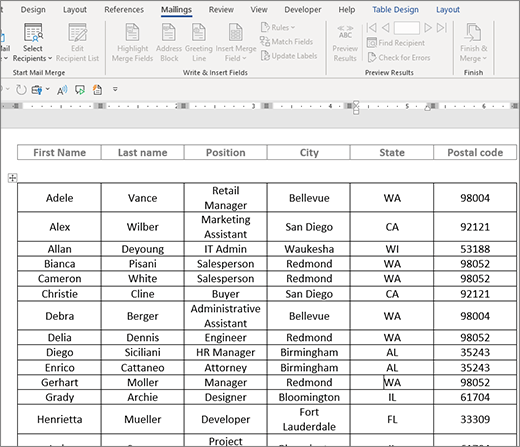
Choose a data source. For more info, see Data sources you can use for a mail merge.
-
Choose File > Save.
If you need to edit your mailing list, see Mail merge: Edit recipients.
At this point, don't include text that you want to print only once in the resulting directory document.
-
Type the text you want to repeat for each item in the directory, such as Name: or Address: labels for individual records.
-
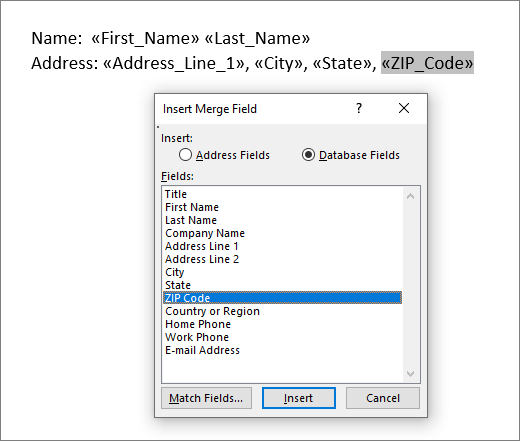
Click or tap where in the document you want to put a merge field, and insert a merge field. For more info, see Mail merge fields
Tips:
-
To create table with one label or heading row, create a document header. Put the label row of the table inside the header. Then put the merge fields in the body of the document.
-

-
This works well for long directories that span over multiple pages, as it creates a header for each page.
You can't type merge field characters (« ») manually. You must use the Mail Merge task pane.
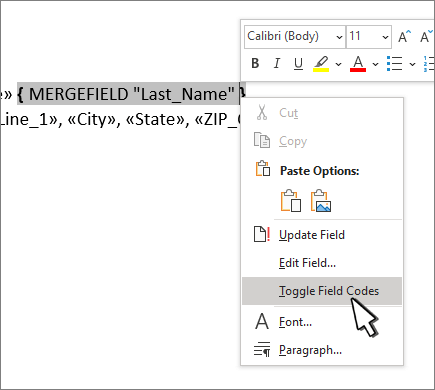
If the merge fields appear inside braces, such as { MERGEFIELD City }, then Word is displaying field codes instead of field results. This doesn't affect the merge, but is difficult to format. Right-click the field code, and select Toggle Field Codes on the shortcut menu.
If any part of your address is missing, see Mail merge: Match Fields to fix.
-
-
Repeat step 2 as needed.
-
After you've completed the main document and inserted all of the merge fields, go to File > Save As.
-
Go to Mailing > Preview Results.
-
Use the Back and Forward buttons to scroll though your data, or use Find recipient to search for specific records
-
If you need to edit, select Preview Results to return to merge field view.
-
Select Mailings > Finish & Merge and choose Edit Individual Documents. You'll see 2 other options, but you can't use them with a directory.
-
Select one of the following:
-
To merge all the records, select All.
-
To merge only the record that you see in the document window, select Current record.
-
To merge a range of records, type the record numbers in the From and To boxes.
Select OK.
-
-
In the new document, add text you only want printed once, such as headers, footers, column headings or any other text.
-
Save or print the directory just as you would any regular document.
Start the document
-
Open a blank document.
-
Go to Mailings > Start Mail Merge > Directory.
-
Go to Mailings > Select Recipients.
-
Choose a data source. For more info, see Data sources you can use for a mail merge.
-
Choose File > Save.
If you need to edit your mailing list, see Mail merge: Edit recipients.
At this point, don't include text that you want to print only once in the resulting directory document.
-
Type the text you want to repeat for each item in the directory, such as Name: or Address: labels for individual records.
-
Click or tap where in the document you want to put a merge field, and insert a merge field. For more info, see Mail merge fields
You can't type merge field characters (« ») manually. You must use the Mail Merge task pane.
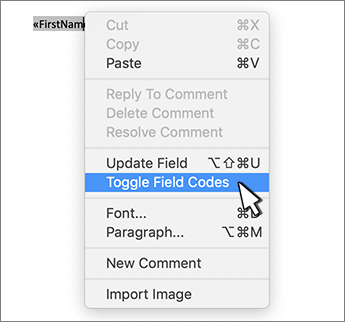
If the merge fields appear inside braces, such as { MERGEFIELD City }, then Word is displaying field codes instead of field results. This doesn't affect the merge, but is difficult to format. Ctrl - Click the field code, and select Toggle Field Codes on the shortcut menu.
If any part of your address is missing, see Mail merge: Match Fields to fix.
-
Repeat step 2 as needed.
-
After you've completed the main document and inserted all of the merge fields, go to File > Save As.
-
Go to Mailing > Preview Results.
-
Use the Back and Forward buttons to scroll though your data, or use Find recipient to search for specific records
-
If you need to edit, select Preview Results to return to merge field view.
-
Select Mailings > Finish & Merge and choose Edit Individual Documents.
-
In the new document, add text you only want printed once, such as headers, footers, column headings or any other text.
-
Save or print the directory just as you would any regular document.


