
Your Windows PC comes with a one-stop backup solution, Windows Backup, that will help you to back up many of the things that are most important to you. From your files, themes, and some settings to many of your installed apps and Wi-Fi information - Windows Backup will help protect what matters and make it easier than ever to move to a brand-new PC.
This guide will help you to use Windows Backup to back up key things on your Windows PC.
Step 1: Sign in with a Microsoft account
This is the account associated with Windows, Microsoft 365, OneDrive, Xbox, and more. Your backed-up information will be stored with your Microsoft account, so getting back to your things on a new PC is as easy as signing in.
To sign in to your Microsoft account, select Start > Settings > Accounts > Your info . Select Sign in with a Microsoft account instead. You’ll see this only if you’re using a local account. If you see Sign in with a local account instead, you’re already using your Microsoft account.
Important: Currently, the Windows Backup app is focused on consumer devices - for example, devices that can be used by signing into a personal Microsoft account (MSA) such as *@outlook.com , *@live.com, and so forth. Work or school Microsoft accounts won't work.
Create a new Microsoft account
Check if you have a Microsoft account

Step 2: Back up your folders
Windows Backup is an easy, single stop for all of your backup needs. Your free Microsoft account comes with 5 GB of OneDrive cloud storage (and more storage is available if you need it), and backing up your folders syncs the folders you specify to your OneDrive account, making them instantly accessible on all computers that you use with this Microsoft account. And since they are synced to OneDrive, once you sign in to OneDrive on a new PC, those files will be available to you once again.
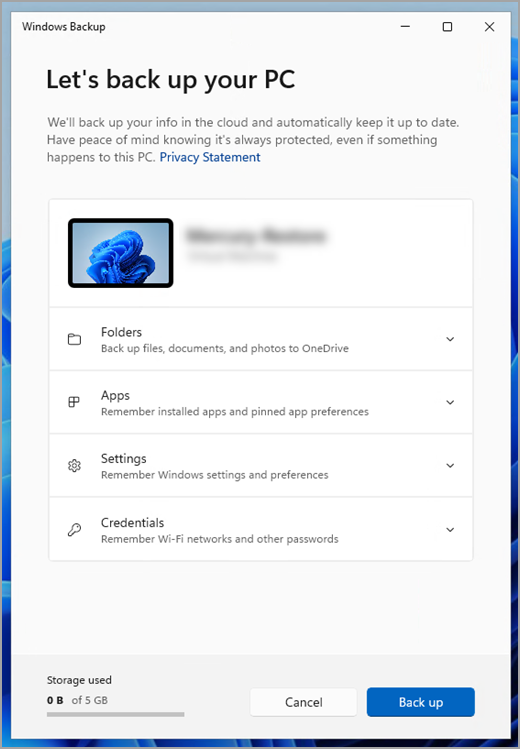
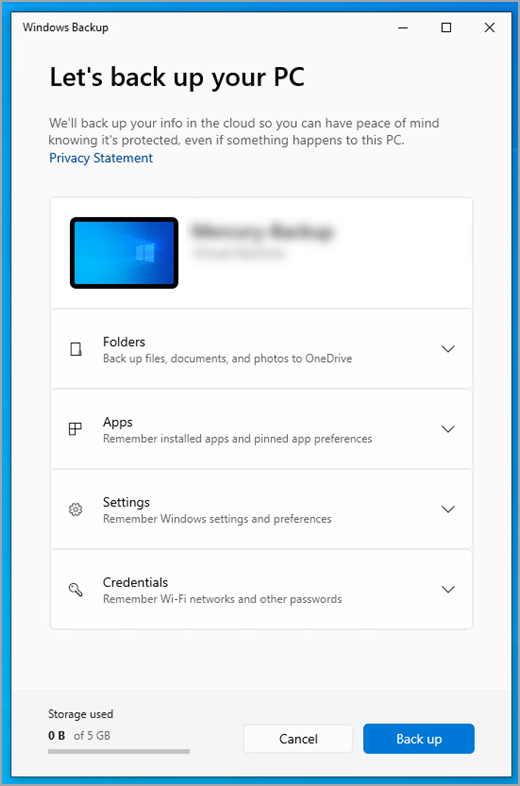
First, launch Windows Backup: select Start , type windows backup, and select Windows Backup from the results. (Or you can select Start > All apps > Windows Backup.)
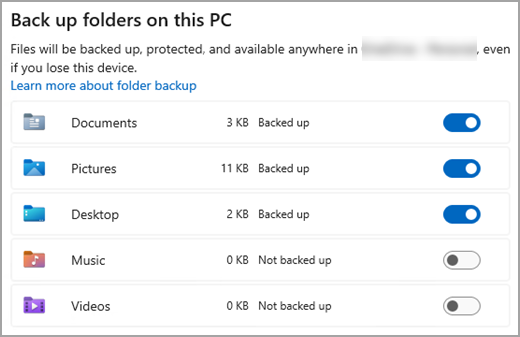
Then select Folders to drop it down, and select which of your user folders you want to back up to OneDrive:
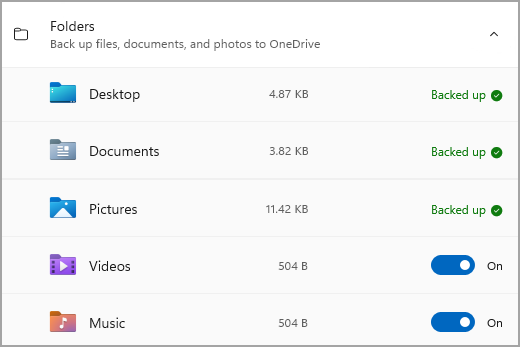
You can back up your Desktop, Documents, Pictures, Videos, and Music folders. Simply toggle the switch for each folder On or Off.
Note: If you have backed up these folders in the past, they will show as Backed Up. If you wish to no longer back up these folders, see What do I do if I want to stop backing something up?, below.
Step 3: Back up your settings
Windows Backup can help back up other Windows settings for you, such as your installed apps, your Wi-Fi network and password information, and other settings such as language preference or your wallpaper settings.
You'll see the state of all of these settings in Windows Backup:
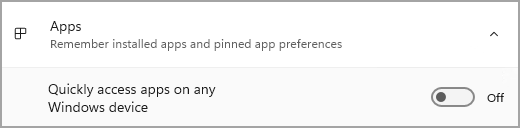
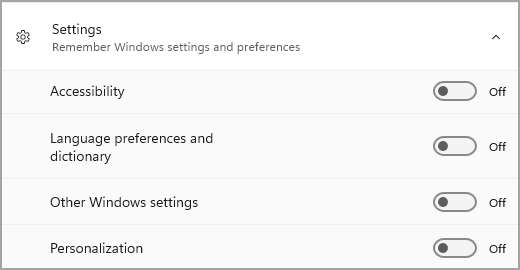
Again, you can simply toggle these settings On or Off.
Note: If these settings have been backed up in the past (and some are by default), they will show as Backed up and the toggle switch will be unavailable. If you want to stop backing these up, see What do I do if I want to stop backing something up?, below.
Once you have everything set up the way you want it, select Back up.
Note: If you receive an error from OneDrive when you try to back up, it's possible that you aren't signed in to OneDrive or there may be another issue with OneDrive that needs to be resolved in order for Windows Backup to work. For more, see Fix OneDrive sync problems.
Step 4: Time to relax!
You're all set! Your folders and settings are being backed up and you can access your files on all of the computers that you log into with this Microsoft account. It really couldn't be easier.
If you want to check and make sure everything is still backed up (hey, we all want that sense of security from time to time!), you can just open the Windows Backup app and it will show you the current state of your backup, or you can check on things at the top of the Windows backup page in Settings, at Start > Settings > Accounts > Windows backup.

How do I restore this backup?
We have your back! When you get a new PC or if you have to reinstall Windows, when you are setting it up, just log in with the same Microsoft account that you used to make the backup here. We'll see that you have backups and ask you if you would like to restore one.

If you have more than one computer backed up, you can select More options and select the backup you wish to restore from. When you get to your desktop everything will be right there waiting for you!
-
You will see pins for your apps restored where you left them on the taskbar, Start Menu, and All Apps list. Apps that are available in the Microsoft Store can be restored by clicking on the app pin to get started. For apps that aren’t available in the Store, you’ll be directed to the web to download the installer.
-
Your most important settings will also be restored on your new device so that it feels like yours and is ready to go right away. For a full list of settings that are supported, see Windows Backup settings and preferences catalog.
-
Files can be restored anytime simply by signing in to OneDrive with the same Microsoft account you used to make the original backup.
What about my Microsoft Edge preferences?
To easily browse the web from any of your devices and keep your favorites organized, sign in to Microsoft Edge and turn on sync.
What do I do if I want to stop backing something up?
You may notice that if you have been backing something up in Windows Backup, that item is marked as Backed up and you no longer have access to the switch to turn it On or Off.
If for some reason you no longer want to back up some of your folders, apps, or settings, the place to control that is in Start > Settings > Accounts > Windows backup.
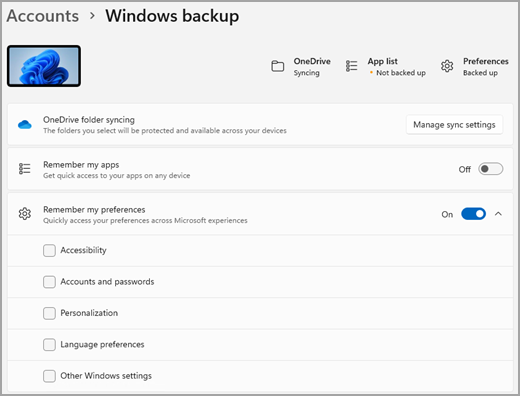
From here, you can deactivate file backup by selecting Manage sync settings next to OneDrive folder syncing and then turning off the folders you no longer wish to back up.
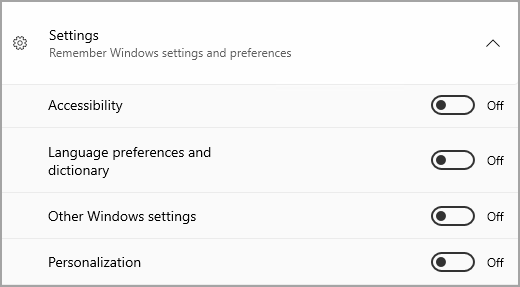
For apps and settings, you can set the switch for Remember my apps to On or Off, or drop down Remember my preferences and ensure the checkboxes for any of the items you wish to back up are checked.
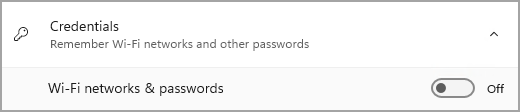
Note: Accounts and passwords is the box to check in Settings for Wi-Fi networks & passwords in Windows Backup.
Once you've turned off backup, if you wish to delete the data that has been backed up previously to your Microsoft account, you can visit your Microsoft Account Devices page , find the Cloud synced settings section at the bottom of the page and select and select Clear stored settings.
Your Windows PC comes with a one-stop backup solution, Windows Backup, that will help you to back up many of the things that are most important to you. From your files, themes, and some settings to many of your installed apps and Wi-Fi information - Windows Backup will help protect what matters and make it easier than ever to move to a brand-new PC.
This guide will help you back up key things on your Windows PC.
Step 1: Sign in with a Microsoft account
This is the account associated with Windows, Microsoft 365, OneDrive, Xbox, and more. Your backed-up information will be stored with your Microsoft account, so getting back to your things on a new PC is as easy as signing in.
To sign in to your Microsoft account, select Start > Settings > Accounts > Your info . Select Sign in with a Microsoft account instead. You’ll see this only if you’re using a local account. If you see Sign in with a local account instead, you’re already using your Microsoft account.
Important: Currently, the Windows Backup app is focused on consumer devices - for example, devices that can be used by signing into a personal Microsoft account (MSA) such as *@outlook.com , *@live.com, and so forth. Work or school Microsoft accounts won't work.
Create a new Microsoft account
Check if you have a Microsoft account
Step 2: Back up your folders
Windows Backup is an easy, single stop for all of your backup needs. Your free Microsoft account comes with 5 GB of OneDrive cloud storage (and more storage is available if you need it), and backing up your folders syncs the folders you specify to your OneDrive account, making them instantly accessible on all computers that you use with this Microsoft account. And since they are synced to OneDrive, once you sign in to OneDrive on a new PC, those files will be available to you once again.
First, launch Windows Backup: select Start , then Windows Backup.
Then select Folders to drop it down, and select which of your user folders you want to back up to OneDrive:
You can back up your Desktop, Documents, Pictures, Videos, and Music folders. Simply toggle the switch for each folder On or Off.
Note: If you have backed up these folders in the past, they will show as Backed Up. If you wish to no longer back up these folders, see What do I do if I want to stop backing something up?, below.
Step 3: Back up your settings
Windows Backup can help back up other Windows settings for you, such as your installed apps, your Wi-Fi network and password information, and other settings such as language preference or your wallpaper settings.
You'll see the state of all of these settings in Windows Backup:
Again, just toggle these settings On or Off.
Note: If these settings have been backed up in the past (and some are by default), they will show as Backed up and the toggle switch will be unavailable. If you want to stop backing these up, see What do I do if I want to stop backing something up?, below.
Once you have everything set up the way you want it, go back to Windows Backup and select Back up.
Note: If you receive an error from OneDrive when you try to back up, it's possible that you aren't signed in to OneDrive or there may be another issue with OneDrive that needs to be resolved in order for Windows Backup to work. For more, see Fix OneDrive sync problems.
Step 4: Time to relax!
You're all set! Your folders and settings are being backed up and you can access your files on all of the computers that you log into with this Microsoft account. It really couldn't be easier.
If you want to check and make sure everything is still backed up (hey, we all want that sense of security from time to time!), you can just open the Windows Backup app and it will show you the current state of your backup, or you can check on the state of your OneDrive folder sync at the top of the main Settings page; just open Start > Settings and look for the icon.

How do I restore this backup?
We have your back! When you get a new Windows 11 PC, when you are setting it up, just log in with the same Microsoft account that you used to make the backup here. We'll see that you have backups and ask you if you would like to restore one.
If you have more than one computer backed up, you can select More options and select the backup you wish to restore from. When you get to your desktop everything you have backed up will be right there waiting for you!
-
You will see pins for your apps restored where you left them on the taskbar, Start Menu, and All Apps list. Apps that are available in the Microsoft Store can be restored by clicking on the app pin to get started. For apps that aren’t available in the Store, you’ll be directed to the web to download the installer.
-
Your most important settings will also be restored on your new device so that it feels like yours and is ready to go right away. For a full list of settings that are supported, see Windows Backup settings and preferences catalog.
-
Files can be restored anytime simply by signing in to OneDrive with the same Microsoft account you used to make the original backup.
If you have to reinstall Windows on your Windows 10 PC, you'll still have your folders synced to OneDrive and your settings synced to your Microsoft account, so as long as you log in with the same account you used to make the backup, everything will restore and you'll still have your files and settings with you.
What about my Microsoft Edge preferences?
To easily browse the web from any of your devices and keep your favorites organized, sign in to Microsoft Edge and turn on sync.
What do I do if I want to stop backing something up?
You may notice that if you have been backing something up in Windows Backup, that item is marked as Backed up and you no longer have access to the switch to turn it On or Off.
If you want to stop backing up some of your folders, you'll need to turn those off in OneDrive. To do that, right-click (or long-press) the OneDrive icon in your system tray, then select Settings > Sync and backup > Manage backup, and turn off the folders you no longer wish to back up.
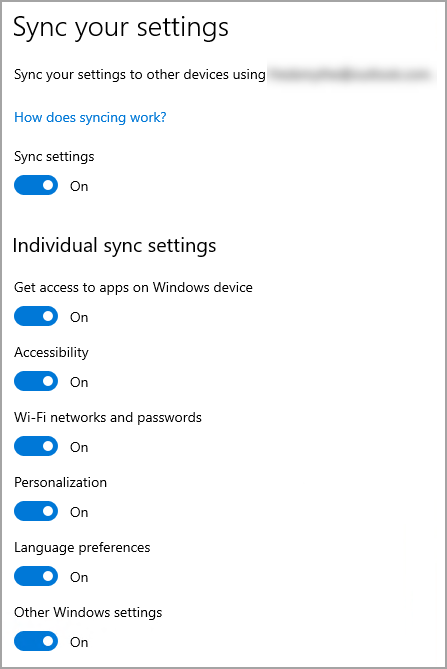
For apps and settings, the place to control that is in Windows Settings. Go to Start > Settings > Accounts > Sync your settings , set Sync Settings to On, and then turn off items you wish to stop backing up.
Once you've turned off backup, if you wish to delete the data that has been backed up previously to your Microsoft account, you can visit your Microsoft Account Devices page , find the Cloud synced settings section at the bottom of the page and select and select Clear stored settings.


