Note: The new Microsoft Planner is currently rolling out to customers. If your experience looks different than the steps listed in this article, or you're working from a Government Cloud Communities (GCC), GCC High, or Department of Defense (DoD) environment, refer to the instructions toward the bottom of this page. Learn more about the new Planner in Frequently asked questions about Planner.
With plans, you can easily manage your team workload, track work towards team goals, organize work into sprints using agile planning, track dependencies on the timeline view, and more.
Create a new plan
-
Select New plan in the left navigation pane.
-
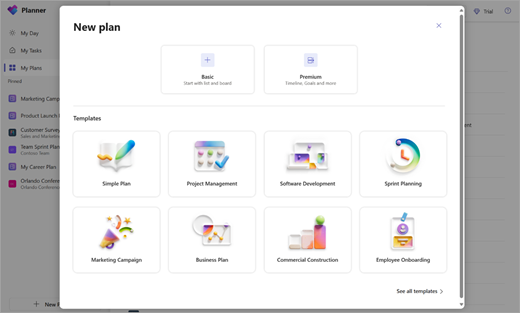
In the New plan window:
-
Select the Basic or Premium option to start a plan from scratch, or choose one of our out-of-the-box templates. Not sure whether to start with basic or premium? See here to compare basic and premium plans.
-
Name your plan and choose whether to pin it to the left navigation pane. You can also optionally choose to share your plan by adding it to a group. Note that you can share your plan at any time.
Note: If you don't add the plan to an existing group, creating a plan also creates a new Microsoft 365 Group. The plan email address that Planner creates goes to Outlook Group Conversations.
-
-
Select Create plan.
Create a new plan
-
Select New plan in the left pane.
-
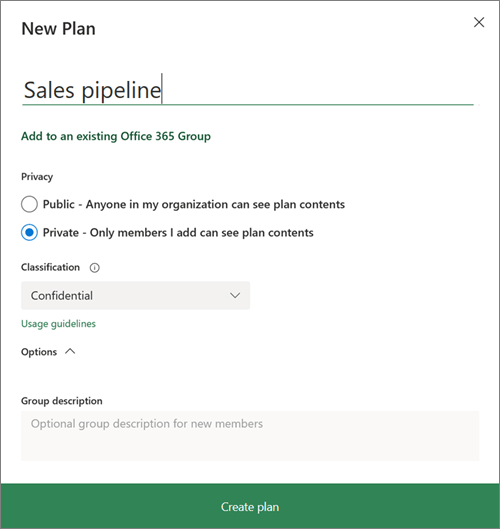
In the New plan window:
-
Type a name for the plan.
Planner creates an email address for your plan automatically. You can use it for discussions with all plan members.
-
Choose the link to Add to an existing Microsoft 365 Group or skip the link if you want to create a new group when you create this plan.
Note: If you don't add the plan to an existing group, creating a plan also creates a new Microsoft 365 Group. The plan email address that Planner creates goes to Outlook Group Conversations.
-
Make the plan public if you want it to be visible to the rest of your organization and in search results, or make it private if you want only plan members to see it.
Note: When you make a plan public or private, you also make the Microsoft 365 Group public or private. Learn more.
-
Select a Classification level for your plan.Note: If you don't see the Classification section, don't worry. Your organization may not be using the Classification capability.
-
To enter a unique description for the plan, select Options and type in what you want.
-
-
Select Create plan.
Add people to a plan
-
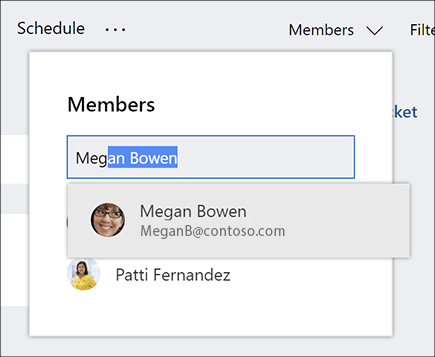
Select Members in the upper-right corner of the Planner window.
-
Begin typing the name or email address of a person within your organization that you want to add to the plan.
-
Select the person's card when it appears.
Note: Want to add people outside of your organization to a plan? See Guest access in Microsoft Planner.
After you add people and tasks to your plan, you can assign people to tasks.

Set up buckets for tasks
Create buckets to organize tasks into things like workstreams, project phases, or topics.
-
Display the plan board.
-
Select Add new bucket to the right of any existing buckets.
-
Type a name for the bucket, and then press Enter.
Don't see Add new bucket? The board might be grouped by something else.
Change the task grouping
-
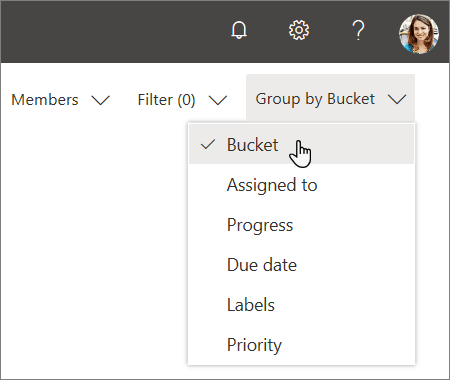
Select Group by near the upper-right corner of the plan board.
-
Select Bucket.
Want to change a bucket name? Select a bucket name to make changes. You can even rename the To Do bucket to something that you might find more useful!


