
Note: This article has done its job, and will be retiring soon. To prevent "Page not found" woes, we're removing links we know about. If you've created links to this page, please remove them, and together we'll keep the web connected.
When a table has many rows and columns, it can be difficult to read. To make reading easier, you can add various types of shading to a table. For example, you can shade every other row with a color or pattern. Adding shading to a table can help make certain rows, columns, or cells—or the entire table—stand out in your document. For example, you could add shading to the header row of a table to make it distinctive. You can also change existing table shading, or remove it from the table altogether.
The easiest way to add colored shading to a table is to use the Shading option on the Table Design tab.
Add or change shading in a table
-
Select the cells you want to change:
-
To select an entire table, click in the table, and then click the Table Move Handle in the upper-left corner.
-
To select a row, column, cell, or group of cells, click and drag your mouse pointer to highlight the cells you want.
-
-
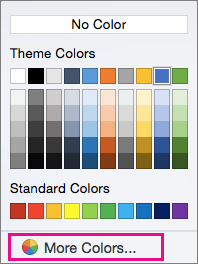
On the Table Design tab, click the arrow next to Shading.

-
Under Theme Colors or Standard Colors, select the shading color you want. Or, for more color options, click More Colors.
Remove shading from a table
-
Select the cells you want to change:
-
To select an entire table, click in the table, and then click the Table Move Handle in the upper-left corner.
-
To select a row, column, cell, or group of cells, click and drag your mouse pointer to highlight the cells you want.
-
-
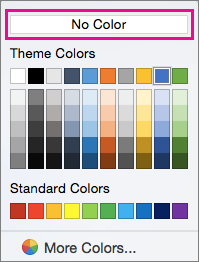
On the Table Design tab, click the arrow next to Shading.
-
Click No Color.
See also
In Word for Mac 2011, you can do any of the following.
-
On the View menu, click Print Layout.
-
Click the table.
-
Do one of the following:
To
Do this
Add or change the shading fill color
On the Tables tab, under Table Styles, choose any table style other than Table Grid.
Remove the shading fill color
On the Tables tab, under Table Styles, choose the Table Grid style.
Tip: Table Grid is the first style in the Table Styles gallery.
-
On the View menu, click Print Layout.
-
Select the cells by clicking the beginning of the cell in front of the text, or if it's an empty cell, in front of the end-of-cell mark

Note: To view end-of-cell marks, on the Standard toolbar, click Show

-
Do one of the following:
To
Do this
Add or change the shading fill color
On the Tables tab, under Table Styles, click the arrow next to Shading, and then choose a fill color.
Remove the shading fill color
On the Tables tab, under Table Styles, click the arrow next to Shading, and then choose No Fill.
-
On the View menu, click Print Layout.
-
Select the text.
-
Do one of the following:
To
Do this
Add or change the shading fill color
On the Tables tab, under Table Styles, click the arrow next to Shading, and then choose a fill color.
Remove the shading fill color
On the Tables tab, under Table Styles, click the arrow next to Shading, and then choose No Fill.
-
On the View menu, click Print Layout.
-
Click the table.
-
Click the Table Layout tab, and then under Settings, click Properties.
-
Click Borders and Shading, and then click the Shading tab.
-
Do one of the following:
To
Do this
Add or change a pattern fill
Select the options that you want for Fill, Style, and Color, and then on the Apply to pop-up menu, click Table.
Remove a pattern fill
Under Fill, click No Fill, on the Style pop-up menu, click Clear, and then on the Apply to pop-up menu, click Table.
-
On the View menu, click Print Layout.
-
Select one or more cells.
-
Click the Table Layout tab, and then under Settings, click Properties.
-
Click Borders and Shading, and then click the Shading tab.
-
Do one of the following:
To
Do this
Add or change a pattern fill
Select the options that you want for Fill, Style, and Color, and then on the Apply to pop-up menu, click Cell.
Remove a pattern fill
Under Fill, click No Fill, on the Style pop-up menu, click Clear, and then on the Apply to pop-up menu, click Cell.
-
On the View menu, click Print Layout.
-
Click anywhere in the paragraph.
-
Click the Table Layout tab, and then under Settings, click Properties.
-
Click Borders and Shading, and then click the Shading tab.
-
Do one of the following:
To
Do this
Add or change a pattern fill
Select the options that you want for Fill, Style, and Color, and then on the Apply to pop-up menu, click Paragraph.
Remove a pattern fill
Under Fill, click No Fill, on the Style pop-up menu, click Clear, and then on the Apply to pop-up menu, click Paragraph.


